
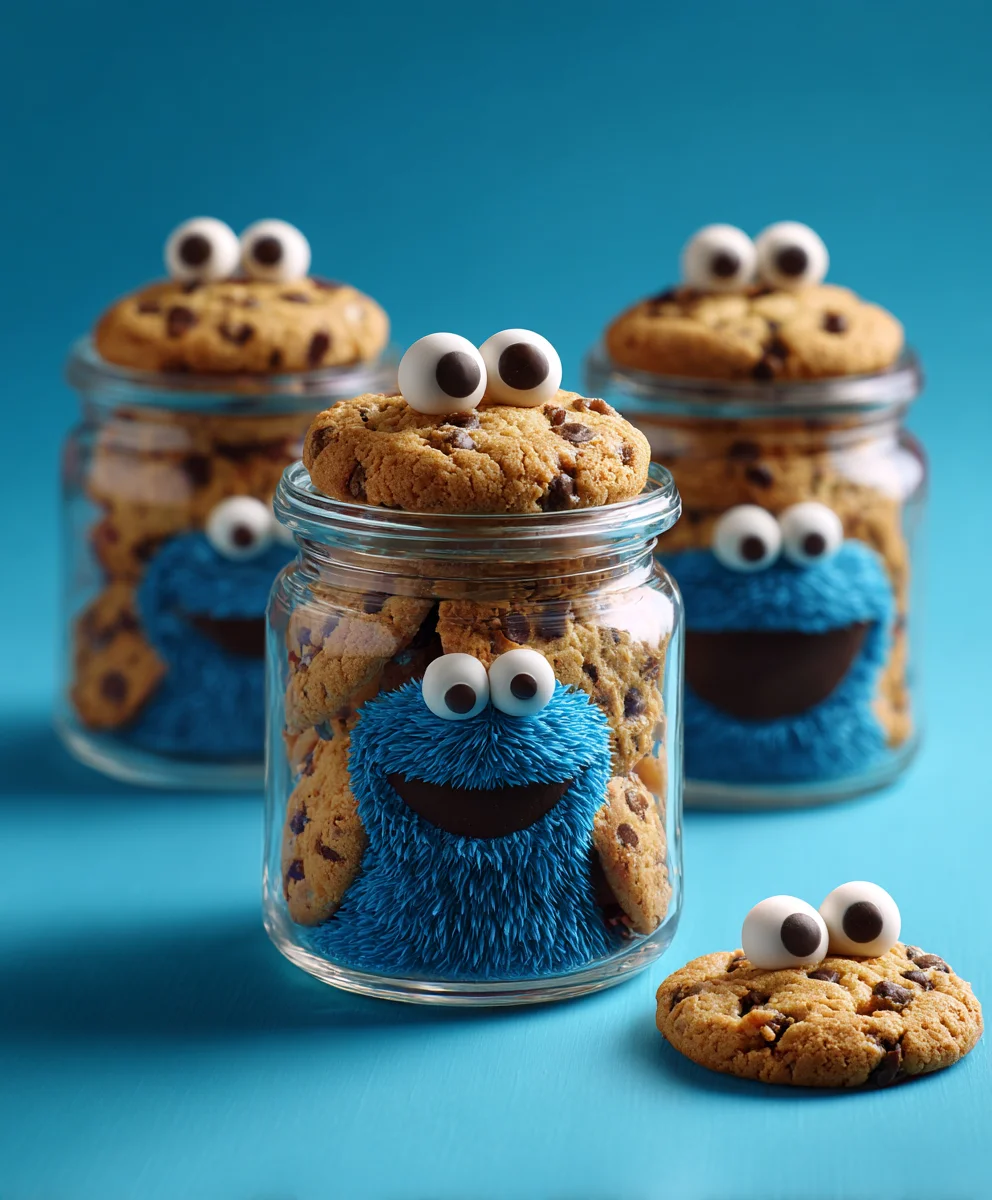
Cookie Monster Cake Jars are more than just a dessert; they are a delightful journey back to childhood, reimagined in a perfectly portioned, incredibly cute package. Imagine the sheer joy of your favorite blue, googly-eyed cookie enthusiast, encapsulated in layers of moist cake, vibrant buttercream, and generous cookie crumbles, all conveniently tucked into a jar. I’m absolutely thrilled to share this recipe with you, as it consistently brings smiles to everyone who tries it.
For decades, Cookie Monster has been an iconic figure, a symbol of pure, unadulterated happiness and an insatiable love for cookies. This recipe pays a whimsical homage to that beloved character, transforming his essence into an edible masterpiece that’s both fun to make and even more fun to devour. I’ve found that people genuinely adore these individual treats for their irresistible combination of textures—the soft cake, the creamy frosting, and the delightful crunch of cookies. They offer a comforting wave of nostalgia with every spoonful, making them a fantastic choice for any occasion, from birthday parties to a simple, charming evening treat.
Why Everyone Loves These Cookie Monster Cake Jars
Beyond their charming aesthetic, their portability and no-mess convenience make them incredibly popular. There’s no need for plates or extra utensils; simply grab a spoon and dig into your own personal serving of happiness. These Cookie Monster Cake Jars are a guaranteed showstopper, captivating both young and old with their playful appearance and delicious flavor profile. I’m confident you’ll find them as enchanting and tasty as I do!
Ingredients:
-
For the Blue Velvet Cake:
- 2 ½ cups (300g) all-purpose flour, sifted
- 1 teaspoon baking powder
- ½ teaspoon baking soda
- ½ teaspoon salt
- 1 cup (226g) unsalted butter, softened to room temperature
- 2 cups (400g) granulated sugar
- 2 large eggs, at room temperature
- 1 teaspoon vanilla extract
- 1 teaspoon blue gel food coloring (I prefer Wilton Royal Blue or Americolor Royal Blue for that perfect Cookie Monster shade)
- 1 cup (240ml) buttermilk, at room temperature
- ½ cup (120ml) whole milk, at room temperature
-
For the Fluffy Blue Vanilla Buttercream:
- 2 cups (452g) unsalted butter, softened to room temperature
- 6-8 cups (720g-960g) powdered sugar, sifted
- ½ cup (120ml) heavy cream or whole milk, plus more if needed
- 2 teaspoons vanilla extract
- Pinch of salt
- Blue gel food coloring (to match your Cookie Monster theme!)
-
For the Edible Cookie Dough:
- ½ cup (113g) unsalted butter, softened
- ¼ cup (50g) granulated sugar
- ½ cup (100g) packed light brown sugar
- 1 cup (120g) all-purpose flour, heat-treated (see instructions below)
- 2 tablespoons milk (any kind)
- 1 teaspoon vanilla extract
- ½ teaspoon salt
- ¾ cup (120g) mini chocolate chips
-
For Decoration and Assembly:
- 6-8 (8oz or 16oz) mason jars, clean and dry
- 1 cup (approx. 150g) pre-made mini chocolate chip cookies or crushed regular chocolate chip cookies
- Large candy eyeballs (available at most craft or baking stores)
- Piping bags and a large star or round tip (like Wilton 1M or 1A)
Preparing the Blue Velvet Cake: The Foundation for Your Cookie Monster Cake Jars
- Preheat and Prep: First things first, let’s get our oven ready. Preheat your oven to a cozy 350°F (175°C). While it’s warming up, prepare your baking pans. I usually opt for two 8-inch round cake pans for this recipe, as the height is perfect for slicing into layers for the jars. Grease and flour them thoroughly, or line the bottoms with parchment paper circles and grease the sides. This step is crucial for easy removal of your beautiful cake layers. There’s nothing worse than a cake sticking to the pan!
- Combine Dry Ingredients: In a medium bowl, whisk together your sifted all-purpose flour, baking powder, baking soda, and salt. Sifting the flour isn’t just for fancy bakers; it truly helps aerate the flour and ensures there are no lumps, leading to a lighter, more tender cake. Set this dry mixture aside for a moment.
- Cream Butter and Sugar: In a large mixing bowl, using either a stand mixer fitted with the paddle attachment or a hand mixer, cream together the softened unsalted butter and granulated sugar on medium speed. You want to beat this for a good 3-5 minutes, until the mixture is light, fluffy, and noticeably pale in color. This process, known as creaming, incorporates air into the butter and sugar, which contributes significantly to the cake’s texture and rise. Don’t rush this step!
- Add Eggs and Vanilla: Scrape down the sides of the bowl to ensure everything is well combined. Then, add the large eggs, one at a time, beating well after each addition until fully incorporated. Follow this with the vanilla extract, mixing until just combined. Vanilla adds a wonderful aroma and flavor that will shine through, even with the vibrant blue color.
- Introduce the Blue: Now for the fun part – turning our cake “Cookie Monster blue”! Add the blue gel food coloring to the wet mixture. Start with about half a teaspoon and gradually add more until you achieve that vibrant, deep blue color you envision for your Cookie Monster Cake Jars. Gel food coloring is concentrated, so a little goes a long way. Mix until the color is evenly distributed throughout the batter.
- Alternate Wet and Dry: With the mixer on low speed, begin adding the dry ingredient mixture to the wet ingredients, alternating with the buttermilk and whole milk. Start and end with the dry ingredients. For example, add about a third of the dry mixture, mix until just combined, then add half of the liquid mixture, mix, another third of dry, mix, the remaining liquid, mix, and finally the last third of dry ingredients. Be careful not to overmix the batter once the flour is added, as this can develop the gluten too much and lead to a tough cake. Mix only until just combined and no streaks of flour remain.
- Bake to Perfection: Divide the batter evenly between your two prepared cake pans. Smooth the tops with a spatula. Bake for 28-35 minutes, or until a wooden skewer or toothpick inserted into the center of the cakes comes out clean. Baking times can vary depending on your oven, so keep an eye on them. The tops should spring back gently when lightly touched.
- Cooling Down: Once baked, remove the cakes from the oven and let them cool in their pans on a wire rack for about 10-15 minutes. This allows the cakes to set properly. After this initial cooling, carefully invert the cakes onto the wire rack to cool completely. It’s absolutely essential that the cakes are fully cooled before you even think about frosting them, otherwise, your beautiful buttercream will melt into a messy puddle! This might take 1-2 hours.
Crafting the Fluffy Blue Vanilla Buttercream: The Creamy Heart of Your Cookie Monster Cake Jars
- Soften Butter (Again!): Ensure your unsalted butter is genuinely at room temperature – not melted, but soft enough to easily indent with your finger. This is key for a smooth, lump-free buttercream. In a large mixing bowl, using your stand mixer with the paddle attachment or a hand mixer, beat the softened butter on medium-high speed for about 5-7 minutes. You want it to become incredibly light, pale, and fluffy. This step incorporates a lot of air, making for a wonderfully airy buttercream.
- Gradually Add Powdered Sugar: With the mixer on low speed, gradually add the sifted powdered sugar, one cup at a time. Sifting the sugar beforehand prevents any lumps from ruining your smooth frosting. If you add it too quickly, you’ll end up in a cloud of sugar dust! Once all the sugar is incorporated, scrape down the sides of the bowl.
- Add Liquids and Flavor: Pour in the heavy cream (or whole milk), vanilla extract, and a pinch of salt. The salt really helps to cut through the sweetness of the sugar and butter, balancing the flavors beautifully.
- Whip to Fluffiness: Increase the mixer speed to medium-high and beat for another 3-5 minutes. During this time, the buttercream will transform into a light, fluffy, and spreadable consistency. If it seems too thick, add a tiny bit more cream (half a tablespoon at a time) until it reaches your desired consistency. If it’s too thin, you can add a tablespoon or two more sifted powdered sugar.
- Color Your Buttercream: Now for the striking blue! Add blue gel food coloring to the buttercream. Again, start with a small amount and gradually add more until you achieve a vibrant blue that perfectly complements your Cookie Monster theme. Mix thoroughly until the color is uniform throughout the buttercream. Scrape down the bowl periodically to ensure even coloring. This frosting will be the luscious “fur” of your Cookie Monster Cake Jars!
Preparing the Edible Cookie Dough: A Sweet Surprise for Your Cookie Monster Cake Jars
- Heat-Treat the Flour (Crucial Step!): Raw flour can contain bacteria, so it’s important to heat-treat it for edible cookie dough. Spread the 1 cup of all-purpose flour evenly on a baking sheet. Bake in your preheated 350°F (175°C) oven for about 5-7 minutes, stirring halfway through. Alternatively, you can microwave it in a microwave-safe bowl on high for 1 minute, stir, and then microwave for another 30 seconds to 1 minute, until it reaches an internal temperature of 160°F (71°C). Allow the flour to cool completely before using it. This step ensures your cookie dough is safe to eat without baking.
- Cream Butter and Sugars: In a medium bowl, cream together the softened unsalted butter, granulated sugar, and packed light brown sugar using a hand mixer or stand mixer. Beat until light and fluffy, about 2-3 minutes.
- Add Wet Ingredients: Add the milk, vanilla extract, and salt to the creamed butter and sugars. Mix until well combined.
- Incorporate Heat-Treated Flour: Gradually add the cooled, heat-treated flour to the mixture, mixing on low speed until just combined. Be careful not to overmix.
- Fold in Chocolate Chips: Finally, gently fold in the mini chocolate chips using a spatula. These small chips are perfect for the texture and proportion within the Cookie Monster Cake Jars. Give it a taste test – it should be perfectly sweet and delicious!
Assembly of Your Delightful Cookie Monster Cake Jars: Layer by Layer Goodness
- Prepare Your Jars: Ensure your mason jars are sparkling clean and completely dry. This is where your beautiful Cookie Monster Cake Jars will come to life!
- Cut the Cake Layers: Once your blue velvet cake layers are completely cool, use a 2-inch or 2.5-inch round cookie cutter (depending on the width of your jar opening) to cut out small cake circles. You’ll need about 2-3 circles per jar, so plan accordingly. Any leftover cake scraps are perfect for snacking or making cake pops!
- Prepare for Piping: Transfer your vibrant blue vanilla buttercream into a piping bag fitted with your chosen star or round tip. If you don’t have a piping tip, you can just snip the end off the piping bag.
- First Layer of Cake: Place one cake circle at the bottom of each mason jar. Gently press it down to create a stable base. This is the solid foundation of your Cookie Monster Cake Jars.
- First Layer of Buttercream: Pipe a generous layer of blue buttercream on top of the cake circle. Aim for about a 1/2-inch to 3/4-inch thick layer. This should look like a fluffy blue cloud!
- Add Edible Cookie Dough: Spoon a tablespoon or two of the edible cookie dough on top of the buttercream. Gently spread it out a bit, but don’t press too hard. You want distinct layers in your Cookie Monster Cake Jars.
- Crushed Cookie Crunch: Sprinkle a layer of crushed chocolate chip cookies on top of the cookie dough. This adds a lovely texture and reinforces the cookie theme.
- Repeat the Layers: Place another cake circle on top of the crushed cookies. Then, repeat the piping of blue buttercream, followed by more edible cookie dough, and another sprinkle of crushed cookies. You should aim for at least two full layers of cake and fillings in each jar, possibly three depending on your jar size and how thick you make each layer.
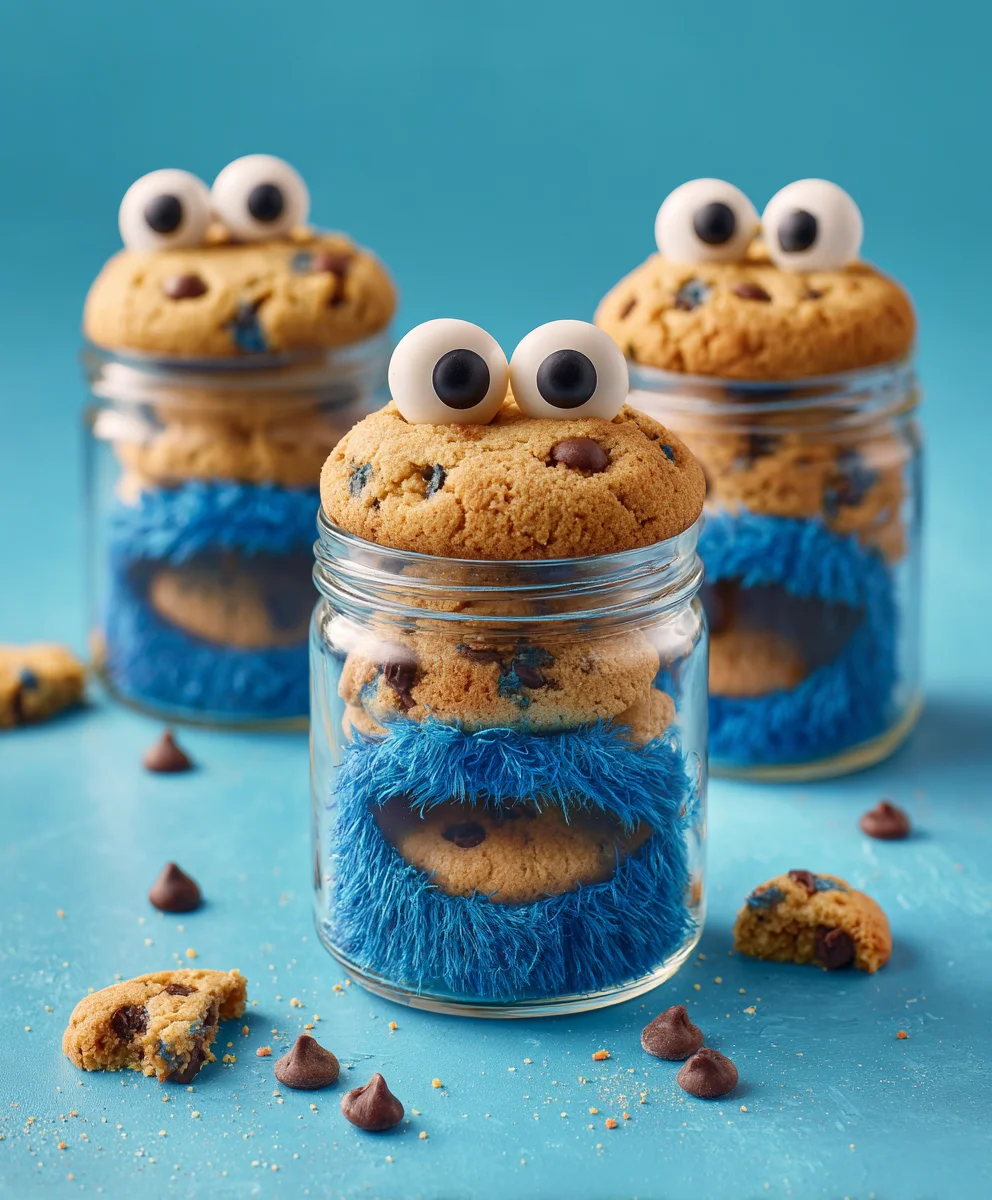
- The Grand Finale – Top Layer and Decoration: For the top layer, you’ll want it to be predominantly blue buttercream, creating the fluffy “fur” effect. Pipe a generous swirl or mound of blue buttercream. This is where you really make your Cookie Monster Cake Jars pop!
- Add Cookie Monster Eyes: Carefully place two large candy eyeballs on top of the blue buttercream, positioning them as if Cookie Monster is looking up at you from inside the jar. If you’re feeling extra creative, you can use a tiny dot of black gel icing or melted chocolate for pupils if your candy eyes don’t already have them.
- Mini Cookie Embellishments: Tuck a few mini chocolate chip cookies (or pieces of regular cookies) into the top buttercream layer, right next to the eyes. This makes it look like Cookie Monster is happily munching on his favorite snack!
- Chill and Enjoy: Once all your Cookie Monster Cake Jars are assembled and decorated, place them in the refrigerator for at least 30 minutes to allow the layers to set. This also helps the flavors meld beautifully.
- Serving and Storage: These Cookie Monster Cake Jars are best enjoyed at room temperature, so pull them out of the fridge about 15-20 minutes before serving. They can be stored in an airtight container in the refrigerator for up to 3-4 days. They also make absolutely adorable and delicious gifts for friends and family – just tie a ribbon around the jar and add a cute tag! Every bite is a delightful journey through blue velvet cake, creamy vanilla buttercream, and chunks of edible cookie dough. Enjoy creating these whimsical treats that are sure to bring a smile to anyone’s face!
Welcome to the grand finale of our culinary adventure! If you’ve made it this far, you’re likely as excited as I am about what we’ve just discussed. I genuinely believe that this recipe is more than just a dessert; it’s an experience, a joyful rebellion against the mundane, and a vibrant celebration of all things delicious and delightful. It’s truly a standout, offering a fantastic blend of textures and tastes that dance on your palate. Imagine the moist, tender cake layers, perfectly complemented by a rich, creamy frosting that’s just sweet enough. Then, there are those delightful cookie crumbles, adding a satisfying crunch and a familiar, comforting flavor that everyone adores. This isn’t merely another sweet treat; it’s a carefully crafted symphony of flavor and fun, designed to bring smiles and spark conversations. The visual appeal alone makes it an instant showstopper, perfect for those moments when you want to impress without overwhelming yourself in the kitchen.
What truly sets this particular recipe apart is its unique ability to combine nostalgic charm with sophisticated flair. It’s whimsical enough to capture the hearts of children, yet refined enough to be appreciated by adult palates. Every spoonful is a journey back to simpler times, but with an elevated taste profile that feels special. I’m talking about the kind of dessert that gets people asking for the recipe, not just out of politeness, but out of genuine admiration for its incredible taste and presentation. It’s also surprisingly versatile, allowing for a good degree of creative freedom once you’ve mastered the basic technique. Whether you’re a seasoned baker or just starting out, the process is designed to be enjoyable, leading to truly spectacular results that you’ll be proud to share.
Making the Most of Your Culinary Creation: Serving & Variation Ideas
Now that you’re armed with the knowledge to create this fantastic dessert, let’s talk about how to make it an even bigger hit. While the standard presentation is already charming, there are so many ways to customize and serve these delectable treats. For an effortless party dessert, prepare them in advance and simply pull them out when it’s time for sweets. They’re fantastic for picnics, potlucks, or even as individual gifts, tied with a pretty ribbon and a personalized tag. You could even set up a ‘build-your-own’ bar at a gathering, with separate bowls of cake pieces, frosting, and different cookie crumbles, letting guests assemble their own custom jars. This interactive approach is always a huge hit, especially with kids and those who love to get creative with their food.
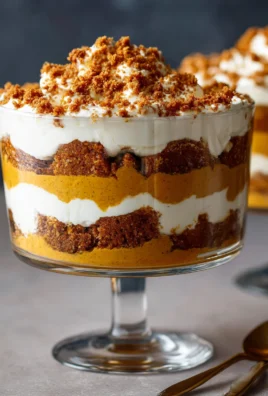
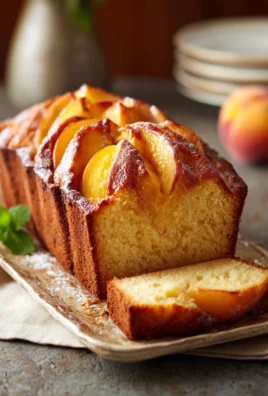
When it comes to variations, the sky’s the limit! If you’re feeling adventurous, try swapping out the classic cookies for different varieties. Imagine a version with crushed chocolate chip cookies, or perhaps a decadent peanut butter cookie crumble for a nutty twist. You could also experiment with the frosting. A hint of almond extract or a swirl of melted chocolate can transform the flavor profile entirely. For a truly festive touch, consider adding a layer of fresh berries – raspberries or blueberries would offer a lovely tart contrast to the sweetness. And let’s not forget sprinkles! A generous shower of colorful sprinkles always elevates the fun factor. For a holiday variation, you could use themed sprinkles or even tinted frosting. The beauty of these Cookie Monster Cake Jars is their adaptability; they’re a perfect canvas for your culinary imagination. Think about seasonal ingredients too – perhaps a pumpkin spice variation in the fall, or a zesty lemon twist in the summer. Each small alteration can lead to a completely new and exciting experience, making this recipe one you’ll revisit again and again.
Your Turn: Dive In and Share Your Sweet Success!
So, what are you waiting for? I’m genuinely excited for you to try this recipe. Don’t let anything hold you back from experiencing the pure joy of creating and savoring these delightful treats. Gather your ingredients, put on some fun music, and let your inner baker shine. I promise you, the smiles and compliments you’ll receive will make every moment worth it. Once you’ve whipped up your batch, I would absolutely love to hear all about your experience. Did you add a unique twist? Did your family rave about them? Snap a photo of your creations – I’m always thrilled to see how your individual flair comes through. Share your pictures and thoughts; let’s build a community of enthusiastic bakers who aren’t afraid to add a little extra fun to their desserts. Your feedback and beautiful photos inspire not just me, but countless others who are looking for their next sweet adventure. Happy baking!
Cookie Monster Cake Jars: Fun & Easy Dessert Recipe!
Cookie Monster Cake Jars are a delightful, perfectly portioned dessert featuring layers of moist blue cake, vibrant buttercream, edible cookie dough, and cookie crumbles, all in a convenient jar. This fun and nostalgic treat is easy to make and perfect for any occasion.
Ingredients
-
2 ½ cups (300g) all-purpose flour
-
1 teaspoon baking powder
-
½ teaspoon baking soda
-
½ teaspoon salt
-
1 cup (226g) unsalted butter, softened
-
2 cups (400g) granulated sugar
-
2 large eggs
-
1 teaspoon vanilla extract
-
1 teaspoon blue gel food coloring
-
1 cup (240ml) buttermilk
-
½ cup (120ml) whole milk
-
2 cups (452g) unsalted butter, softened
-
6-8 cups (720g-960g) powdered sugar
-
½ cup (120ml) heavy cream or whole milk
-
2 teaspoons vanilla extract
-
Pinch of salt
-
Blue gel food coloring
-
½ cup (113g) unsalted butter, softened
-
¼ cup (50g) granulated sugar
-
½ cup (100g) packed light brown sugar
-
1 cup (120g) all-purpose flour, heat-treated
-
2 tablespoons milk (any kind)
-
1 teaspoon vanilla extract
-
½ teaspoon salt
-
¾ cup (120g) mini chocolate chips
-
6-8 (8oz or 16oz) mason jars, clean and dry
-
1 cup (approx. 150g) pre-made mini chocolate chip cookies or crushed regular chocolate chip cookies
-
Large candy eyeballs
-
Piping bags and a large star or round tip (optional)
Instructions
-
Step 1
Preheat oven to 350°F (175°C). Grease and flour two 8-inch round cake pans. -
Step 2
Whisk flour, baking powder, baking soda, and salt. Set aside. -
Step 3
Cream 1 cup butter and 2 cups granulated sugar until light and fluffy (3-5 mins). Add eggs one at a time, then 1 tsp vanilla; mix well. -
Step 4
Add 1 tsp blue gel food coloring to wet mixture; mix until vibrant blue. -
Step 5
Alternately add dry ingredients and liquids (buttermilk, whole milk) to wet ingredients on low speed, starting and ending with dry. Mix until just combined, avoid overmixing. -
Step 6
Divide batter into pans and bake for 28-35 minutes, or until a toothpick comes out clean. Cool in pans 10-15 minutes, then completely on a wire rack. -
Step 7
Beat 2 cups softened butter until light and fluffy (5-7 mins). Gradually add 6-8 cups sifted powdered sugar on low speed. Scrape bowl. -
Step 8
Add ½ cup heavy cream, 2 tsp vanilla, and a pinch of salt. Whip on medium-high for 3-5 minutes until light and fluffy. Adjust consistency with more cream or powdered sugar if needed. -
Step 9
Add blue gel food coloring to buttercream until vibrant blue; mix thoroughly. -
Step 10
Heat-treat 1 cup flour by baking at 350°F (175°C) for 5-7 minutes (stir halfway) or microwaving until 160°F (71°C). Cool completely. -
Step 11
Cream ½ cup butter, ¼ cup granulated sugar, and ½ cup brown sugar until light and fluffy (2-3 mins). Add 2 tbsp milk, 1 tsp vanilla, and ½ tsp salt; mix. -
Step 12
Gradually add cooled, heat-treated flour. Mix until just combined. Fold in ¾ cup mini chocolate chips. -
Step 13
Clean and dry 6-8 mason jars. Cut cooled blue velvet cake into 2-2.5 inch circles. -
Step 14
Transfer blue buttercream to a piping bag with your chosen tip. -
Step 15
Layer each jar: cake circle, piped buttercream (½-¾ inch), 1-2 tbsp edible cookie dough, crushed cookies. -
Step 16
Repeat layers for 2-3 full layers. Finish the top with a generous swirl or mound of blue buttercream. -
Step 17
Place two large candy eyeballs on the buttercream. Tuck a few mini chocolate chip cookies around the eyes. -
Step 18
Chill jars for at least 30 minutes to set layers and meld flavors. Serve at room temperature. Store in fridge for 3-4 days.
Important Information
Nutrition Facts (Per Serving)
It is important to consider this information as approximate and not to use it as definitive health advice.
Allergy Information
Please check ingredients for potential allergens and consult a health professional if in doubt.
Leave a Comment