
Chocolate Crack Pie – the name alone promises something truly extraordinary, doesn’t it? Something dangerously delicious, utterly captivating, and perhaps even a little bit addictive. I’m here to tell you, it absolutely delivers. This isn’t merely a dessert; it’s an experience, a phenomenon that has garnered a cult following for very compelling reasons. While its precise origins might be shrouded in a delightful, flour-dusted mystery, the legend states that once you taste its unique blend of sweet, salty, and intensely gooey perfection, you’ll understand precisely how it earned its evocative moniker.
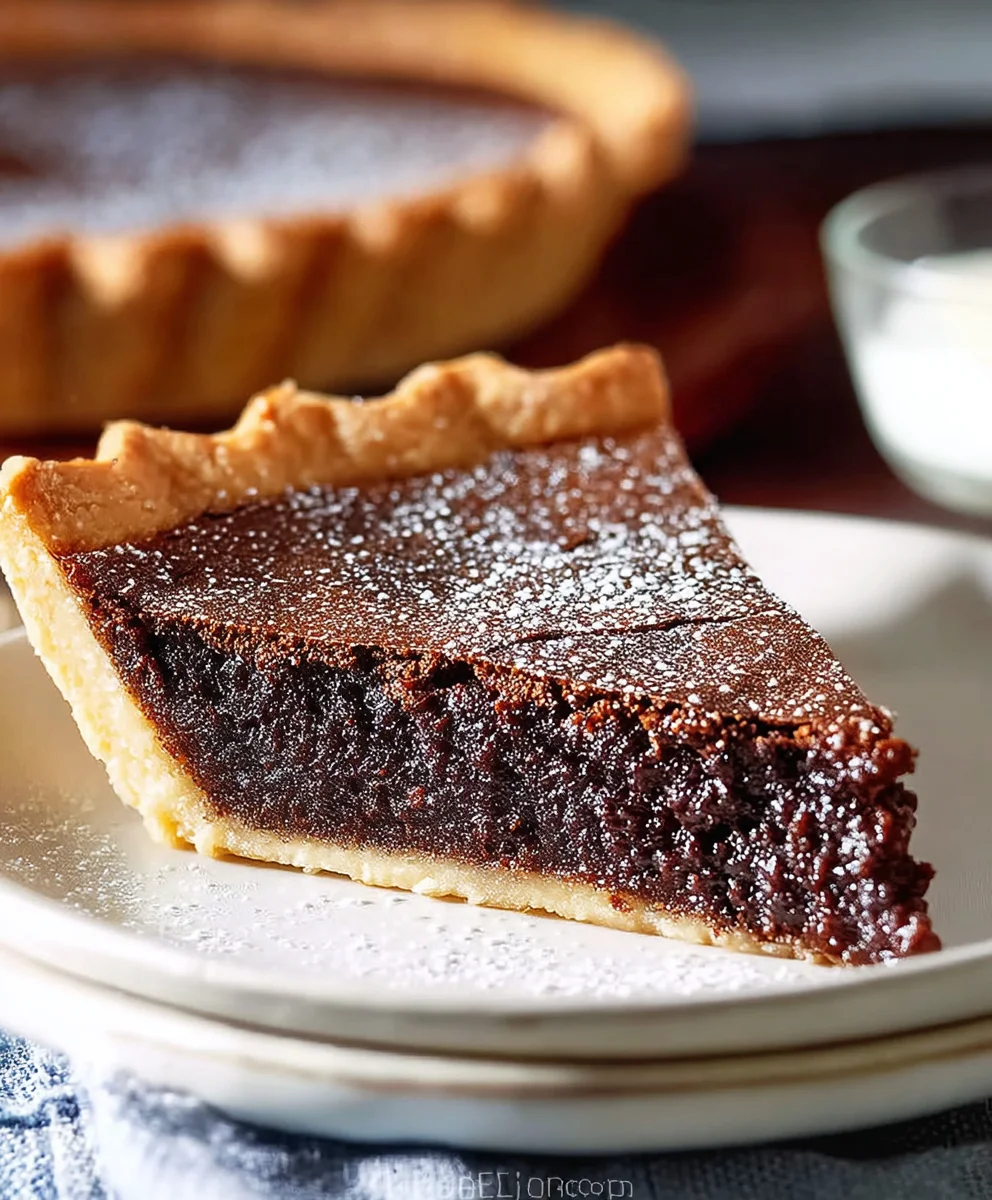
People adore this particular pie for its intensely rich, fudgy filling that sits luxuriously atop a crisp, buttery crust. It’s the kind of dessert that satisfies every chocolate craving with its complex layers of flavor and incredibly pleasing texture – a beautiful symphony of chewy, gooey, and delightfully crunchy elements. Preparing an authentic Chocolate Crack Pie is a journey into creating pure joy, and I promise you, the smiles it brings to faces are entirely worth every moment of baking bliss.
Ingredients:
- For the Chocolate Crack Pie Crust:
- 25-30 chocolate sandwich cookies (about 1 ¾ – 2 packages, depending on brand and size), finely crushed. I usually go for the classic cream-filled ones, as they add a subtle richness to the crust that perfectly complements our filling.
- 6 tablespoons (85g) unsalted butter, melted. Good quality butter really makes a difference here, binding the crumbs together beautifully and adding a depth of flavor.
- 2 tablespoons granulated sugar (optional, but I love the extra hint of sweetness and crispness it provides).
- A pinch of fine sea salt (optional, but it really elevates the chocolate flavor in the crust).
- For the Irresistible Chocolate Crack Pie Filling:
- 1 cup (226g) unsalted butter, melted. Yes, a whole cup! This contributes to the incredibly rich, fudgy texture that defines this pie.
- 1 ½ cups (300g) granulated sugar.
- ½ cup (100g) packed light brown sugar. The brown sugar adds a lovely molasses note and helps with the chewiness.
- ¼ cup (30g) unsweetened cocoa powder, sifted. Make sure it’s unsweetened, and sifting prevents lumps, ensuring a smooth, uniform chocolate flavor.
- 3 large eggs, at room temperature. Room temperature eggs emulsify better with the other ingredients, leading to a smoother filling.
- 1 tablespoon cornstarch. This is our secret weapon for that perfectly gooey, slightly set consistency.
- 1 teaspoon pure vanilla extract. Use good quality vanilla; it really brightens the chocolate flavor.
- ½ teaspoon fine sea salt. This is absolutely crucial! It balances the sweetness and makes the chocolate taste even more intensely chocolatey. Don’t skip it!
- 1 cup (170g) semisweet chocolate chips or chopped chocolate. I prefer good quality chopped semisweet chocolate for a more pronounced chocolate presence and a melt-in-your-mouth texture, but chips work wonderfully too.
- For Garnish (Optional, but highly recommended!):
- Flaky sea salt (like Maldon). A sprinkle on top before serving really enhances the “crack” and makes the chocolate sing.
- Sweetened whipped cream or a scoop of vanilla bean ice cream.
For the Chocolate Crack Pie Crust:
Creating the perfect foundation for our Chocolate Crack Pie is the first step towards pure dessert bliss. This crust is simple, yet incredibly satisfying, providing a delightful textural contrast to the gooey filling.
- Prepare your pie dish: Lightly grease a standard 9-inch pie dish. I usually use a tiny bit of butter or a quick spray of non-stick cooking spray to ensure nothing sticks, especially around the edges.
- Crush the cookies: This is where the fun begins! Place the chocolate sandwich cookies into a food processor. Pulse until they are finely ground into even crumbs. You’re looking for a texture similar to fine sand, without any large chunks. If you don’t have a food processor, no worries! You can place the cookies in a large zip-top bag, seal it, and crush them with a rolling pin or the bottom of a heavy pan. Just make sure they are really well crushed for a uniform crust.
- Melt the butter: In a microwave-safe bowl or a small saucepan over low heat, melt the 6 tablespoons of unsalted butter. Once melted, set it aside for a moment to cool slightly.
- Combine ingredients: In a medium-sized mixing bowl, combine the finely crushed chocolate cookie crumbs, the optional 2 tablespoons of granulated sugar, and the pinch of fine sea salt. Give them a good stir with a spoon or your hands to ensure everything is evenly distributed.
- Add melted butter: Pour the slightly cooled melted butter over the cookie mixture. Stir well with a spoon or spatula until all the crumbs are moistened and resemble wet sand. It should hold together when you press a small amount between your fingers. This step is crucial for a crust that holds its shape.
- Press into the pie dish: Transfer the crumb mixture into your prepared 9-inch pie dish. Using the bottom of a flat-bottomed glass, a measuring cup, or your fingers, firmly press the mixture evenly across the bottom and up the sides of the pie dish. Make sure the edges are nice and neat, and the entire surface is uniformly compressed. A well-pressed crust is a sturdy crust!
- Chill the crust: Place the pie dish with the pressed crust into the refrigerator for at least 30 minutes. This chilling time helps the butter solidify, making the crust more stable and less likely to crumble when you add the filling and bake. Trust me, patience here pays off. Alternatively, if you want a slightly crispier crust, you can pre-bake it in a preheated oven at 350°F (175°C) for 8-10 minutes, then let it cool completely before adding the filling. For this particular Chocolate Crack Pie, I often skip the pre-baking because the filling is so rich, but it’s a matter of preference!
Preparing the Irresistible Chocolate Crack Pie Filling:
Now for the star of the show! This chocolate filling is what gives our Chocolate Crack Pie its name – a truly addictive, fudgy, and intensely chocolatey experience that you won’t soon forget.
- Preheat your oven: Set your oven to 325°F (160°C). We’re going for a slightly lower and slower bake for this pie to ensure it cooks through without drying out.
- Melt butter and sugars: In a large, heat-proof bowl, combine the 1 cup of melted unsalted butter, 1 ½ cups of granulated sugar, and ½ cup of packed light brown sugar. Whisk these together vigorously until the sugars are completely dissolved and the mixture is smooth and glossy. You want to make sure there are no grainy sugar bits remaining. This often takes a couple of minutes of dedicated whisking.
- Incorporate cocoa powder: Sift the ¼ cup of unsweetened cocoa powder directly into the butter and sugar mixture. Whisk again until the cocoa is fully incorporated and the mixture is a beautiful, rich chocolate color. Make sure there are no streaks of dry cocoa powder. The mixture will be quite thick and luscious at this stage.
- Add eggs, one at a time: Crack your three large, room temperature eggs into the chocolate mixture, adding them one at a time. After each egg, whisk thoroughly until it is fully incorporated and the mixture is smooth before adding the next. This method helps create a stable emulsion, leading to a perfectly textured filling.
- Whisk in remaining wet ingredients: Next, add the 1 tablespoon of cornstarch, 1 teaspoon of pure vanilla extract, and ½ teaspoon of fine sea salt to the bowl. Whisk everything together until the mixture is completely smooth, lump-free, and looks homogenous. The cornstarch is essential here; it gives the pie that signature “crack” texture as it cools and helps achieve a wonderfully gooey yet set consistency.
- Fold in chocolate chips: Gently fold in the 1 cup of semisweet chocolate chips or chopped chocolate. I love how these melt into pockets of extra chocolatey goodness in the finished pie, adding another layer of texture and flavor. Stir just until they are evenly distributed throughout the filling.
- Pour filling into crust: Carefully pour the prepared chocolate filling into your chilled pie crust. Using a rubber spatula, scrape every last bit of that delicious filling into the crust – you don’t want to waste a drop! Gently spread the filling evenly across the crust.
Baking Your Chocolate Crack Pie to Perfection:
Baking is where the magic truly happens, transforming our liquid filling into that iconic, dense, and slightly gooey Chocolate Crack Pie that everyone raves about.
- Prepare for baking: Place the pie dish on a baking sheet. This helps to catch any potential drips (though with this recipe, it’s usually not an issue) and makes it easier to transfer the pie in and out of the oven.
- Bake the pie: Carefully transfer the baking sheet with the pie to your preheated 325°F (160°C) oven. Bake for approximately 45-55 minutes.
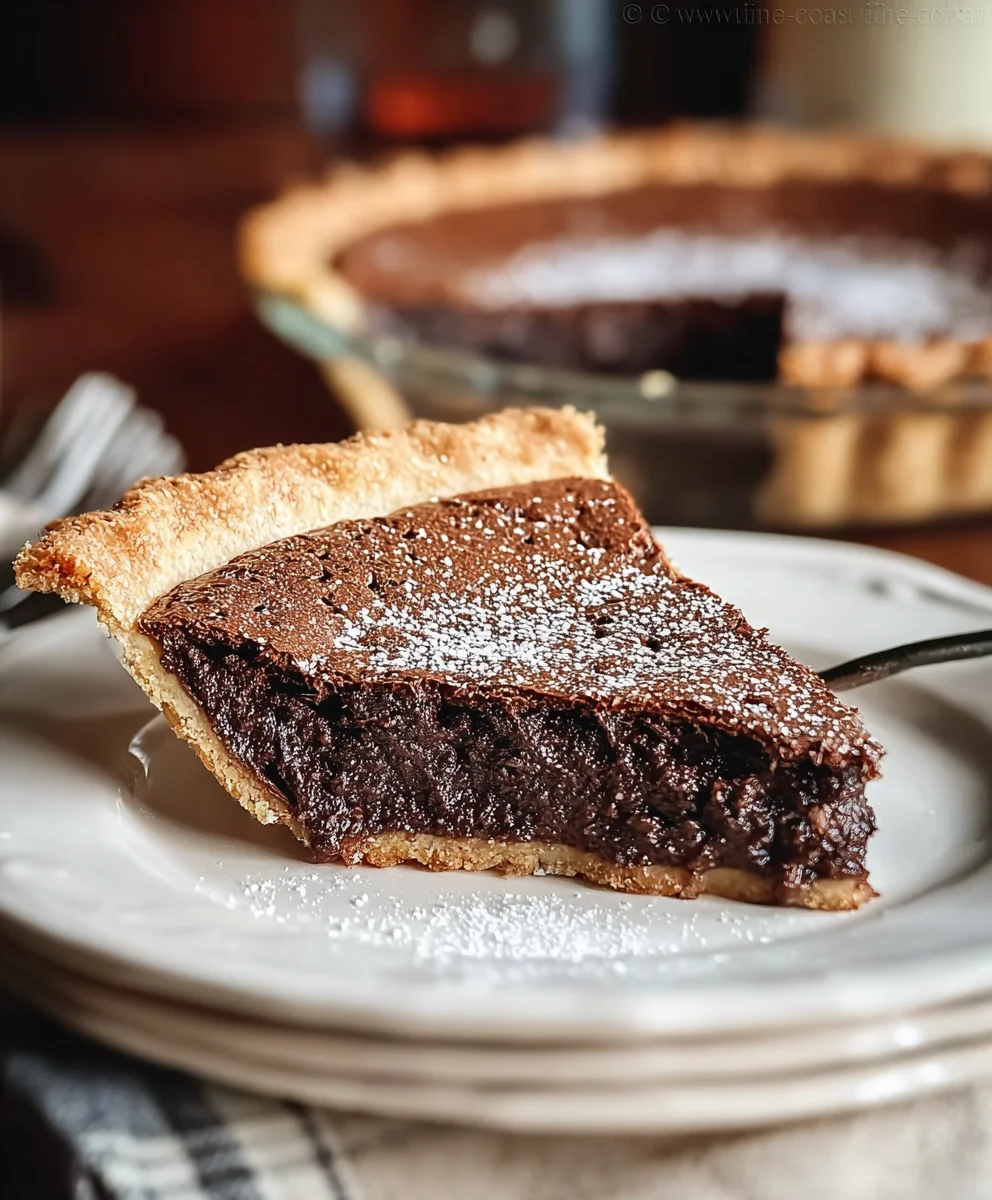
- Check for doneness: This is a critical step for the perfect Chocolate Crack Pie! You’re looking for the edges of the pie to be set and slightly puffed, while the very center (about a 2-inch circle) should still have a slight jiggle to it when you gently shake the pie dish. It’s okay if it looks a little underbaked in the center; it will continue to cook and set as it cools. Overbaking will result in a dry, cake-like texture, and we definitely want that signature gooeyness! I usually start checking around the 45-minute mark and then every 5 minutes after that. Every oven is a little different, so trust your instincts and those visual cues. The top might form a slight, delicate crack, which is a wonderful sign and part of its charm.
Cooling and Serving Your Decadent Chocolate Crack Pie:
Patience is a virtue, especially when it comes to cooling this pie. The cooling process is just as important as the baking to achieve that perfect, firm-yet-gooey texture of your Chocolate Crack Pie.
- Cool at room temperature: Once baked, carefully remove the pie from the oven and transfer it from the baking sheet to a wire rack. Let the pie cool completely at room temperature for at least 2-3 hours. During this time, the residual heat will continue to cook the center, and the pie will gradually set. It will transform from its jiggly state to a more stable, dense texture. Do not try to move it too much or slice it before it has cooled significantly.
- Refrigerate for optimal setting: For the absolute best texture and ease of slicing, I highly recommend refrigerating the pie for at least another 2-4 hours, or even better, overnight. This chilling period allows the pie to firm up completely, developing that rich, dense, and slightly chewy consistency that makes it so unique. It also deepens the chocolate flavor. When you’re ready to serve, if it’s been in the fridge for a long time, you might want to let it sit out for 15-20 minutes before slicing to take the chill off slightly, as it can be very firm straight from the fridge.
- Slice and serve: Once fully cooled and set, use a sharp, thin-bladed knife to cut generous slices of your incredible Chocolate Crack Pie. For clean slices, wipe your knife with a warm, damp cloth between each cut.
- Garnish and enjoy: This pie is absolutely divine on its own, but for an extra special touch, I love to sprinkle a few flakes of flaky sea salt (like Maldon) over each slice just before serving. The salt provides a wonderful contrast to the sweetness and really makes the chocolate notes pop. For a truly decadent experience, serve it with a dollop of freshly whipped cream or a scoop of your favorite vanilla bean ice cream. The creamy topping beautifully complements the rich, fudgy pie.
Storage Tip: Leftover Chocolate Crack Pie should be stored, covered, in the refrigerator for up to 4-5 days. It actually tastes even better the next day, as the flavors have more time to meld and deepen!
Conclusion:
If you’ve followed along with me through this incredible culinary journey, you’re now armed with everything you need to bake one of the most utterly irresistible desserts known to humankind. I’m talking about a confection that transcends the ordinary, a dessert so profoundly satisfying it promises to become a permanent fixture in your baking repertoire. We’ve explored the nuances, the simple yet brilliant steps, and the magic behind transforming humble ingredients into something truly spectacular. This isn’t just another recipe; it’s an invitation to experience pure, unadulterated joy, a taste sensation that will have everyone asking for seconds, and then probably thirds.
Why This Recipe is an Absolute Must-Try
I genuinely believe that this particular recipe for Chocolate Crack Pie stands head and shoulders above many other chocolate desserts you might encounter. Why? Because it delivers on so many fronts. Imagine a pie with an impossibly rich, dense, and gooey chocolate filling that seems to melt on your tongue, yet still possesses a delightful chewiness. Now, envision that luxurious filling nestled in a perfectly crisp, buttery crust that provides the ideal textural contrast. It’s a symphony of textures and flavors – sweet, intensely chocolatey, and wonderfully comforting. It’s the kind of dessert that looks impressive enough for any special occasion, but is surprisingly straightforward to make. Trust me when I say, the moment you take that first bite, you’ll understand why I’m so passionate about it. It’s the perfect balance of richness without being cloying, and its simplicity belies the profound satisfaction it brings. This is a pie that doesn’t just satisfy a sweet craving; it creates an experience.
Elevate Your Experience: Serving Suggestions and Delicious Variations
While this pie is absolutely phenomenal on its own, a true masterpiece requiring no embellishment, there are certainly ways to enhance the experience, depending on your mood and the occasion. For a classic pairing, I highly recommend serving a warm slice with a generous scoop of good quality vanilla bean ice cream. The cold, creamy ice cream melting into the warm, gooey chocolate is a combination that simply cannot be beaten. If you prefer something a little lighter, a dollop of freshly whipped cream, perhaps lightly sweetened and infused with a hint of vanilla or a whisper of espresso powder, offers a beautiful contrast. A sprinkle of flaky sea salt over the top before serving is another fantastic way to elevate the flavors, enhancing the chocolate’s depth and adding a subtle savory note that cuts through the sweetness beautifully.
Thinking about variations? Don’t be afraid to experiment! While the core recipe is perfect, consider adding a handful of toasted pecans or walnuts to the filling for an added crunch and nutty flavor dimension. You could also swirl in a spoonful of a high-quality caramel sauce or peanut butter into the chocolate mixture before baking for a different twist. For a touch of fruitiness, a handful of fresh raspberries or sliced strawberries served alongside offers a delightful tart counterpoint to the pie’s richness. And for those who enjoy a little spice, a tiny pinch of cayenne pepper mixed into the chocolate batter can add an unexpected and intriguing warmth that truly makes the chocolate sing. The possibilities are truly endless, allowing you to personalize this incredible dessert to your heart’s content.
Now It’s Your Turn!
So, there you have it. My heartfelt plea for you to try your hand at creating this truly extraordinary dessert. Don’t let the name “Crack Pie” intimidate you; it simply refers to its incredibly addictive quality. I promise you, the process is rewarding, and the results are nothing short of spectacular. This is more than just a recipe; it’s an opportunity to create something wonderful, to share joy with loved ones, and to indulge in a moment of pure, unadulterated pleasure. I am so confident that this will become a cherished recipe in your household, one that you’ll turn to again and again for celebrations, quiet evenings in, or simply because you deserve a treat.
Please, I urge you, try this recipe for Chocolate Crack Pie. Bake it, taste it, savor it, and then come back and tell me all about your experience! I absolutely adore hearing from you and seeing your culinary creations. Share your triumphs, your serving suggestions, or any clever variations you come up with. Did you serve it with coffee? A glass of milk? What did your family think? Your feedback is invaluable, and it truly makes my day to know that I’ve inspired someone to get into the kitchen and create something delicious. Happy baking, my friends – I can’t wait to hear how much you love it!
Decadent Chocolate Crack Pie
This dangerously delicious Chocolate Crack Pie features an intensely rich, fudgy chocolate filling atop a crisp, buttery crust. A symphony of chewy, gooey, and crunchy textures with sweet and salty notes, making it utterly captivating and addictive.
Ingredients
-
For the Crust:
-
1 ½ cups graham cracker crumbs
-
6 tbsp (85g) unsalted butter, melted
-
2 tbsp granulated sugar (optional)
-
Pinch of fine sea salt (optional)
-
For the Irresistible Chocolate Crack Pie Filling:
-
1 cup (226g) unsalted butter, melted
-
1 ½ cups (300g) granulated sugar (use 1 ¼ cups for a less sweet pie)
-
½ cup (100g) packed light brown sugar
-
¼ cup (30g) unsweetened cocoa powder, sifted
-
3 large eggs, at room temperature
-
1 tbsp cornstarch
-
1 tsp pure vanilla extract
-
½ tsp fine sea salt
-
1 cup (170g) semisweet chocolate chips or chopped chocolate
-
For Garnish (Optional):
-
Flaky sea salt
-
Sweetened whipped cream or vanilla bean ice cream
Instructions
-
Step 1
Lightly grease a 9-inch pie dish. In a medium bowl, combine graham cracker crumbs, 6 tbsp melted butter, 2 tbsp granulated sugar (optional), and pinch of sea salt (optional); stir until crumbs are moistened. Press mixture firmly and evenly into the bottom and up the sides of the pie dish. Chill for at least 30 minutes in the refrigerator, or pre-bake at 350°F (175°C) for 8-10 minutes for a crispier crust, then cool. -
Step 2
Preheat oven to 325°F (160°C). In a large, heat-proof bowl, whisk 1 cup melted unsalted butter with 1 ½ cups granulated sugar (or 1 ¼ cups for less sweetness) and ½ cup packed light brown sugar until smooth. Sift in ¼ cup unsweetened cocoa powder and whisk until fully incorporated. Add 3 room temperature eggs, one at a time, whisking thoroughly after each. Whisk in 1 tbsp cornstarch, 1 tsp pure vanilla extract, and ½ tsp fine sea salt until smooth and lump-free. Gently fold in 1 cup semisweet chocolate chips or chopped chocolate. Pour the prepared filling into the chilled pie crust and spread evenly. -
Step 3
Place the pie dish on a baking sheet. Bake in the preheated oven for approximately 45-55 minutes. The pie is done when the edges are set and slightly puffed, but the very center (about a 2-inch circle) still has a slight jiggle. Avoid overbaking to maintain gooeyness. -
Step 4
Carefully remove the pie from the oven and transfer to a wire rack. Cool completely at room temperature for at least 2-3 hours. For optimal texture and ease of slicing, refrigerate for another 2-4 hours or overnight. Slice with a sharp, thin-bladed knife (wiping between cuts for cleanliness). Garnish with flaky sea salt, sweetened whipped cream, or vanilla bean ice cream, if desired. Store leftovers covered in the refrigerator for up to 4-5 days.
Important Information
Nutrition Facts (Per Serving)
It is important to consider this information as approximate and not to use it as definitive health advice.
Allergy Information
Please check ingredients for potential allergens and consult a health professional if in doubt.

Leave a Comment