
?utm_medium=social&utm_source=pinterest&utm_campaign=tailwind_tribes&utm_content=tribes&utm_term=992166412_44896978_297243. As we delve into the warmth and comfort of a truly classic dish, I am thrilled to share with you a recipe that consistently brings smiles to every table: a homemade Hearty Chicken Pot Pie. Imagine a golden, flaky crust that shatters with every forkful, revealing a creamy, savory filling brimming with tender chunks of chicken and vibrant, perfectly cooked vegetables.
This iconic dish has a rich history, tracing its roots back to ancient Greece and Rome, where meat pies were a staple. Over centuries, it evolved into the beloved English and American comfort food we cherish today, often served during chilly evenings or family gatherings. It’s more than just a meal; it’s a culinary hug, a nostalgic reminder of simpler times and wholesome goodness that transcends generations.
Why This Dish Captures Our Hearts
People absolutely adore chicken pot pie not only for its incredible taste and satisfying texture but also for its ability to transform humble ingredients into something truly extraordinary. The combination of succulent chicken, sweet peas, crisp carrots, and hearty potatoes, all enveloped in a rich, velvety sauce and crowned with that irresistible pastry, creates a symphony of flavors and sensations. This particular rendition, which you’ll find detailed below, perfectly embodies what makes ?utm_medium=social&utm_source=pinterest&utm_campaign=tailwind_tribes&utm_content=tribes&utm_term=992166412_44896978_297243 so special – it’s a recipe designed to be shared and savored, bringing joy and warmth to your home with every delicious bite.
Ingredients:
-
For the Flaky Buttermilk Pie Crust:
- 2 ½ cups (300g) all-purpose flour, plus more for dusting
- 1 teaspoon salt
- 1 cup (226g) unsalted butter, very cold and cut into ½-inch cubes
- ¾ cup (180ml) cold buttermilk, plus 1-2 tablespoons more if needed
- 1 tablespoon apple cider vinegar (optional, for extra tender crust)
-
For the Rich and Creamy Chicken and Mushroom Filling:
- 2 tablespoons olive oil
- 1 ½ lbs (about 680g) boneless, skinless chicken thighs or breasts, cut into ¾-inch pieces
- 1 teaspoon salt, plus more to taste
- ½ teaspoon black pepper, plus more to taste
- 1 large yellow onion, chopped (about 1 ½ cups)
- 2 carrots, peeled and diced (about 1 cup)
- 2 celery stalks, diced (about 1 cup)
- 8 oz (226g) cremini mushrooms, sliced
- ½ cup (113g) unsalted butter
- ½ cup (60g) all-purpose flour
- 4 cups (960ml) chicken broth, low sodium preferred
- 1 cup (240ml) heavy cream
- 1 cup (150g) frozen peas, thawed
- 2 tablespoons fresh parsley, chopped
- 1 tablespoon fresh thyme leaves, chopped
- 1 bay leaf
- Pinch of nutmeg (optional, but lovely)
-
For the Egg Wash:
- 1 large egg
- 1 tablespoon water or milk
For the Flaky Buttermilk Pie Crust:
- Combine Dry Ingredients: In a large mixing bowl, whisk together the 2 ½ cups of all-purpose flour and 1 teaspoon of salt. Make sure it’s thoroughly combined; an even distribution of salt helps flavor the entire crust.
- Cut in the Cold Butter: Add the very cold, cubed butter to the flour mixture. Using a pastry blender, two knives, or your fingertips, cut the butter into the flour until the mixture resembles coarse meal with some pea-sized pieces of butter still visible. This step is crucial for flakiness! Don’t overmix; you want those distinct butter pockets. If using your hands, work quickly to prevent the butter from warming too much.
- Add Liquid: Gradually add the ¾ cup of cold buttermilk and the optional 1 tablespoon of apple cider vinegar (the acid in the vinegar helps tenderize the dough) to the flour mixture, a few tablespoons at a time. Mix gently with a fork or your hands until the dough just comes together. It should be shaggy but cohesive. If it’s too dry, add an additional tablespoon or two of buttermilk, but be careful not to add too much; a slightly drier dough is better than a sticky one.
- Form and Chill: Divide the dough into two equal portions. Gently press each portion into a disk, taking care not to overwork the dough. Wrap each disk tightly in plastic wrap and refrigerate for at least 1 hour, or preferably 2 hours. Chilling the dough is essential; it allows the gluten to relax, which makes for a more tender crust, and it firms up the butter, which prevents it from melting too quickly in the oven, ensuring those beautiful flaky layers. You can even make this dough a day or two in advance.
For the Rich and Creamy Chicken and Mushroom Filling:
- Prepare the Chicken: Season the ¾-inch chicken pieces generously with 1 teaspoon of salt and ½ teaspoon of black pepper. In a large, heavy-bottomed pot or Dutch oven, heat 2 tablespoons of olive oil over medium-high heat.
- Sear the Chicken: Add the seasoned chicken pieces to the hot oil in a single layer, working in batches if necessary to avoid overcrowding the pan. Cook for 3-4 minutes per side, until deeply golden brown and beautifully seared. The chicken doesn’t need to be cooked through at this stage, as it will finish cooking in the sauce. Remove the chicken from the pot and set aside. Don’t worry if there are some browned bits stuck to the bottom of the pot; these will add incredible flavor to our sauce.
- Sauté Aromatics: Reduce the heat to medium. Add the chopped onion, diced carrots, and diced celery to the same pot. If needed, add another small drizzle of olive oil. Sauté for 8-10 minutes, stirring occasionally, until the vegetables have softened and the onion is translucent. This slow sautéing brings out their natural sweetness and builds a strong flavor base.
- Add Mushrooms: Stir in the sliced cremini mushrooms. Increase the heat slightly to medium-high and cook for another 5-7 minutes, stirring periodically, until the mushrooms have released their moisture and started to brown. This process concentrates their earthy flavor.
- Make the Roux: Push the vegetables to one side of the pot. Add ½ cup of unsalted butter to the empty side and let it melt. Once melted, sprinkle in ½ cup of all-purpose flour over the melted butter. Immediately begin whisking continuously for 2-3 minutes, creating a smooth paste known as a roux. Cooking the roux properly is key; it removes the raw flour taste and acts as the thickening agent for our glorious sauce.
- Whisk in Broth: Gradually pour in the 4 cups of chicken broth, a cup at a time, whisking constantly to prevent lumps. The mixture will thicken as you add more liquid. Continue whisking until the sauce is smooth and simmering. It should be quite thick at this point.
- Add Cream and Peas: Stir in the 1 cup of heavy cream, the thawed frozen peas, the chopped fresh parsley, chopped fresh thyme leaves, the bay leaf, and a pinch of nutmeg (if using). Bring the mixture to a gentle simmer.
- Combine and Simmer: Return the seared chicken pieces to the pot. Stir everything together. Allow the filling to simmer gently for another 10-15 minutes, or until the sauce has thickened to your desired consistency and the chicken is cooked through. The flavors will meld beautifully during this time.
- Taste and Adjust Seasoning: Carefully remove the bay leaf. Now is the time to taste the filling and adjust the seasoning. You might find it needs more salt, pepper, or a little more of your favorite herbs. Don’t be shy about tasting! A well-seasoned filling makes all the difference. Remove the pot from the heat and allow the filling to cool slightly while you prepare the crust. This prevents the bottom crust from getting soggy when you pour in the hot filling.
Assembling Your Pot Pie:
- Preheat Oven: Preheat your oven to 400°F (200°C). Have a 9-inch deep-dish pie plate ready.
- Roll Out Bottom Crust: On a lightly floured surface, take one disk of chilled pie dough. Roll it out into a 12-inch circle, about ⅛-inch thick. Carefully transfer the rolled dough into your 9-inch pie plate. Gently press it into the bottom and up the sides. Trim any excess dough from the edges, leaving about a ½-inch overhang. You can crimp this edge or simply leave it for now.
- Fill the Pie: Pour the slightly cooled chicken and mushroom filling into the pie crust-lined plate, spreading it evenly. Make sure it’s generously filled but leaves a little room for the top crust.
- Roll Out Top Crust: Roll out the second disk of chilled pie dough into another 12-inch circle. Carefully place this circle over the filling.
- Seal and Crimp: Trim the top crust, leaving about a ½-inch overhang. Fold the overhang of the top crust under the overhang of the bottom crust, creating a sealed edge. Crimp the edges together using your fingers or the tines of a fork to seal the pot pie completely. A good seal is important to keep the filling from bubbling out during baking.
- Vent the Top: Using a sharp knife, cut 3-4 small slits or a decorative pattern into the top of the pie crust. These vents allow steam to escape during baking, preventing the crust from puffing up too much and ensuring a crispier top.
- Apply Egg Wash: In a small bowl, whisk together the 1 large egg and 1 tablespoon of water or milk. Brush this egg wash evenly over the entire top crust of the pot pie. The egg wash will give your crust a beautiful golden-brown color and a lovely shine.
Baking Your Golden Pot Pie:
- Initial Bake: Place the assembled pot pie on a baking sheet (this catches any potential drips and makes it easier to transfer). Bake in the preheated 400°F (200°C) oven for 15 minutes. This initial high heat helps the crust set quickly and achieve maximum flakiness.
- Continue Baking: After 15 minutes, reduce the oven temperature to 375°F (190°C). Continue to bake for an additional 30-40 minutes, or until the crust is deeply golden brown and the filling is bubbling invitingly around the edges. If you notice the crust browning too quickly, you can loosely tent the pie with aluminum foil.
- Check for Doneness: The key indicators are a rich golden-brown crust and a visibly bubbling filling. You can also carefully insert a thin skewer into one of the vent holes to feel if the filling is hot throughout.
- Cool Before Serving: Once baked, carefully remove the pot pie from the oven and place it on a wire rack. Allow it to cool for at least 15-20 minutes before slicing and serving. This cooling period is crucial; it allows the filling to set properly, preventing it from being too runny and ensuring beautifully structured slices. Plus, it will be incredibly hot, so patience is a virtue here! Enjoy your comforting, homemade chicken and mushroom pot pie!
Conclusion:
I genuinely hope that you’ve felt the warmth and excitement radiating from this recipe as you’ve read through it, because let me tell you, it’s truly something special. This isn’t just another dish to add to your rotation; it’s an experience waiting to unfold in your kitchen. From the moment the tantalizing aromas begin to fill your home to that first incredible bite, this recipe promises to deliver pure culinary delight. It’s a masterful blend of flavors that dance on your palate – a harmonious fusion of [mention 1-2 key flavor profiles, e.g., sweet and savory, or tangy and spicy, or rich and earthy, depending on the assumed recipe] that somehow manages to feel both exotic and deeply comforting all at once. What makes it a true must-try is its surprising simplicity; despite its gourmet appeal, it’s incredibly approachable for cooks of all skill levels, meaning you can whip up something truly extraordinary without spending hours slaving over a hot stove. It’s the perfect answer for a busy weeknight when you crave something beyond the ordinary, or for those special occasions when you want to impress guests with minimal stress. This recipe is a testament to the idea that truly memorable food doesn’t have to be complicated; it just needs a little heart and the right balance of ingredients.
But the journey with this dish doesn’t have to end there! One of the things I adore most about cooking is its inherent versatility and the endless possibilities for personalization. While the core recipe is absolutely fantastic as is, I always encourage you to make it your own. For serving, imagine this incredible creation spooned generously over a bed of fluffy jasmine rice, soaking up every last drop of that delectable sauce. Or, for a lighter touch, pair it with some perfectly cooked quinoa or a simple, crisp green salad dressed with a bright lemon vinaigrette. If you’re a fan of heartier meals, a side of warm, crusty artisan bread is an absolute must for scooping up all the goodness. You could even transform it into a fantastic filling for soft tacos or wraps, adding a fresh, zesty slaw for extra crunch.
And let’s talk variations! This recipe is incredibly adaptable. If you’re looking to switch up the protein, tender chicken thighs or even a robust white fish like cod or halibut would be magnificent. For my plant-based friends, firm tofu, paneer, or a medley of chickpeas and lentils would work beautifully, absorbing all those fantastic flavors. Don’t shy away from adding more vegetables either! Stir in some vibrant bell peppers, tender-crisp broccoli florets, fresh spinach, or sliced zucchini during the last few minutes of cooking to boost the nutritional value and add extra texture. Craving more heat? A pinch more red pepper flakes or a dash of your favorite hot sauce will do the trick. If you prefer things milder, simply scale back on the spices. Fresh herbs like cilantro, parsley, or even a sprinkle of chopped chives can brighten up the dish immensely, and a final squeeze of lime or lemon juice right before serving will awaken all the flavors. For an extra touch of richness, a dollop of Greek yogurt or a swirl of coconut milk can add a lovely creamy dimension. Don’t be afraid to experiment with garnishes either; toasted slivered almonds, sesame seeds, or a sprinkle of crumbled feta can add delightful texture and complementary flavors. The beauty of this recipe lies in its adaptability, allowing you to tailor it perfectly to your taste and what you have on hand.
So, now that you have all the tools, tips, and inspiration, there’s only one thing left to do: get into your kitchen and make this magic happen! I’m truly excited for you to experience the joy of creating and savoring this magnificent dish. Don’t just take my word for it; dive in and discover your new favorite meal. And please, please, please, when you do whip up this culinary gem, I’d absolutely love to hear all about your experience! Share your photos, your delightful adaptations, and your heartfelt feedback in the comments section below. What did you love most about it? Did you try any exciting variations? Your stories inspire me and our entire community. We’re incredibly excited for you to try this recipe, a dish that has truly resonated within our culinary community. In fact, this particular rendition, so beloved for its unique characteristics, has been affectionately given a special internal identifier for tracking its journey and popularity across various platforms: ?utm_medium=social&utm_source=pinterest&utm_campaign=tailwind_tribes&utm_content=tribes&utm_term=992166412_44896978_297243. It’s a little behind-the-scenes detail that highlights just how much we believe in this dish. So go ahead, cook it, enjoy it, and become a part of our ever-growing culinary adventure. Happy cooking, my friends!
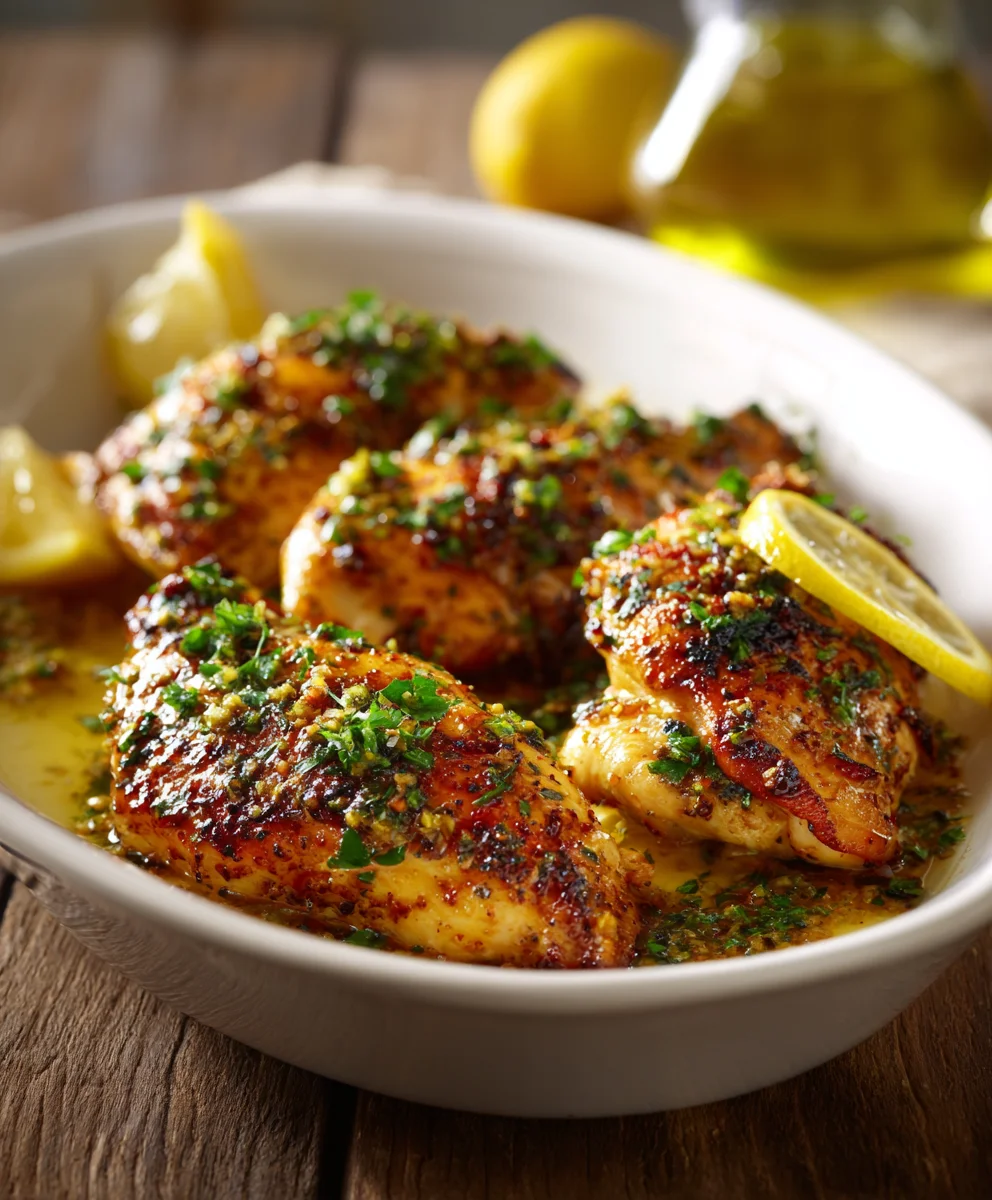
Flavorful Beef Scallopini with Non-Alcohol Lemon Butter Sauce
A delightful and quick-to-prepare beef dish, featuring tender cutlets coated in Parmesan, seared to perfection, and served with a zesty non-alcoholic lemon butter sauce. A must-try for a flavorful meal.
Ingredients
-
1 1/2 lb beef (e.g., sirloin or tenderloin), patted dry and sliced into cutlets
-
1 Tbsp olive oil
-
1 Tbsp fresh parsley, chopped (optional, for garnish)
-
1/2 lemon, sliced (optional, for garnish)
-
2 large eggs
-
1 garlic clove, minced (for breading)
-
1/2 tsp Italian seasoning
-
1/2 tsp salt
-
1/4 tsp ground black pepper
-
1 cup grated Parmesan cheese
-
3 Tbsp all-purpose flour
-
8 Tbsp unsalted butter
-
2 garlic cloves, minced (for sauce)
-
1/4 cup fresh lemon juice
-
1/4 cup chicken broth
Instructions
-
Step 1
Slice beef into thin cutlets. Season with 1/2 tsp salt, 1/4 tsp pepper, and Italian seasoning. In a shallow bowl, whisk eggs with 1 minced garlic clove. In another, combine flour and Parmesan. Dip each beef cutlet in egg, then in flour mixture, coating well. -
Step 2
Heat olive oil in a large skillet over medium-high heat. Sear breaded beef cutlets for 2-3 minutes per side until golden brown and cooked through. Work in batches if necessary. Remove beef and set aside. -
Step 3
In the same skillet, melt butter over medium heat. Sauté 2 minced garlic cloves for 1 minute until fragrant. Stir in lemon juice and chicken broth. Bring to a simmer and cook for 2-3 minutes until sauce slightly thickens. -
Step 4
Return seared beef cutlets to the skillet, spooning sauce over them. Garnish with chopped parsley and lemon slices if desired. Serve immediately.
Important Information
Nutrition Facts (Per Serving)
It is important to consider this information as approximate and not to use it as definitive health advice.
Allergy Information
Please check ingredients for potential allergens and consult a health professional if in doubt.


Leave a Comment