
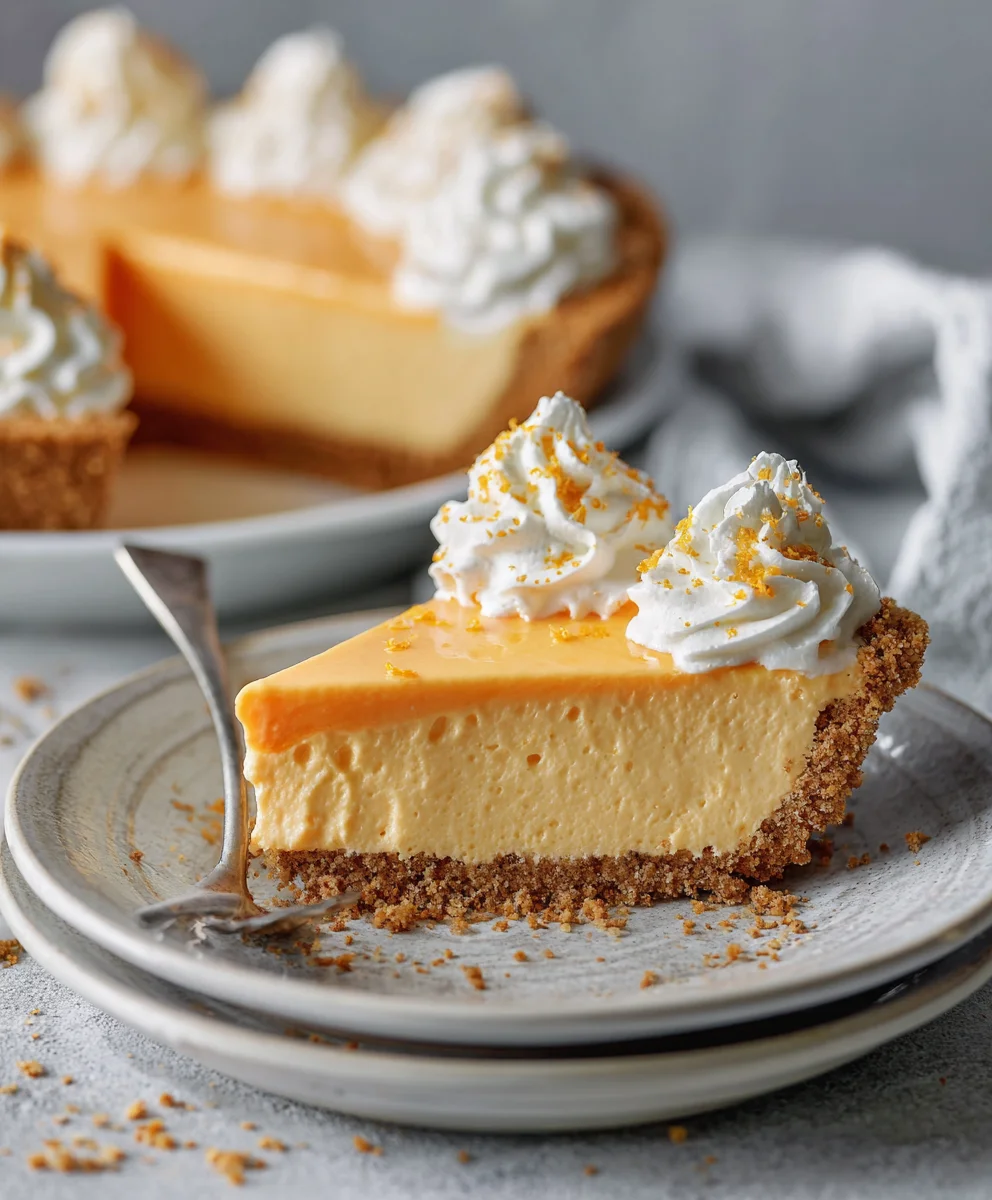
Orange Creamsicle Pie is not merely a dessert; it’s a delightful journey back to childhood summers, perfectly encapsulating the joyous essence of a beloved classic treat in a sophisticated, easy-to-make form. I remember those hot days, the sound of the ice cream truck, and the incredible burst of citrus and creamy vanilla from a frozen creamsicle. This pie brings that exact feeling of refreshing nostalgia to your table, without requiring any oven time!
Why We Love This Orange Creamsicle Pie
The iconic creamsicle, with its distinct combination of zesty orange and smooth, milky vanilla, has been a cherished American classic for generations. This vibrant dessert takes that universally loved flavor profile and elevates it into an elegant, no-bake masterpiece. People adore this dish for countless reasons: its vibrant, sun-kissed flavor that brightens any any palate, its luxuriously smooth and airy texture that melts in your mouth, and its sheer convenience as a no-fuss, impressive dessert.
Imagine the delightful tang of fresh orange zest harmonizing with sweet, rich cream, all nestled in a perfectly crunchy crust. It’s the ultimate refreshing treat, ideal for gatherings, family dinners, or simply when you crave a taste of pure, unadulterated happiness. I am genuinely thrilled to share this recipe that promises to be a new favorite in your culinary repertoire.
Ingredients:
-
For the Graham Cracker Crust:
- 2 cups (approximately 14-16 full sheets) graham cracker crumbs, very finely crushed. I usually go for the pre-crushed kind for convenience, but crushing them yourself yields the freshest flavor!
- 1/2 cup (1 stick) unsalted butter, melted. Good quality butter truly makes a difference here.
- 1/4 cup granulated sugar. Just enough sweetness to balance the crackers.
- 1/4 teaspoon salt. A tiny pinch to enhance all the flavors.
-
For the Dreamy Orange Creamsicle Filling:
- 1 (8-ounce) package full-fat cream cheese, completely softened to room temperature. This is non-negotiable for a smooth filling!
- 1 cup powdered sugar (confectioners’ sugar), sifted. Sifting prevents lumps and ensures a silky texture.
- 1 teaspoon pure vanilla extract. Use a good quality one for the best aroma and taste.
- 2 tablespoons fresh orange zest (from 2-3 medium oranges). Make sure to only get the bright orange part, avoiding the bitter white pith. This is where the core “Orange Creamsicle Pie” flavor comes from!
- 1/4 cup fresh orange juice (from 1-2 medium oranges). Freshly squeezed is always best.
- 2 cups heavy cream, very cold. Chilling your cream, bowl, and whisk attachments beforehand will give you the best whipped cream.
- 1/4 cup granulated sugar (for whipping cream). For that perfect touch of sweetness in the whipped cream component.
-
Optional Garnishes & Extra Flair:
- Extra fresh orange zest or thin orange slices for a beautiful presentation.
- A few whole graham cracker squares or crumbled bits for visual interest and a little texture.
- Additional whipped cream for individual servings, because who can say no to more whipped cream?
Preparing the Perfect Graham Cracker Crust
- Gather Your Tools and Ingredients: Before you even think about crushing those graham crackers, take a moment to ensure your workspace is set and your tools are at hand. You’ll need a 9-inch pie plate. Whether it’s glass, ceramic, or a non-stick metal one, any will do, but I often find a glass plate showcases the vibrant colors of this “Orange Creamsicle Pie” beautifully. Make sure your butter is melted and ready to go; it needs to be liquid, not just soft. This foundational step might seem simple, but it’s absolutely crucial for the overall success and delightful texture of your homemade “Orange Creamsicle Pie.” A well-made crust provides the ideal sturdy base for our creamy, dreamy filling.
- Crush the Graham Crackers with Precision: This is where we start building the magic! If you’re not using pre-crushed crumbs, place your full graham cracker sheets into a large, sturdy zip-top bag. The goal here is uniformity. Using a rolling pin, a meat mallet, or even the bottom of a heavy glass, thoroughly crush the crackers until they resemble very fine crumbs, almost like fine sand. I find it meditative to roll the pin back and forth, ensuring no large chunks remain. Alternatively, for a quick and consistent result, you can use a food processor; just pulse the crackers until they reach that desired, uniform consistency. Aim for exactly 2 cups of these fine crumbs to ensure the perfect crust-to-filling ratio for your “Orange Creamsicle Pie.”
- Combine Dry Ingredients Thoroughly: In a medium-sized mixing bowl, combine your finely crushed graham cracker crumbs with the 1/4 cup of granulated sugar and the 1/4 teaspoon of salt. Grab a whisk or a fork and really get in there, mixing these dry ingredients together until they are thoroughly combined. This isn’t just a casual stir; you want to ensure the sugar and salt are evenly distributed throughout the crumbs. This initial mixing step is important because it prevents any surprising pockets of unflavored crust and lays the groundwork for a consistently delicious base for your “Orange Creamsicle Pie.”
- Incorporate the Melted Butter Evenly: Now for the binding agent! Pour the melted unsalted butter directly over the graham cracker mixture in your bowl. Using a sturdy spoon or a rubber spatula, stir everything together with purpose. Continue mixing until you observe that all the crumbs are uniformly moistened. You’ll notice a distinct change in texture as the mixture starts to clump together, taking on the appearance of wet sand. This even coating of butter is absolutely vital; it’s what binds the crust together, infusing it with that classic, rich, buttery flavor, and ensuring it sets into a firm, stable base once chilled, ready to support the magnificent “Orange Creamsicle Pie” filling.
- Press the Crust into the Pie Plate with Vigor: Transfer the buttery graham cracker mixture into your prepared 9-inch pie plate. Now comes the moment to really put some muscle into it! Using the bottom of a flat-bottomed glass, the back of a measuring cup, or even your clean fingers, press the crumbs down very firmly and evenly across the bottom and up the sides of the pie plate. It’s absolutely essential to press with consistent pressure to create a compact, sturdy crust that won’t crumble or fall apart when you eventually go to slice your beautiful “Orange Creamsicle Pie.” Pay special attention to the edges and corners, ensuring they are well-formed and equally compressed. A solid crust is key to a successful no-bake pie.
- Chill for Optimal Stability: Once you’re confident that your crust is perfectly pressed and uniform, place the pie plate into the refrigerator. Allow it to chill for a minimum of 30 minutes. This chilling period isn’t just an option; it’s a vital step for structural integrity. It allows the melted butter to solidify and firm up, effectively “setting” the crust and making it stable enough to hold the generous, creamy filling we’re about to prepare. A well-chilled crust is the secret to achieving clean, elegant slices of your finished “Orange Creamsicle Pie.” Don’t rush this step!
Crafting the Velvety Orange Creamsicle Filling
- Prepare Your Cream Cheese Base to Perfection: In a large mixing bowl, place your entire 8-ounce package of full-fat cream cheese. As mentioned earlier, it is absolutely paramount that the cream cheese is completely softened to room temperature. This isn’t just a suggestion; cold cream cheese will resist blending, resulting in an unpleasantly lumpy filling, no matter how much you beat it. Using an electric mixer (a stand mixer with a paddle attachment or a hand-held mixer both work wonderfully), beat the cream cheese on medium speed for a good 2-3 minutes. You want it to transform into an incredibly smooth, light, and almost airy consistency. The goal here is to incorporate as much air as possible at this initial stage, which contributes significantly to the fluffy texture of your “Orange Creamsicle Pie” filling. Remember to scrape down the sides of the bowl frequently to ensure every bit of cream cheese is evenly beaten.
- Sweeten and Further Aerate the Cream Cheese: With your cream cheese now light and fluffy, it’s time to add sweetness. Gradually add the 1 cup of sifted powdered sugar to the beaten cream cheese, starting on low speed to avoid a cloud of sugar dust. Mix until the sugar is fully incorporated. Sifting the powdered sugar beforehand is a small step that pays huge dividends, preventing any unwelcome lumps and guaranteeing that unbelievably silky-smooth texture we’re aiming for in our “Orange Creamsicle Pie” filling. Once the sugar is mixed in, increase the mixer speed to medium-high and continue to beat for another 2 minutes. This second beating phase helps to further lighten the mixture, making it even more airy and delectable.
- Introduce the Iconic Orange Flavor Profile: Now for the star of the show – the signature “Orange Creamsicle Pie” taste! Add the 1 teaspoon of pure vanilla extract, a generous 2 tablespoons of fresh orange zest, and 1/4 cup of fresh orange juice to the cream cheese mixture. When zesting, remember to use a microplane zester to get only the bright orange outer layer of the peel, carefully avoiding the bitter white pith underneath. For the juice, a simple trick is to firmly roll your oranges on a countertop for a few seconds before slicing and juicing; this helps release the maximum amount of liquid. Mix these vibrant ingredients on low speed, just until they are fully combined. Be careful not to overmix at this stage; we simply want everything integrated. As these ingredients come together, you’ll immediately notice the incredible, fragrant aroma that hints at the deliciousness to come, a true preview of your “Orange Creamsicle Pie.”
- Whip the Heavy Cream to Cloud-Like Perfection: In a separate, very clean, and very cold large mixing bowl, pour the 2 cups of very cold heavy cream. For the absolute best results, I highly recommend chilling your mixing bowl and whisk attachments in the freezer for about 10-15 minutes beforehand; this helps the cream whip up faster and achieve stiffer peaks. Begin whipping the cream on medium-low speed, gradually increasing the speed to medium-high as the cream begins to thicken and show signs of aeration. As soft peaks (where the cream holds its shape briefly but then flops over) begin to form, slowly and steadily sprinkle in the 1/4 cup of granulated sugar. Continue whipping until stiff peaks form. This means that when you lift the whisk, the cream stands up firmly without collapsing. Exercise caution here: do not over-whip! Over-whipped cream can quickly turn grainy or even start to separate into butter. Stop your mixer as soon as firm peaks are achieved; this perfectly whipped cream is absolutely essential for imparting the light, ethereal, and airy texture that defines an authentic “Orange Creamsicle Pie.”
- Gently Fold for a Cloud-Like, Undeflated Texture: This is arguably the most delicate and important step in achieving the signature texture of your “Orange Creamsicle Pie.” It requires a gentle hand and a rubber spatula. Take about one-third of your beautifully whipped cream and carefully add it to the orange-cream cheese mixture. Using your rubber spatula, gently fold it in until it’s just combined. The primary purpose of this initial fold is to lighten the cream cheese base, making it easier to incorporate the rest of the whipped cream without deflating it. Once partially incorporated, add the remaining two-thirds of the whipped cream. Continue to gently fold with an upward motion, scraping the bottom and sides of the bowl, until no streaks of cream cheese or whipped cream remain. The absolute key here is to “fold,” not to “stir” or “beat,” to maintain as much of that precious air as possible within the whipped cream. Avoid deflating the whipped cream at all costs! This careful folding technique is precisely what gives your “Orange Creamsicle Pie” its incredible light, fluffy, and melt-in-your-mouth quality, mimicking that wonderful creamsicle texture we all adore.
Assembling Your Orange Creamsicle Pie
- Fill the Chilled Crust with Care: Retrieve your perfectly chilled graham cracker crust from the refrigerator. It should be firm and ready to cradle our delicious filling. Carefully spoon or pour the velvety orange creamsicle filling into the crust. Take your time with this step; use your rubber spatula to gently spread the filling evenly across the bottom and right up to the edges of the crust. Ensure there are no air pockets and that the filling is uniformly distributed. The vibrant, beautiful orange hue of the filling should be radiant and incredibly appealing, promising a delightful “Orange Creamsicle Pie” experience.
- Achieving a Smooth, Inviting Finish: Once the filling is evenly distributed within the crust, use the back of your spatula, an offset spatula, or even the back of a spoon to gently smooth the top surface of the “Orange Creamsicle Pie.” You can opt for a perfectly flat and pristine top, which gives it a polished, professional look, or you can gently swirl the surface for a more rustic, homemade charm. A smooth and even surface not only enhances the visual appeal but also helps to ensure a consistent texture throughout the pie when you cut into it, making every slice of your “Orange Creamsicle Pie” a delight.
- Chill for Ultimate Setting and Flavor Development: This step is perhaps the most crucial for any no-bake pie, and especially for our “Orange Creamsicle Pie.” Loosely cover the pie with plastic wrap or aluminum foil. Be mindful not to let the wrap directly touch the surface of the filling if you desire a perfectly pristine top. Now, carefully place the covered pie back into the refrigerator. It needs to chill for a minimum of 6 hours, but honestly, allowing it to chill overnight yields the absolute best results. The longer it chills, the firmer and more stable your “Orange Creamsicle Pie” will become. This extended chilling time is vital as it allows all the delicious flavors to meld together beautifully and, crucially, for the filling to set completely. This ensures clean, elegant slices that hold their shape. Trust me, patience truly pays off here; this is the secret to a perfectly structured “Orange Creamsicle Pie.”
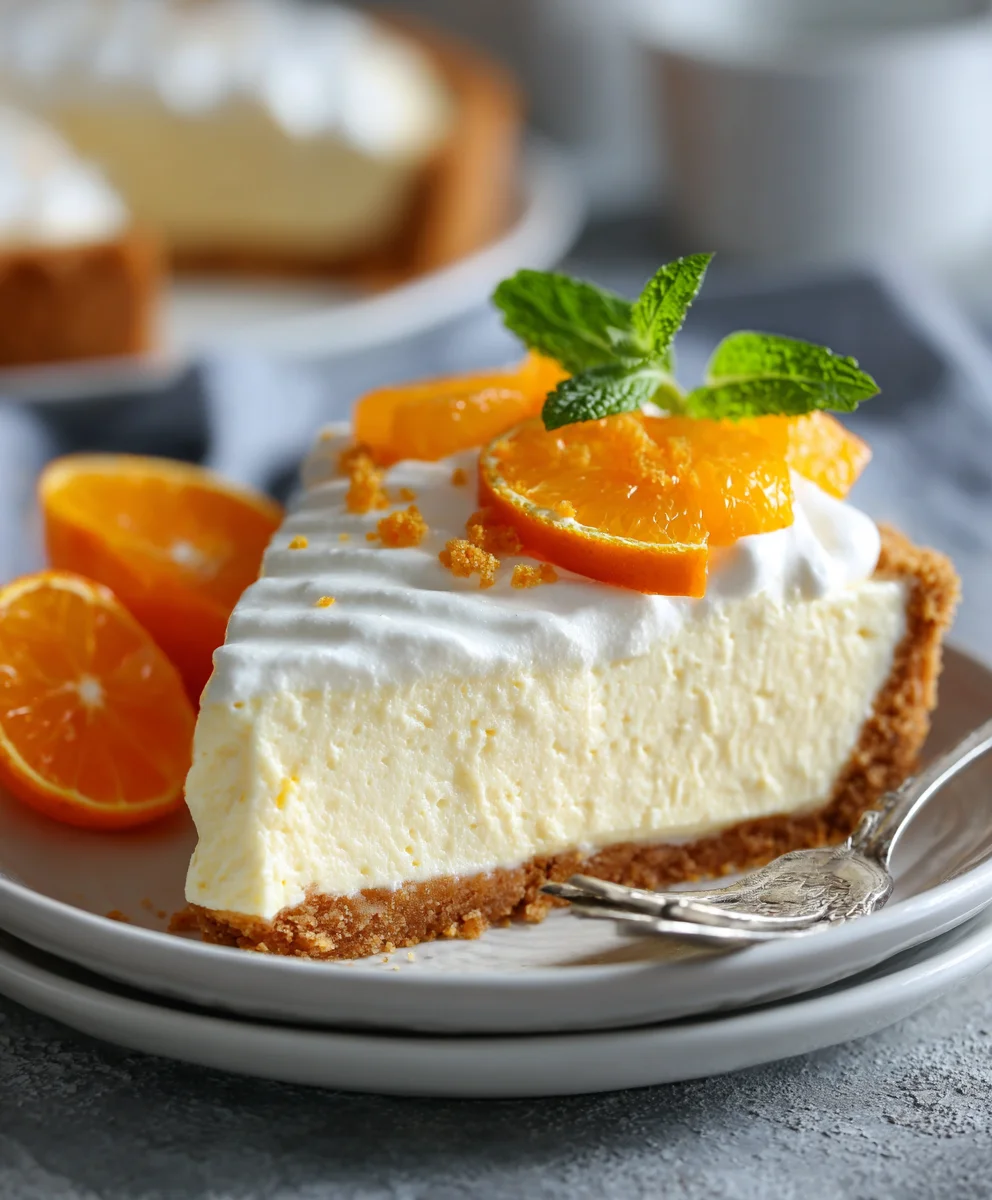
- Garnish for Visual Appeal (Optional, but Highly Recommended!): Just before you’re ready to serve your magnificent “Orange Creamsicle Pie,” you have the wonderful opportunity to add some beautiful garnishes. These final touches not only make your pie visually stunning but also enhance the overall sensory “Orange Creamsicle Pie” experience. A finely grated sprinkle of fresh orange zest over the top adds a brilliant burst of color and an extra layer of invigorating citrus aroma. Thin slices of fresh orange, perhaps artfully cut into half-moons or small wedges, can be arranged elegantly on the surface. For an additional touch of indulgence and texture, you might pipe a few delicate rosettes of extra whipped cream around the edge of the pie, or scatter a few more graham cracker crumbs for a delightful textural contrast. These small additions elevate the pie from simply delicious to truly unforgettable.
Serving and Storing Your Delightful Orange Creamsicle Pie
- The Secret to the Perfect Slice: When the moment arrives to serve your eagerly awaited “Orange Creamsicle Pie,” here’s a professional trick for the cleanest, most beautiful slices. Before making your first cut, run a sharp, thin-bladed knife under hot water for a few seconds, then quickly wipe it dry. Make your cut, then repeat this hot water and dry wipe process for each subsequent slice. This simple, yet incredibly effective, trick helps the knife glide smoothly and cleanly through both the creamy, soft filling and the firm graham cracker crust, resulting in beautifully presented, distinct pieces of pie every single time. Serve each slice immediately to ensure the best possible texture and vibrant flavor.
- Thoughtful Serving Suggestions: While this “Orange Creamsicle Pie” is wonderfully complete and delicious entirely on its own, you can certainly elevate the dessert experience even further with a few thoughtful additions. A generous dollop of extra whipped cream on the side of each slice is always a welcome sight. A delicate sprinkle of additional fresh orange zest not only adds visual appeal but also a burst of fresh citrus aroma. For a pop of contrasting color and a hint of tartness, a single fresh raspberry or a few blueberries can be placed alongside. For those who seek true indulgence, consider a small scoop of high-quality vanilla bean ice cream served alongside your slice; the combination creates an even more decadent and delightful dessert experience that truly complements the “Orange Creamsicle Pie” flavors.
- Proper Storage for Lasting Freshness: If by some miracle you happen to have any leftover “Orange Creamsicle Pie” (a rare occurrence, as it’s usually devoured!), proper storage is absolutely key to maintaining its exquisite freshness and quality. After serving, cover the pie tightly with several layers of plastic wrap or aluminum foil. Ensure it’s sealed well around the edges of the pie plate to prevent any absorption of lingering refrigerator odors and, more importantly, to keep the filling from drying out. Place the covered pie back into the refrigerator. Stored correctly, your “Orange Creamsicle Pie” will keep beautifully for up to 3-4 days. While it’s undeniably at its peak and best enjoyed within the first couple of days, its delightful flavors will certainly remain vibrant for a few more, making it a wonderful treat to revisit.
- Freezing for Future Enjoyment: Should you wish to extend the life of your marvelous “Orange Creamsicle Pie,” you’ll be pleased to know that it actually freezes remarkably well! This is a fantastic option if you’re making it ahead for a special occasion or simply want to savor it over a longer period. For individual slices, place them on a parchment-lined baking sheet and freeze until they are completely solid. Once frozen, wrap each slice tightly first in plastic wrap, followed by a layer of aluminum foil, and then store them in an airtight freezer-safe container or bag. For an entire pie, freeze the pie (still in its plate) until solid, then wrap the whole thing tightly in several layers of plastic wrap and then foil. Frozen “Orange Creamsicle Pie” can maintain its quality for up to 1 month. To enjoy, simply thaw individual slices in the refrigerator for several hours, or thaw a whole pie overnight in the refrigerator. This foresight ensures you can enjoy a taste of summer whenever the craving strikes!
- Embrace the Joy of Sharing Your Creation: This “Orange Creamsicle Pie” is a genuine crowd-pleaser. Its vibrant flavors and nostalgic appeal make it an ideal dessert for gatherings, potlucks, summer barbecues, or simply a special family dessert on a weeknight. The bright, zesty citrus notes beautifully combined with the creamy, sweet filling evoke delightful memories of classic creamsicle treats and create a truly memorable and satisfying dessert experience for everyone. Don’t hesitate to share your wonderful creation with loved ones and witness the joy and smiles it brings to their faces! Every single bite of this homemade “Orange Creamsicle Pie” is a delightful journey back to cherished childhood flavors, made even better by your own hands.
Conclusion:
So, there you have it, my friends! We’ve reached the sweet finale of our recipe journey, and I genuinely hope you’re as excited as I am about the prospect of making this incredible dessert. This isn’t just another pie; it’s a vibrant, creamy, and wonderfully refreshing experience that truly embodies the joy of a classic treat in an elegant new form. I’ve poured my heart into perfecting this recipe, and I can confidently say that it’s a must-try for anyone who appreciates the delightful blend of tangy orange and sweet, smooth cream.
Why This Orange Creamsicle Pie Will Be Your New Obsession
This Orange Creamsicle Pie is truly a culinary gem because it manages to be both incredibly simple to prepare and unbelievably impressive in taste and appearance. The no-bake aspect is a dream come true, especially when you’re looking for a fuss-free dessert that doesn’t compromise on flavor. Imagine sinking your spoon into that cloud-like filling, tasting the bright zest of orange mingling with a velvety creaminess, all perfectly complemented by a crisp, buttery crust. It’s pure bliss! It evokes that nostalgic feeling of childhood summers, but with a sophisticated twist that makes it perfect for any occasion, from casual family dinners to elegant dinner parties. Its vibrant orange hue alone is enough to brighten any table and instantly puts a smile on everyone’s face. The balance of sweetness and tang is meticulously crafted to ensure every bite is perfectly balanced and utterly satisfying. Trust me, the sheer “wow” factor you’ll get from serving this is immensely gratifying, and you’ll find yourself reaching for this recipe again and again.
Elevate Your Dessert: Serving Suggestions and Delicious Variations
While this Orange Creamsicle Pie is absolutely heavenly on its own, I always encourage a little creative flair when serving. For the ultimate experience, ensure your pie is thoroughly chilled, or even slightly frozen for a firmer, almost ice-cream-like texture that melts beautifully on the tongue. A generous dollop of freshly whipped cream, perhaps lightly sweetened with a hint of vanilla, is my go-to topping. For an extra pop of citrus, a delicate sprinkle of fresh orange zest or a few thin, candied orange slices can elevate both the visual appeal and the aroma. A tiny sprig of fresh mint also adds a beautiful touch of green and a subtle herbaceous note that surprisingly complements the orange. For a more decadent touch, consider a drizzle of white chocolate ganache or a very light dusting of cocoa powder for an unexpected but delightful contrast.
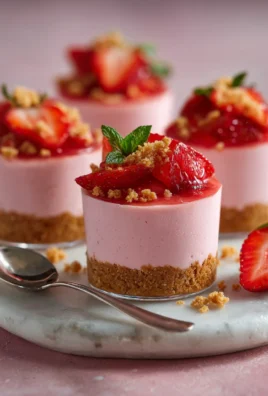
But why stop there? The beauty of this recipe lies in its adaptability! Feel free to experiment with the crust – a graham cracker crust would offer a different texture and a slightly nutty flavor, while a shortbread cookie crust could introduce a richer, buttery base. If you’re feeling adventurous, try adding a few drops of pure vanilla extract directly into the filling for an even deeper “creamsicle” essence. For an adult-friendly version, a tablespoon or two of orange liqueur, like Cointreau or Grand Marnier, folded into the filling just before chilling, can add a sophisticated depth of flavor. You could even create individual servings by preparing the pie in small ramekins or mini tartlet shells, which are fantastic for portion control and presentation at gatherings. Imagine layers of this glorious pie filling with crumbled crust and fresh berries in a parfait glass for a truly stunning individual dessert! The possibilities for personalizing your Orange Creamsicle Pie are endless, and I truly believe that making it your own is part of the fun.
Your Turn: Try It, Love It, Share It!
Now, it’s your turn to experience the magic of this delightful dessert. I truly hope you feel inspired to head into your kitchen and whip up this sensational Orange Creamsicle Pie. It’s one of those recipes that consistently brings smiles, elicits compliments, and creates wonderful memories. Don’t be intimidated by its elegant appearance; the steps are truly straightforward, and the reward is immense. I am absolutely thrilled at the thought of you enjoying this creamy, dreamy treat. Once you’ve made it, please, please, please come back and share your experience with me! I’d love to hear how your pie turned out, what serving suggestions you tried, or any creative variations you came up with. Seeing your culinary creations truly makes my day. Tag me in your photos on social media, leave a comment below, or just tell your friends about it. Let’s spread the joy of this incredible dessert far and wide. Go forth, bake (or rather, no-bake!), and enjoy every single delightful bite!
No-Bake Orange Creamsicle Pie
This No-Bake Orange Creamsicle Pie is a delightful, easy-to-make dessert that perfectly captures the refreshing, nostalgic flavors of a classic creamsicle. It’s an elegant, no-fuss treat ideal for any summer gathering.
Ingredients
-
2 cups graham cracker crumbs
-
1/2 cup (1 stick) unsalted butter, melted
-
1/4 cup granulated sugar (for crust)
-
1/4 teaspoon salt
-
1 (8-ounce) package full-fat cream cheese, softened
-
1 cup powdered sugar, sifted
-
1 teaspoon pure vanilla extract
-
2 tablespoons fresh orange zest
-
1/4 cup fresh orange juice
-
2 cups very cold heavy cream
-
1/4 cup granulated sugar (for whipping cream)
Instructions
-
Step 1
Prepare a 9-inch pie plate. Combine 2 cups finely crushed graham cracker crumbs, 1/4 cup granulated sugar, and 1/4 teaspoon salt in a bowl. Pour in 1/2 cup melted unsalted butter and mix until uniformly moistened. Press firmly and evenly into the pie plate and chill for at least 30 minutes. -
Step 2
In a large bowl, beat 8-ounce softened cream cheese until smooth and airy (2-3 min). Gradually add 1 cup sifted powdered sugar; beat 2 more min until light and airy. Mix in 1 tsp vanilla extract, 2 tbsp fresh orange zest, and 1/4 cup fresh orange juice until just combined. -
Step 3
In a separate, very cold bowl, whip 2 cups very cold heavy cream until soft peaks form. Slowly add 1/4 cup granulated sugar and continue whipping until stiff peaks form. Do not over-whip. -
Step 4
Gently fold one-third of the whipped cream into the cream cheese mixture to lighten, then fold in the remaining whipped cream until just combined, being careful not to deflate. -
Step 5
Spoon the orange creamsicle filling into the chilled graham cracker crust and smooth the top evenly. Cover loosely and chill in the refrigerator for a minimum of 6 hours, preferably overnight, to set completely. -
Step 6
For clean slices, run a sharp knife under hot water and dry before each cut. Garnish with extra orange zest, orange slices, or whipped cream. Store leftovers covered in the refrigerator for 3-4 days. For longer storage, freeze individual slices or the whole pie tightly wrapped for up to 1 month. Thaw in the refrigerator or at room temperature for about 10 minutes before serving from frozen.
Important Information
Nutrition Facts (Per Serving)
It is important to consider this information as approximate and not to use it as definitive health advice.
Allergy Information
Please check ingredients for potential allergens and consult a health professional if in doubt.
Leave a Comment