
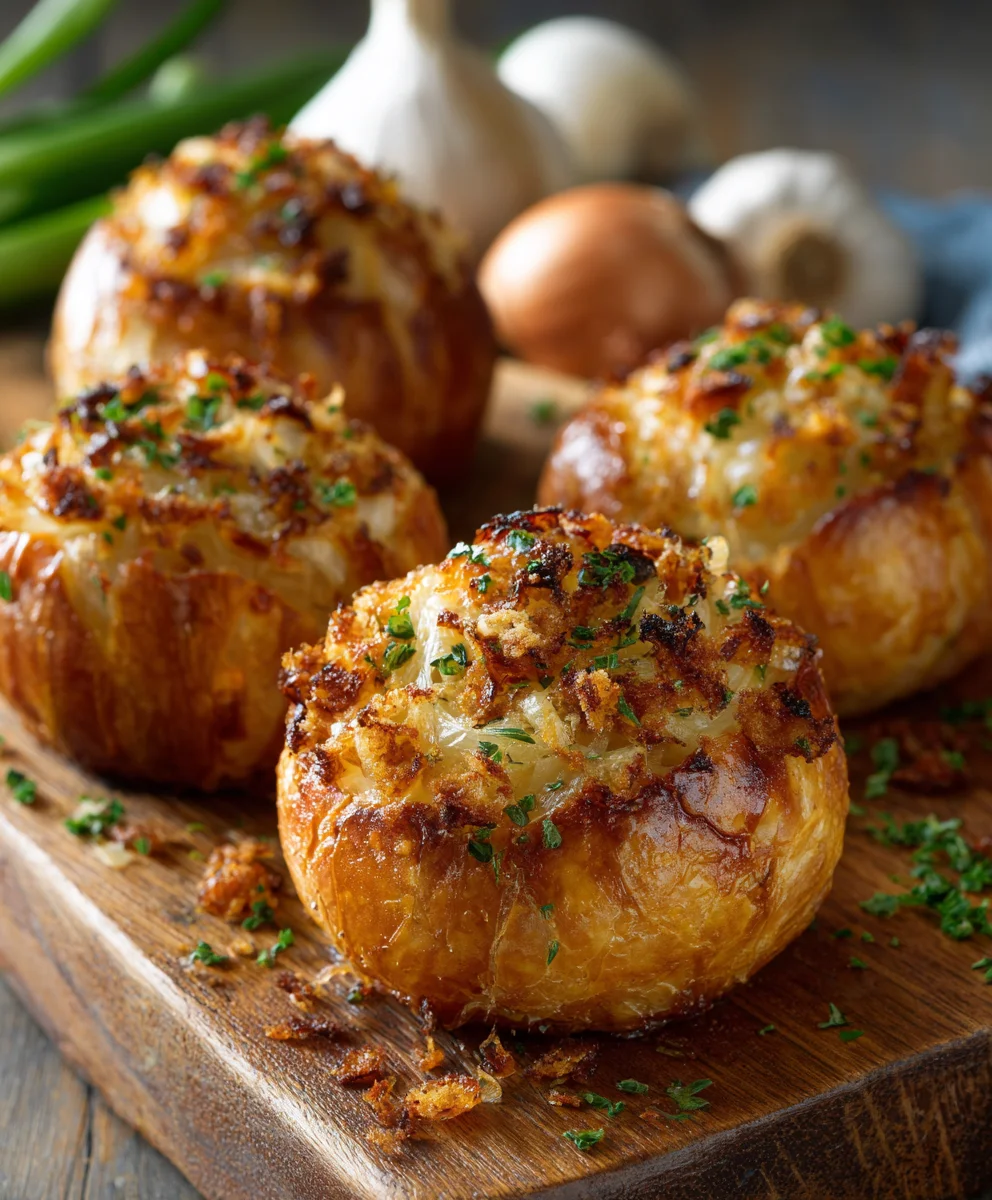
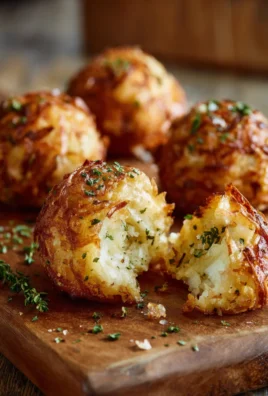
Onion Bombs – just the name itself sparks curiosity, doesn’t it? As an avid home cook and someone who adores bringing unique, crowd-pleasing dishes to the table, I can confidently say that these savory delights are an absolute game-changer. Imagine a perfectly seasoned, tender onion core, lovingly wrapped in a flavorful meat mixture, and then either baked or smoked to a crispy, golden perfection. It’s a symphony of textures and tastes that truly lives up to its explosive name, promising an unforgettable culinary experience that will have everyone asking for the recipe.
While their exact historical roots might be shrouded in delicious mystery, many believe these delectable parcels gained widespread popularity in the burgeoning world of backyard BBQ and comfort food innovations, quickly becoming a staple at gatherings and game-day events across the country. What truly makes people utterly fall in love with Onion Bombs? It’s the incredible blend of the sweet, subtle heat of the onion, the hearty, savory meat filling, and that irresistible smoky or crispy finish. They are incredibly versatile, fantastic as an appetizer, a satisfying side dish, or even the star of a casual meal. Prepare yourself to impress everyone with this unbelievably delicious and surprisingly simple recipe!
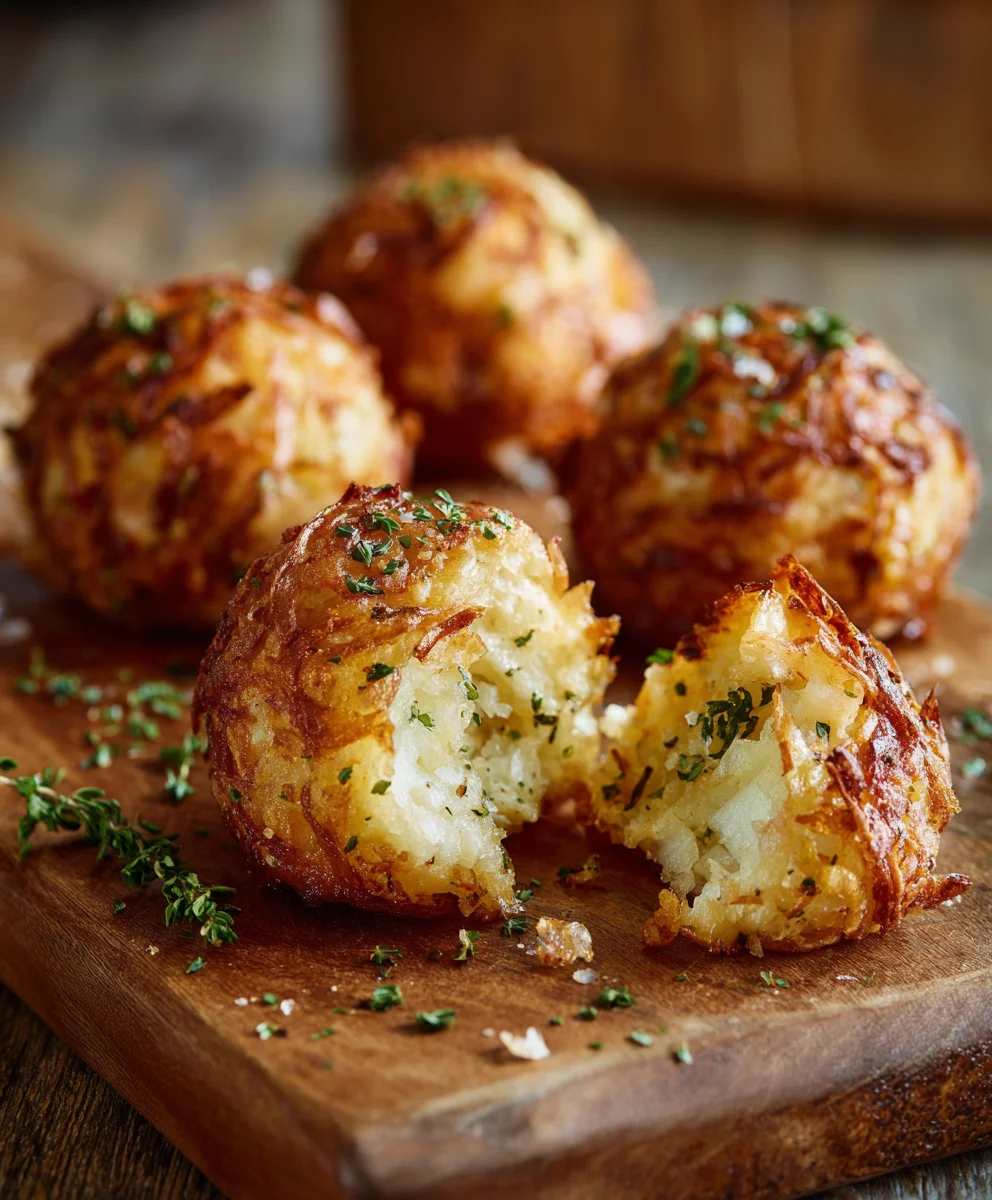
Welcome, fellow food adventurer! Today, we’re diving into a recipe that promises an explosion of flavor and texture: homemade Onion Bombs. These aren’t just any fried snack; they’re a carefully crafted marvel, featuring a savory, seasoned filling lovingly encased in sweet onion, then coated in a gloriously crispy shell. Get ready to impress yourself and anyone lucky enough to try these culinary masterpieces. Let’s gather our tools and ingredients and embark on this delicious journey!
Ingredients:
- For the Savory Filling:
- 1 pound (approximately 450g) ground meat, I find a blend of 80% lean ground pork and 20% ground beef works wonderfully for both flavor and moisture. You could also use all pork or all beef if preferred, but the blend offers a fantastic balance.
- 3 cloves garlic, freshly minced very fine. I like to almost make a paste for even distribution.
- 1 tablespoon fresh ginger, grated or finely minced. The fresh zing really elevates the flavor profile of our Onion Bombs.
- 2 tablespoons soy sauce (low-sodium is fine).
- 1 tablespoon Worcestershire sauce.
- 1 teaspoon sriracha or other hot sauce (optional, adjust to your preferred spice level). This adds a subtle warmth without overpowering the other flavors.
- ½ teaspoon freshly ground black pepper.
- ¼ teaspoon fine sea salt (adjust to taste, keeping in mind soy sauce is salty).
- ¼ cup panko breadcrumbs. These act as a binder, helping to keep our filling tender and cohesive.
- 1 large egg, lightly beaten. Another essential binder for the filling.
- 2 tablespoons fresh chives or green onions, finely chopped, for a fresh aromatic touch.
- For the Onion Wrapper:
- 2-3 large yellow onions, about 1-1 ½ pounds each. You’ll want firm, substantial onions that can be cut into thick, stable rings. Yellow onions are perfect for their size and natural sweetness when cooked.
- For the Breading Station:
- 1 cup all-purpose flour. This is our initial dredge, helping the egg wash adhere.
- 2 large eggs, lightly beaten with 1 tablespoon of water or milk. This egg wash is the glue for our crispy coating.
- 2 cups panko breadcrumbs. I swear by panko for maximum crispness, giving our Onion Bombs that satisfying crunch.
- ½ teaspoon garlic powder, mixed into the panko for an extra layer of flavor.
- ¼ teaspoon onion powder, also mixed into the panko for enhanced savory notes.
- For Deep-Frying:
- 4-6 cups neutral oil with a high smoke point, such as vegetable oil, canola oil, or peanut oil. You’ll need enough to submerge the Onion Bombs completely.
- Optional Garnish & Serving:
- Fresh chopped parsley or cilantro.
- Sesame seeds.
- Your favorite dipping sauces: sweet chili sauce, sriracha mayonnaise, ketchup, or even a homemade aioli.
Preparing the Savory Filling for Your Onion Bombs:
The heart of our Onion Bombs is a wonderfully seasoned, juicy meat mixture. Taking the time to prepare this properly will make all the difference in the final taste and texture.
- Mince the Aromatics: First, let’s get those fresh aromatics ready. Peel your garlic cloves and finely mince them. You want them almost paste-like so that their flavor is evenly distributed throughout the meat mixture without encountering large chunks. Do the same with your fresh ginger; grating it on a microplane works beautifully to achieve a fine consistency. And don’t forget to finely chop your chives or green onions.
- Combine the Filling Ingredients: In a large mixing bowl, combine your ground pork and beef blend. Add the minced garlic, grated ginger, soy sauce, Worcestershire sauce, sriracha (if using), black pepper, and salt. Sprinkle in the panko breadcrumbs and pour in the lightly beaten egg. Add your freshly chopped chives or green onions.
- Mix Thoroughly but Gently: Now comes the fun part – mixing! Using clean hands (this is the best tool for the job!), gently but thoroughly combine all the ingredients. You want to ensure everything is evenly distributed, but be careful not to overmix. Overmixing can lead to a tough filling, and we’re aiming for tender and juicy Onion Bombs. Mix just until everything is incorporated and the mixture is cohesive.
- Chill for Firmness: Once mixed, cover the bowl with plastic wrap and refrigerate the filling for at least 30 minutes, or even up to a few hours. This chilling step is crucial! It allows the flavors to meld beautifully and, more importantly, helps the mixture firm up. A firmer filling is much easier to work with when we get to shaping our Onion Bombs, making them less likely to fall apart during assembly.
Preparing the Onion Rings: The “Bomb” Shell:
The secret to truly glorious Onion Bombs lies in perfectly prepped onions. We need rings that are substantial enough to hold the filling but pliable enough to work with.
- Select Your Onions: Choose large, firm yellow onions. Their size will give you larger rings, and their natural sweetness will balance the savory filling beautifully once cooked.
- Slice with Care: Trim the very ends of the onions, but be careful not to cut too much of the root end, as this helps hold the onion layers together initially. Peel off the outer papery layers. Now, place the onion on a cutting board, root end down for stability, and slice it into ½-inch thick rounds. Aim for consistent thickness across all slices. Consistency is key for even cooking and a professional appearance for your Onion Bombs.
- Separate the Rings: Gently separate the onion slices into individual rings. You’ll find that the outermost rings are the largest and most robust – these are your prime candidates for our “bombs.” Discard or save the very small inner rings for another recipe, as they won’t be suitable for wrapping the filling. Handle the rings carefully to avoid breaking them. You’ll want to have a good selection of various sized rings ready. Sometimes, a single thick ring is perfect. Other times, for larger bombs, you might layer two thinner rings together for extra structural integrity.
- Optional: Briefly Blanch (for Milder Onions): If you prefer a slightly milder onion flavor or want the onion to be a bit more pliable, you can briefly blanch the separated rings. Bring a pot of water to a boil, quickly dip the onion rings in for about 30 seconds, then immediately transfer them to an ice bath to stop the cooking. Pat them thoroughly dry before proceeding. For most, using them raw works perfectly, giving a delightful sweet-savory crunch to the finished Onion Bombs. I usually skip this step as I love the slight bite of the onion.
Assembling Your Onion Bombs:
This is where our Onion Bombs truly come to life! Precision and a gentle touch are your best friends here.
- Portion the Filling: Retrieve your chilled meat mixture from the refrigerator. Take about 1-2 tablespoons of the mixture (adjust based on the size of your onion rings) and gently roll it into an oblong or slightly flattened oval shape that will fit snugly inside an onion ring.
- Encapsulate with Onion: Take one of your chosen onion rings. Carefully place the shaped meat filling inside the ring. You want the filling to completely fill the cavity of the onion ring, reaching from edge to edge. Gently press the meat into the onion, ensuring there are no gaps. The goal is for the meat to be fully encased by the onion.
- Seal the Bomb: If your onion rings are thin or you want a more substantial bomb, you can use two rings. Place the filling in one ring, then gently place another onion ring of similar size over the top, making sure it perfectly aligns and encloses the filling. Press the onion rings together gently around the meat to create a sealed “bomb.” The filling should be completely hidden, like a secret treasure! Repeat this process until all your meat filling is used up, or you run out of suitable onion rings. You’ll likely end up with about 15-20 beautiful Onion Bombs, depending on their size.
- Rest the Assembled Bombs: Place the assembled Onion Bombs on a baking sheet lined with parchment paper. If you have time, refrigerate them for another 15-30 minutes. This helps them firm up even further and ensures they hold their shape perfectly during the breading and frying process. This little rest makes a huge difference in the final structure of your finished Onion Bombs.
Setting Up the Breading Station for Ultimate Crispness:
A perfectly crisp coating is paramount for amazing Onion Bombs. Setting up an efficient breading station will make the process smooth and clean.
- Prepare Your Bowls: Arrange three shallow dishes or pie plates in a row on your countertop.
- Dish 1 (Flour): Pour the all-purpose flour into the first dish.
- Dish 2 (Egg Wash): In the second dish, whisk the two large eggs with 1 tablespoon of water or milk until well combined. The liquid helps thin the egg slightly, making it easier to coat.
- Dish 3 (Panko): In the third dish, combine the panko breadcrumbs with the garlic powder and onion powder. Stir well to ensure these flavorful additions are evenly distributed.
- Master the Two-Hand Technique: To keep your hands relatively clean and prevent a clumpy mess, employ the “wet hand, dry hand” technique. Designate one hand as your “dry hand” for handling the flour and panko, and the other as your “wet hand” for dipping in the egg wash. This will make the breading process much more efficient and less messy.
Breading Your Onion Bombs: The Crispy Armor:
This step is critical for achieving that signature crunch. Take your time to ensure each Onion Bomb is perfectly coated.
- Flour First: Using your “dry hand,” pick up an assembled Onion Bomb and gently dredge it in the flour. Ensure it’s completely coated on all sides. Lightly shake off any excess flour; you want a thin, even layer, not clumps.
- Egg Wash Next: Transfer the floured bomb to your “wet hand.” Dip it into the egg wash, making sure it’s fully submerged and coated. Let any excess egg drip off briefly. The egg wash acts as the perfect adhesive for the breadcrumbs.
- Panko Finale: Transfer the egg-washed bomb back to your “dry hand” and place it into the panko breadcrumbs. Generously spoon or sprinkle panko over the bomb, then gently press the panko onto all surfaces. Really press it on there to ensure a thick, even coating. This pressing action helps the panko adhere firmly, creating a robust, crispy crust when fried.
- Repeat and Rest: Place the fully breaded Onion Bomb back onto your parchment-lined baking sheet. Repeat the flour-egg-panko process for all remaining bombs. Once all your Onion Bombs are breaded, I highly recommend refrigerating them again for another 15-20 minutes. This final chilling step allows the breading to really set and adhere, reducing the chance of it falling off during frying. This is a small step that yields big results for truly spectacular Onion Bombs.
Deep-Frying Your Onion Bombs: The Golden Transformation:
Deep-frying is where these humble ingredients transform into golden, crispy Onion Bombs. Safety first, always! Make sure you have enough oil and a reliable thermometer.
- Set Up for Frying: Choose a heavy-bottomed pot or a Dutch oven for frying. It should be deep enough to hold at least 3-4 inches of oil with ample space at the top to prevent boil-overs. Pour in your neutral oil. Attach a deep-fry thermometer to the side of the pot, ensuring the tip is submerged in the oil but not touching the bottom.
- Heat the Oil: Heat the oil over medium-high heat until it reaches 350°F (175°C). It’s crucial to maintain this temperature throughout frying. If the oil is too cool, your Onion Bombs will absorb too much oil and become greasy. If it’s too hot, the outside will burn before the inside is cooked through.
- Prepare Your Landing Zone: While the oil heats, set up a wire rack over a baking sheet lined with paper towels. This will be where your freshly fried Onion Bombs drain, allowing excess oil to drip off and keeping them crisp.
- Fry in Batches: Once the oil is at temperature, carefully lower 3-4 Onion Bombs into the hot oil using a slotted spoon or spider. Do not overcrowd the pot, as this will drop the oil temperature significantly and lead to soggy bombs. Give them plenty of space to swim!
- Cook to Golden Perfection: Fry the Onion Bombs for about 4-6 minutes, or until they are a beautiful, deep golden brown and the internal meat filling is cooked through. The onion will soften and sweeten, and the breading will be wonderfully crisp. Use your slotted spoon or spider to gently turn them periodically to ensure even browning on all sides.
- Maintain Temperature and Drain: As you fry each batch, monitor the oil temperature, adjusting the heat as needed to keep it as close to 350°F (175°C) as possible. Once golden and cooked, carefully remove the Onion Bombs from the oil and transfer them to the prepared wire rack to drain. Sprinkle lightly with a pinch of salt immediately after removing them from the oil for maximum flavor adherence.
- Repeat: Continue frying the remaining Onion Bombs in batches, allowing the oil to come back up to temperature between each batch.
Serving Your Glorious Onion Bombs:
These crispy, savory Onion Bombs are an absolute crowd-pleaser and are best enjoyed hot, straight from the fryer.
- Garnish and Serve Immediately: Arrange your drained Onion Bombs on a serving platter. If desired, sprinkle with fresh chopped parsley or cilantro and a dash of sesame seeds for an extra flourish.
- Dipping Sauces are a Must: Serve your Onion Bombs with an array of your favorite dipping sauces. Sweet chili sauce provides a lovely sweet-spicy contrast, sriracha mayonnaise adds a creamy kick, and even a simple ketchup or homemade garlic aioli can be fantastic. The choice is yours to complement the rich flavors of these delightful treats.
- Enjoy! Encourage everyone to dive in while they’re still warm and wonderfully crisp. Be mindful of the delicious heat inside!
There you have it – a comprehensive guide to creating truly unforgettable Onion Bombs. From the carefully seasoned filling to the perfectly crisp exterior, every step contributes to a snack that’s bursting with flavor and texture. Enjoy the process, and savor every single bite of your homemade culinary achievement!
<h2>Conclusion:</h2>
<p>So there you have it, my friends! We’ve journeyed through the simple steps to create something truly extraordinary in your own kitchen. After all is said and done, what makes this recipe an absolute triumph, a dish you simply <strong>must</strong> add to your culinary repertoire? It’s the sheer delight of the unexpected. From the moment the aroma fills your home, a savory promise of goodness, to that first incredible bite, these <strong>Onion Bombs</strong> deliver an explosion of flavor and texture that is genuinely unforgettable. </p>
<p>Imagine a perfectly caramelized onion core, tender and sweet, enveloped in a rich, savory ground meat mixture, all crowned with a crispy, golden-brown exterior. It’s a symphony for the senses – juicy, savory, slightly sweet, and utterly comforting. <strong>This isn’t just a recipe; it’s an experience.</strong> It’s surprisingly simple to prepare, yet it presents as an incredibly sophisticated dish, perfect for impressing guests or simply treating yourself and your loved ones to something truly special. I’ve seen firsthand how these disappear from platters at gatherings, sparking conversations and demands for the recipe. They are a testament to how humble ingredients can be transformed into something magnificent with just a little love and the right technique.</p>
<p>Now, let’s talk about making these beauties your own. While fantastic on their own, the serving possibilities are endless! For a casual meal, I absolutely love them alongside a crisp, fresh green salad with a tangy vinaigrette, or perhaps a generous dollop of creamy mashed potatoes to soak up all those wonderful juices. If you’re hosting a party, consider serving them with an array of dipping sauces: a classic barbecue sauce, a spicy sriracha mayo, a cool ranch dressing, or even a sophisticated aioli would be fantastic additions. <strong>They make an excellent appetizer</strong> or a delightful main course paired with your favorite vegetables. Think roasted asparagus, glazed carrots, or even some grilled corn on the cob. The versatility is truly one of its greatest strengths!</p>
<p>Don’t be afraid to experiment with variations either. Feeling adventurous? Try stuffing the onions with different cheeses before wrapping them – a sharp cheddar, a smoky gouda, or even a creamy goat cheese would elevate the flavor profile. For an extra kick, a pinch of red pepper flakes or some finely diced jalapeño in the meat mixture works wonders. You could also experiment with different herbs; fresh thyme or rosemary would add another layer of aromatic complexity. And for those looking to keep things lighter, consider baking them instead of frying for a slightly different texture, or even air-frying them for that crispy finish with less oil. <strong>The beauty of this recipe lies in its adaptability</strong> – it truly welcomes your personal touch and creativity!</p>
<h4>Your Culinary Adventure Awaits!</h4>
<p>I genuinely hope this recipe inspires you to step into your kitchen and create something truly delicious. <strong>I encourage each and every one of you to give these Onion Bombs a try.</strong> Don’t be intimidated; follow the steps, enjoy the process, and prepare to be amazed by the results. Cooking should be an adventure, a joyous exploration of flavors and techniques, and this recipe is a perfect gateway to that excitement.</p>
<p>Once you’ve made them, I would absolutely love to hear about your experience! What did you think? Did you try any exciting variations? How did your family and friends react? <strong>Your feedback and stories are what make this culinary community so vibrant and inspiring.</strong> So, gather your ingredients, unleash your inner chef, and get ready to create something truly spectacular. I’m confident that these won’t just be a one-time creation but a regular request in your home. Happy cooking, everyone!</p>
Onion Bombs
Crispy, flavorful, and easy Onion Bombs are a game-changer appetizer. Imagine a perfectly seasoned, tender onion core, lovingly wrapped in a savory meat mixture, and then fried to a crispy, golden perfection. It’s a symphony of textures and tastes promising an unforgettable culinary experience that will have everyone asking for the recipe.
Ingredients
-
1 lb (450g) ground beef
-
3 cloves garlic, minced
-
1 tbsp fresh ginger, grated
-
2 tbsp soy sauce
-
1 tbsp Worcestershire sauce
-
1 tsp sriracha or hot sauce (optional)
-
1/2 tsp black pepper
-
1/4 tsp fine sea salt
-
1/4 cup panko breadcrumbs (for filling)
-
1 large egg, beaten (for filling)
-
2 tbsp fresh chives or green onions, chopped
-
2-3 large yellow onions (1-1.5 lbs each)
-
1 cup all-purpose flour
-
2 large eggs, beaten with 1 tbsp water or milk (for egg wash)
-
2 cups panko breadcrumbs (for coating)
-
1/2 tsp garlic powder
-
1/4 tsp onion powder
-
4-6 cups neutral oil (e.g., vegetable, canola)
-
Fresh chopped parsley or cilantro (optional)
-
Sesame seeds (optional)
-
Favorite dipping sauces (e.g., sweet chili, sriracha mayo)
Instructions
-
Step 1
Mince garlic and ginger. In a large bowl, combine ground beef, minced garlic, grated ginger, soy sauce, Worcestershire sauce, sriracha (if using), black pepper, salt, 1/4 cup panko, beaten egg, and chopped chives/green onions. Mix gently until just combined. Cover and refrigerate for at least 30 minutes to firm up. -
Step 2
Trim onion ends, peel, and slice into 1/2-inch thick rounds. Gently separate into individual rings. Select larger, robust rings for assembly; discard smaller inner rings. (Optional: Blanch rings briefly for milder flavor, then pat dry). -
Step 3
Take 1-2 tablespoons of chilled meat mixture and shape into an oblong to fit snugly inside an onion ring. Place filling inside the ring, pressing to fill the cavity. For larger bombs, use two similar-sized rings, placing one over the other to fully encase the meat. Place assembled bombs on a parchment-lined baking sheet and refrigerate for 15-30 minutes. -
Step 4
Prepare three shallow dishes: one with 1 cup all-purpose flour, one with 2 large eggs beaten with 1 tbsp water or milk, and one with 2 cups panko mixed with 1/2 tsp garlic powder and 1/4 tsp onion powder. -
Step 5
Using a ‘dry hand/wet hand’ technique, dredge each bomb in flour, then egg wash, then coat thoroughly in seasoned panko breadcrumbs, pressing firmly to adhere. Place breaded bombs back on the baking sheet and refrigerate for another 15-20 minutes to set the coating. -
Step 6
Heat 4-6 cups neutral oil in a heavy-bottomed pot to 350°F (175°C). Set up a wire rack over a paper towel-lined baking sheet for draining. -
Step 7
Carefully lower 3-4 breaded bombs into the hot oil. Fry for 4-6 minutes, turning occasionally, until deep golden brown and the internal meat is cooked through. -
Step 8
Remove fried bombs with a slotted spoon, transfer to the wire rack to drain, and sprinkle with a pinch of salt. Repeat with remaining batches. Serve immediately with optional garnishes (parsley, sesame seeds) and your favorite dipping sauces.
Important Information
Nutrition Facts (Per Serving)
It is important to consider this information as approximate and not to use it as definitive health advice.
Allergy Information
Please check ingredients for potential allergens and consult a health professional if in doubt.


Leave a Comment