
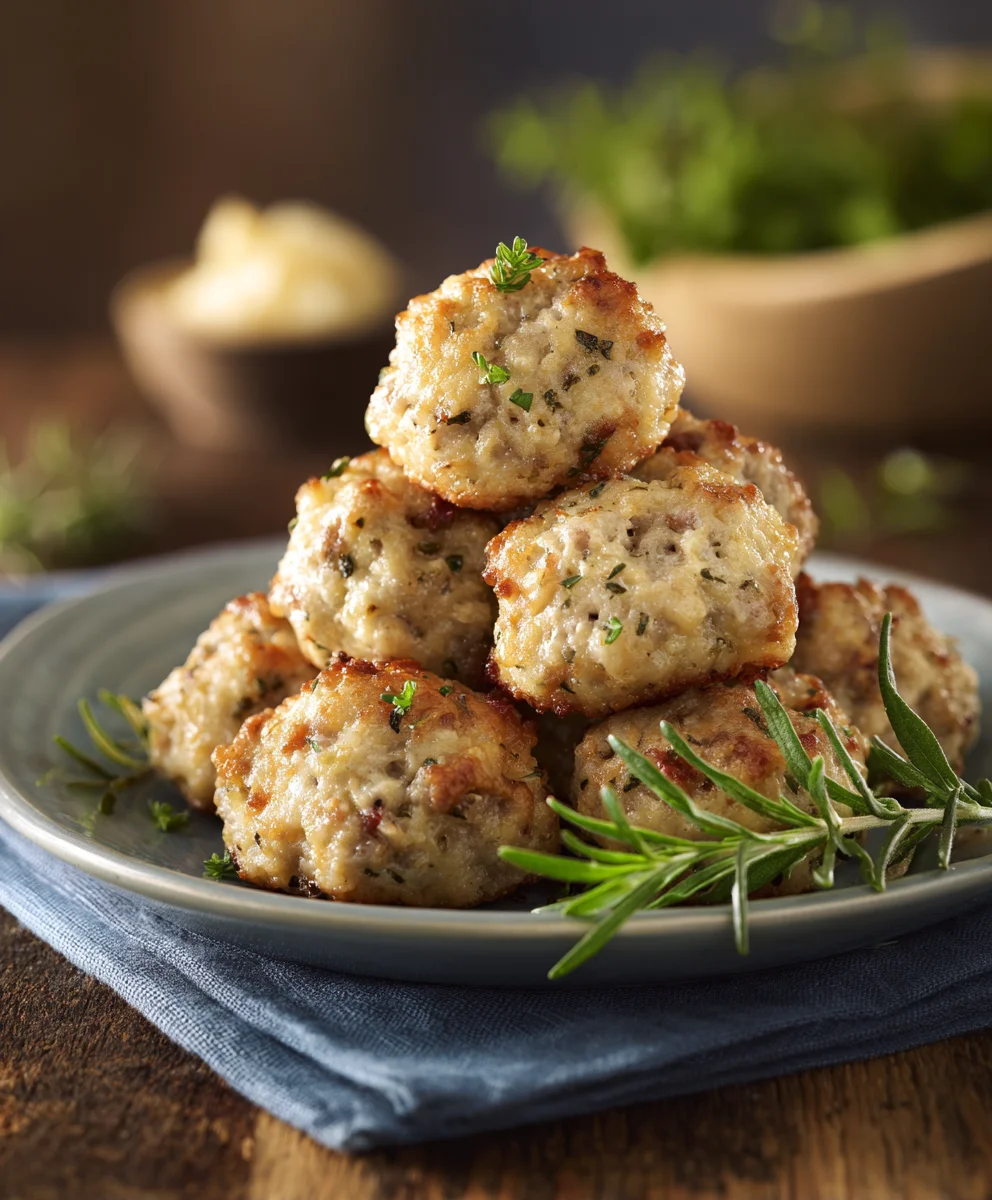
Paula Deen Sausage Balls are more than just a recipe; they are a delightful institution, bringing a touch of Southern comfort and convenience to countless gatherings and breakfasts. From the moment the aroma of sizzling sausage and melting cheese fills your kitchen, you know you’re in for a treat. These savory, bite-sized delights have become a beloved staple, especially around the holidays or for a hearty brunch spread, and for good reason.
I find that the magic of these incredible snacks lies not only in their irresistible taste but also in their heartwarming connection to Southern hospitality. While the concept of savory sausage and cheese bites has roots in various regional cuisines, Paula Deen’s particular rendition catapulted them into national stardom, making them synonymous with easy, crowd-pleasing fare. They embody a certain unpretentious deliciousness that everyone, from the pickiest eater to the most discerning palate, can appreciate.
Why are Paula Deen Sausage Balls so universally adored?
It’s simple: they offer the perfect trifecta of flavor, texture, and convenience. The combination of savory breakfast sausage, sharp cheddar cheese, and tender baking mix creates a wonderfully balanced profile that’s both cheesy and meaty, with a slightly crisp exterior and a soft, flavorful interior. They are incredibly easy to prepare, often requiring just a few common ingredients and minimal effort, making them an ideal make-ahead option for busy mornings or unexpected guests. This timeless recipe truly delivers comfort and joy in every single bite.

Ingredients:
- 1 pound (16 ounces) breakfast sausage, mild or hot, your preference! I often lean towards a high-quality pork sausage, but feel free to experiment with turkey or chicken sausage for a lighter take. Just be sure it’s the raw, ground variety, not pre-cooked links or patties.
- 2 cups (8 ounces) shredded sharp cheddar cheese. Trust me on this, freshly shredded cheese melts better and blends more seamlessly into the dough, providing that signature gooey texture. Pre-shredded cheese often contains anti-caking agents that can slightly alter the texture, so if you have the time, shredding it yourself is a small step that makes a big difference in your Paula Deen Sausage Balls.
- 3 cups original Bisquick baking mix. This is the magical binding agent that makes these sausage balls so incredibly easy to whip up. Ensure it’s fresh and not expired, as its leavening power can wane over time, potentially affecting the texture of your finished product.
- 1/2 teaspoon garlic powder (optional, but highly recommended for an extra layer of flavor that complements the sausage beautifully).
- 1/4 teaspoon black pepper (optional, adjust to your taste for a little kick).
- Pinch of cayenne pepper (optional, for those who love a bit of heat in their Paula Deen Sausage Balls).
Gathering Your Tools & Prepping Ingredients
- Before we dive into mixing, let’s get our kitchen workstation ready for these delightful Paula Deen Sausage Balls. Preheat your oven to a cozy 350°F (175°C). This ensures your oven is at the perfect temperature the moment your sausage balls are ready to bake, leading to even cooking and that beautiful golden-brown exterior we all crave.
- Next, prepare one or two large baking sheets. I recommend lining them with parchment paper or silicone baking mats. This crucial step prevents sticking and makes cleanup an absolute breeze. There’s nothing worse than having your delicious, perfectly baked Paula Deen Sausage Balls stubbornly clinging to the pan! If you don’t have parchment paper, a light spray of non-stick cooking spray will work in a pinch, but parchment paper is truly superior for even browning and no-fuss removal.
- Now, let’s talk about our star ingredients. First, ensure your breakfast sausage is thoroughly thawed if you’re using frozen, and preferably at a slightly cooler than room temperature state. This makes it easier to handle and combine with the other ingredients. If it’s too warm, it can become greasy and more difficult to mix.
- For the cheddar cheese, if you’re using a block, now’s the time to shred it. As I mentioned in the ingredients list, freshly shredded cheese really does make a difference. Use the large holes of a box grater or a food processor with a shredding attachment for quick work.
- Measure out your Bisquick mix carefully. While baking is often seen as an exact science, for these Paula Deen Sausage Balls, a slight variation won’t be catastrophic, but aiming for accuracy will give you the best texture. Have your optional garlic powder, black pepper, and cayenne pepper measured out and ready to go.
- Wash your hands thoroughly! We’ll be getting our hands right into the mix for this recipe, and good hygiene is always the first step in creating delicious food safely.
Mixing the Iconic Paula Deen Sausage Ball Dough
- Grab a very large mixing bowl – you’ll need plenty of space to get everything properly combined for your Paula Deen Sausage Balls. Into this bowl, add the 3 cups of Bisquick baking mix. Spread it out a bit to create a base.
- Now, add your 2 cups of freshly shredded sharp cheddar cheese on top of the Bisquick. If you’re using the optional seasonings like garlic powder, black pepper, and cayenne pepper, sprinkle them over the cheese and Bisquick at this stage. Giving them a quick stir with a spoon will help distribute them somewhat before the sausage goes in. This preliminary mix helps ensure the seasonings aren’t just clumped in one area.
- Next, crumble the raw breakfast sausage directly into the bowl with the Bisquick and cheese. Try to break it up into smaller pieces as you add it; this will make the subsequent mixing much easier. Don’t worry about perfect crumbles just yet, we’ll get there.
- Now comes the fun part – mixing! While you can certainly attempt this with a sturdy spoon or a stand mixer fitted with a paddle attachment, I find that the absolute best way to combine these ingredients for perfect Paula Deen Sausage Balls is with your hands. Roll up your sleeves, folks!
- Using clean hands, begin to gently work the sausage into the Bisquick and cheese mixture. The goal here is to evenly distribute the sausage and cheese throughout the Bisquick, creating a cohesive, somewhat stiff dough. This isn’t like bread dough; you don’t need to knead it aggressively. Instead, think of it more like squeezing and pressing the ingredients together.
- Be patient and thorough! This step often takes a good 5 to 7 minutes of consistent mixing. You might feel like it’s never going to come together at first, especially if your sausage is very cold, but keep working at it. The warmth from your hands will help the cheese soften slightly and the sausage fat will begin to emulsify with the Bisquick, binding everything together. You want to avoid overmixing once it’s combined, but underserving this step will lead to crumbly sausage balls that don’t hold their shape. The mixture should eventually form a fairly uniform, somewhat crumbly but pliable “dough” that you can press into a ball without it falling apart. This is the secret to well-structured Paula Deen Sausage Balls.
-
Troubleshooting the Mix:
- If your mixture seems too dry and won’t come together: This can sometimes happen if your cheese is particularly dry, or if your Bisquick is very fresh and absorbent. You can try adding a tablespoon of milk (whole milk works best) at a time, very sparingly, until it just comes together. Be extremely careful not to add too much, as a wet mixture will spread during baking. Mix it in thoroughly before deciding if more is needed.
- If your mixture seems too wet and sticky: This is less common, but could occur if your sausage is very fatty or if your cheese is exceptionally moist. Try adding another tablespoon or two of Bisquick, mixing thoroughly after each addition, until the mixture is easier to handle.
The ideal consistency for your Paula Deen Sausage Balls dough should be firm enough to roll into a ball without sticking excessively to your hands, but not so dry that it crumbles apart.
Forming the Perfect Paula Deen Sausage Balls
- Now that our dough is perfectly mixed, it’s time to transform it into those recognizable bite-sized morsels. This step is all about consistency, both in size and shape, to ensure even cooking.
- I find the easiest way to form uniform Paula Deen Sausage Balls is by using a small cookie scoop (about 1.5 to 2 tablespoons in size). This helps immensely in creating consistently sized balls, which is key for them to bake evenly. If you don’t have a scoop, simply use a regular tablespoon measure and eyeball the amount for each ball.
- Take a scoop or a portion of the mixture and gently roll it between the palms of your hands to form a round ball, roughly 1 inch in diameter. You don’t need to press too hard; just enough to make it compact and smooth. If the mixture is sticking to your hands, you can lightly dampen your hands with a little water, or very lightly flour them, but typically, if the mix is correct, it shouldn’t be too sticky.
- As you form each ball, place it on your prepared baking sheet. Make sure to leave a little space between each ball, about an inch apart. This allows for proper air circulation during baking, which promotes even browning on all sides. Overcrowding the pan can lead to steaming rather than baking, resulting in paler, less crispy sausage balls.
- Continue this process until you’ve used up all of the delicious sausage mixture. You should end up with approximately 40-50 sausage balls, depending on their size. Take your time here; uniform sizing is important for a consistent bake and presentation.
-
Prepping for the Freezer (Optional):
If you want to bake some now and save some for later, you can freeze these sausage balls unbaked! After forming the balls, arrange them in a single layer on a parchment-lined baking sheet and place them in the freezer until they are solid, typically 1-2 hours. Once frozen, transfer the solid balls to a freezer-safe zip-top bag or airtight container. They will keep well for up to 2-3 months. When you’re ready to bake them, simply place the frozen balls on a baking sheet and bake as directed, adding an extra 5-10 minutes to the baking time, or until they are cooked through and golden brown. This is a fantastic way to have homemade Paula Deen Sausage Balls ready for unexpected guests or quick snacks!
Baking Your Delicious Paula Deen Sausage Balls to Golden Perfection
- Your oven should be fully preheated to 350°F (175°C) by now. Carefully place your baking sheets, laden with the unbaked Paula Deen Sausage Balls, into the preheated oven. If you’re using two sheets, place one on the upper-middle rack and the other on the lower-middle rack.
- Bake for 20-25 minutes. The exact baking time can vary slightly depending on your oven and the size of your sausage balls. For those using larger sausage balls or a slightly cooler oven, it might take a few extra minutes.
- Mid-Bake Rotation: If you’re using two baking sheets, midway through the baking time (around the 10-12 minute mark), carefully rotate the pans. Swap their positions (top to bottom, and front to back) to ensure all your Paula Deen Sausage Balls bake evenly and achieve that gorgeous golden-brown finish. This step is key for consistent results across all your batches.
- You’ll know your sausage balls are perfectly baked when they are beautifully golden brown on the outside and the sausage inside is fully cooked through. If you want to be absolutely sure, you can use an instant-read meat thermometer to check the internal temperature of a few sausage balls. It should register 160°F (71°C).
- Once baked to perfection, remove the baking sheets from the oven. Don’t rush to move them immediately! Allow the Paula Deen Sausage Balls to rest on the baking sheet for about 5 minutes. This brief resting period helps them firm up slightly, making them easier to transfer and preventing them from falling apart.
- After resting, transfer the sausage balls to a wire rack to cool slightly. While they are incredibly tempting straight out of the oven, they will be very hot and the cheese will be molten. A few minutes on the cooling rack will bring them to the ideal temperature for enjoying.
Serving Suggestions & Storage Tips for Your Paula Deen Sausage Balls
- These incredible Paula Deen Sausage Balls are best served warm, shortly after they’ve had a chance to cool down just enough to handle. The melty cheese and savory sausage are at their peak when they’re still warm and inviting. They are truly a crowd-pleaser!
-
Dipping Sauces to Elevate Your Experience:
While they are absolutely fantastic on their own, a good dipping sauce can take your Paula Deen Sausage Balls to the next level. Consider serving them with:
- Honey Mustard: The sweet and tangy notes perfectly complement the savory sausage.
- Maple Syrup: A classic pairing with breakfast sausage, it offers a wonderful sweet and salty dynamic.
- Ranch Dressing: A creamy, herby favorite that’s always a hit.
- Spicy Ketchup or Sriracha Mayo: For those who love a little extra kick!
- Grape Jelly or Apple Jelly: An old-fashioned Southern favorite that might surprise you with how well it works!
-
Perfect for Any Occasion:
These versatile Paula Deen Sausage Balls are a staple for so many different gatherings. They make a fantastic breakfast or brunch item, an easy appetizer for parties, game days, or holiday gatherings, or even a quick and satisfying snack throughout the day. I often make a big batch for potlucks, and they are always the first to disappear!
-
Storage Instructions:
If by some miracle you have any leftover Paula Deen Sausage Balls, store them in an airtight container in the refrigerator for up to 3-4 days. It’s rare for them to last that long in my house, but it’s good to know!
-
Reheating Leftovers:
To reheat, you can pop them in the microwave for 30-60 seconds, though this can sometimes make them a bit softer. For best results, I recommend reheating them in a preheated oven or toaster oven at 300°F (150°C) for about 10-15 minutes, or until warmed through and slightly crispy again. This method helps restore some of their original texture.
-
Freezing Baked Sausage Balls:
Yes, you can freeze baked Paula Deen Sausage Balls too! Once they have completely cooled, arrange them in a single layer on a baking sheet and freeze until solid. Then transfer them to a freezer-safe bag or container. They can be stored for up to 2-3 months. To reheat from frozen, bake them at 300°F (150°C) for about 20-25 minutes, or until heated through. This makes them an excellent make-ahead option for busy mornings or unexpected guests.
- There you have it! A truly iconic, easy-to-make, and utterly delicious recipe for Paula Deen Sausage Balls that will undoubtedly become a favorite in your household. Enjoy every savory, cheesy bite!
Conclusion:
Well, there you have it, my friends! We’ve journeyed through the simple yet profound magic of what I believe is one of the most irresistible savory bites you can ever whip up in your kitchen. This isn’t just a recipe; it’s an invitation to experience comfort, flavor, and pure joy, all rolled into one delightful sphere.
Why is this recipe an absolute must-try? Let me count the ways! First and foremost, the taste is utterly phenomenal. The perfect balance of savory sausage, sharp cheddar cheese, and the unique, fluffy texture from the baking mix creates a symphony of flavors that is both comforting and incredibly addictive. They’re crispy on the outside, tender on the inside, and bursting with a hearty, cheesy goodness that makes every bite an experience. Secondly, their simplicity is a true blessing. Even if you’re a novice in the kitchen, you’ll find this recipe incredibly forgiving and straightforward. There’s no complicated technique, no fancy equipment required—just a few basic ingredients and a little bit of mixing, rolling, and baking. It’s the kind of recipe that builds confidence and delivers spectacular results without the stress. Finally, these delectable morsels are incredibly versatile. Whether you’re hosting a grand holiday brunch, needing an easy game day appetizer, or simply looking for a quick and satisfying snack for your family, they fit the bill perfectly every single time. They disappear from platters with astonishing speed, making them a guaranteed crowd-pleaser and a reliable go-to for any occasion where delicious, easy-to-eat food is appreciated.
Now, let’s talk about how to elevate your experience with some fantastic serving suggestions and playful variations that can truly make this recipe your own. For a classic breakfast or brunch spread, serve these hot out of the oven alongside some fluffy scrambled eggs, fresh fruit, and perhaps a side of crispy bacon. They are also absolutely stellar as an appetizer. Arrange them artfully on a platter with toothpicks for easy grabbing. To take them to the next level, consider offering a variety of dipping sauces. My personal favorites include a tangy honey mustard, a smoky barbecue sauce, or even a spicy sriracha mayo for those who love a little kick. Don’t underestimate the power of a simple maple syrup drizzle either – the sweet and savory combination is surprisingly delightful and a true southern classic! For a more adventurous twist, try a creamy ranch dressing or a jalapeño jelly for an unexpected burst of flavor.
Feeling creative? The beauty of this recipe lies in its adaptability. While I adore the classic cheddar, don’t hesitate to experiment with different cheeses. A sharp Colby Jack can offer a milder, meltier texture, while pepper jack will introduce a wonderful zesty heat. If you’re a fan of a deeper, nuttier flavor, a bit of grated Gruyere can be an exquisite addition. For an extra layer of spice, a pinch of red pepper flakes mixed into the dough can add a subtle warmth without overpowering the other flavors. You could also experiment with different types of sausage; a hot Italian sausage will obviously amplify the heat, while a sage breakfast sausage can bring an herbaceous note that is simply divine. A tiny bit of finely chopped fresh chives or parsley folded into the mixture just before baking can add a fresh, aromatic finish and a pop of color too. And for those busy weeks, remember that these are incredibly make-ahead friendly. You can prepare the mixture, roll the balls, and then freeze them raw on a baking sheet before transferring them to a freezer-safe bag. When you’re ready to bake, simply pop them directly into the oven from frozen, adding a few extra minutes to the baking time. This convenience makes them an absolute lifesaver for last-minute entertaining or quick weeknight snacks. They also reheat beautifully in a toaster oven, maintaining their delightful texture.
So, my dear readers, I implore you: don’t just read about this culinary delight. Take the plunge! Gather your ingredients, get your hands a little messy, and experience the sheer joy of creating these wonderful bites for yourself and your loved ones. I promise, once you’ve tasted the homemade version, you’ll understand exactly why these are such a beloved staple. In fact, I’m confident that these Paula Deen Sausage Balls will quickly become a cherished recipe in your own collection, a go-to for countless future gatherings and cozy moments.
When you do try them, and I truly hope you do, please come back and share your experience with me! I absolutely adore hearing about your kitchen adventures, your successes, and even your creative variations. What cheeses did you use? What dipping sauces did you discover? Did you serve them for breakfast, brunch, or an evening party? Your insights and feedback are invaluable and inspire me every single day. Leave a comment below, tell me all about it, and let’s celebrate the simple pleasure of delicious, home-cooked food together. Happy baking!
Paula Deen Beef Sausage Balls – Easy & Delicious Recipe!
These easy and delicious Paula Deen Beef Sausage Balls are a delightful institution of Southern comfort. Made with savory ground beef breakfast sausage, sharp cheddar cheese, and Bisquick, they’re perfect for breakfast, brunch, or as a crowd-pleasing appetizer. They offer a perfect trifecta of flavor, texture, and convenience in every bite.
Ingredients
-
1 pound (16 ounces) ground beef breakfast sausage, raw
-
2 cups (8 ounces) shredded sharp cheddar cheese
-
3 cups original Bisquick baking mix
-
1/2 teaspoon garlic powder (optional)
-
1/4 teaspoon black pepper (optional)
-
Pinch of cayenne pepper (optional)
Instructions
-
Step 1
Preheat oven to 350°F (175°C). Line large baking sheets with parchment paper. Ensure ground beef breakfast sausage is thawed and cheese is shredded. -
Step 2
In a large mixing bowl, combine Bisquick, shredded sharp cheddar cheese, optional garlic powder, black pepper, and cayenne pepper. Crumble in the raw ground beef breakfast sausage. -
Step 3
Using clean hands, mix thoroughly for 5-7 minutes until a cohesive, somewhat stiff dough forms. Ensure ingredients are evenly distributed. (If too dry, add milk sparingly; if too wet, add a little more Bisquick). -
Step 4
Scoop and roll the mixture into 1-inch diameter balls (approx. 1.5-2 tablespoons each). Place them about 1 inch apart on the prepared baking sheets. (Yields approx. 40-50 balls). -
Step 5
Optional freezer prep: For later use, arrange formed balls on parchment-lined sheet, freeze until solid (1-2 hrs), then transfer to freezer-safe bag. Bake from frozen, adding 5-10 minutes to bake time. -
Step 6
Bake for 20-25 minutes, rotating pans halfway through for even browning, until golden brown and the internal temperature of the sausage reaches 160°F (71°C). -
Step 7
Remove from oven and let rest on the baking sheet for 5 minutes before transferring to a wire rack to cool slightly. -
Step 8
Serve warm, optionally with dipping sauces like honey mustard, maple syrup, or ranch. -
Step 9
Store leftovers in an airtight container in the refrigerator for up to 3-4 days. Reheat in a 300°F (150°C) oven or toaster oven for best results. -
Step 10
Baked sausage balls can be frozen for up to 2-3 months; reheat from frozen at 300°F (150°C) for 20-25 minutes.
Important Information
Nutrition Facts (Per Serving)
It is important to consider this information as approximate and not to use it as definitive health advice.
Allergy Information
Please check ingredients for potential allergens and consult a health professional if in doubt.


Leave a Comment