
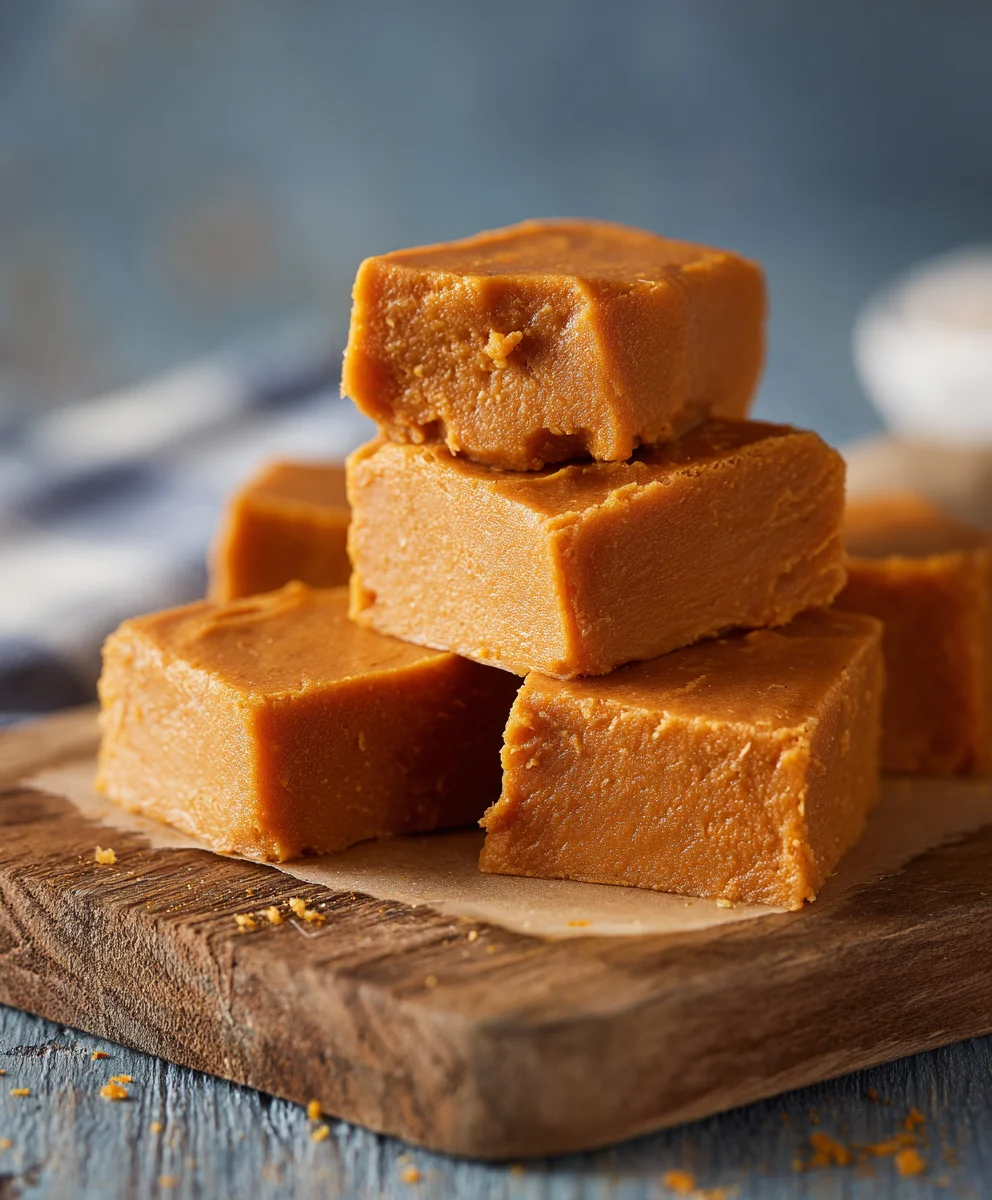
Pumpkin Fudge. The very mention of this delectable treat instantly conjures images of crisp autumn air, cozy gatherings, and the comforting aroma of fall spices. I am absolutely thrilled to share with you a recipe that perfectly encapsulates the magic of the season, transforming wholesome ingredients into an utterly irresistible confection. While the history of fudge dates back to the late 19th century as a charmingly rustic American candy, its seasonal iteration with pumpkin marries this rich tradition with the quintessential flavors of autumn.
This delightful Pumpkin Fudge captures the very essence of fall, blending the earthy sweetness of pumpkin with a symphony of warm spices—cinnamon, nutmeg, and ginger—all enveloped in an impossibly smooth, melt-in-your-mouth texture. People adore this dish not only for its nostalgic charm and stunning flavor profile but also for its relatively simple preparation, making it a perfect addition to any holiday table or a thoughtful, homemade gift. Get ready to experience a taste sensation that is both deeply comforting and elegantly spiced.
Ingredients:
- For the Creamy Pumpkin Fudge Base:
- 3 cups (600g) granulated sugar – I always find this amount provides the perfect sweetness for a rich Pumpkin Fudge.
- 1 cup (240ml) full-fat evaporated milk – This is absolutely crucial for the creamy, silky texture we’re aiming for in our homemade Pumpkin Fudge. Do not substitute with regular milk or condensed milk.
- 1/2 cup (113g) unsalted butter, cut into several pieces – Using unsalted butter allows us to control the salt content precisely.
- 1/2 cup (120g) pure pumpkin puree – Make sure it’s 100% pumpkin puree, not pumpkin pie filling, which already has spices and sugar added. This is the heart of our Pumpkin Fudge!
- 1 teaspoon pure vanilla extract – A good quality vanilla enhances all the other flavors beautifully.
- For the Spices and Flavor Enhancers:
- 1 teaspoon ground cinnamon – The quintessential spice for any Pumpkin Fudge recipe.
- 1/2 teaspoon ground nutmeg – Adds a warm, slightly nutty depth.
- 1/4 teaspoon ground ginger – Provides a gentle zing that brightens the flavor profile.
- 1/8 teaspoon ground cloves – Use sparingly, as cloves are potent, but they contribute wonderfully to the overall pumpkin spice blend.
- 1/4 teaspoon fine sea salt – A small amount of salt balances the sweetness and brings out all the wonderful spice flavors.
- For the Richness and Texture:
- 12 ounces (340g) white chocolate chips (or finely chopped white chocolate) – High-quality white chocolate melts smoothly and adds a fantastic, creamy richness without overpowering the pumpkin. This is a key ingredient for a smooth Pumpkin Fudge.
- Optional Add-ins (Highly Recommended!):
- 1/2 cup (60g) chopped pecans or walnuts – Toasted nuts add a lovely crunch and depth of flavor to your Pumpkin Fudge.
Preparation and Pre-Cooking Setup
- Prepare Your Pan: First things first, we need to get our pan ready. I always reach for a 9×13 inch (23×33 cm) baking pan for this Pumpkin Fudge recipe. You’ll want to line it completely with parchment paper or aluminum foil. Make sure the paper or foil extends over the edges of the pan, creating “handles.” This little trick will make it incredibly easy to lift the set fudge out of the pan later, ensuring perfectly clean cuts and preventing any sticky situations. If you’re using foil, a quick spray with non-stick cooking spray is also a good idea to prevent any potential sticking, even though the parchment paper usually handles this perfectly. Setting up your pan properly from the start is a small step that makes a huge difference in the final presentation of your beautiful Pumpkin Fudge.
- Gather Your Tools: Before we even think about turning on the stove, it’s a good practice to gather all your necessary equipment and ingredients. For this delightful Pumpkin Fudge, you’ll need a large, heavy-bottomed pot (at least 4-5 quart capacity) – a heavy bottom is crucial for even heat distribution and preventing scorching. A reliable candy thermometer is non-negotiable for achieving the correct consistency; precision is key in fudge making! Have a sturdy whisk or wooden spoon ready for stirring, and a heat-proof spatula for scraping down the sides of the pot. Also, measure out all your ingredients beforehand, having them ready and waiting. This organized approach, often called “mise en place,” ensures a smooth cooking process and helps prevent any last-minute scrambling when the fudge mixture is hot and requires your full attention.
- Toast Optional Nuts (If Using): If you’ve decided to include those wonderful chopped pecans or walnuts for an extra layer of flavor and crunch in your Pumpkin Fudge, take a few minutes to toast them. Spread them in a single layer on a dry skillet over medium-low heat, stirring frequently, for about 5-7 minutes until they are fragrant and lightly golden. Alternatively, you can toast them on a baking sheet in a 350°F (175°C) oven for about 8-10 minutes. Toasted nuts have a much deeper, more intense flavor than raw nuts, which will elevate your homemade Pumpkin Fudge to another level. Once toasted, immediately remove them from the heat and set them aside to cool completely. We’ll fold them in just before pouring the fudge into the pan.
Creating the Pumpkin Fudge Base
- Combine Main Ingredients: In your large, heavy-bottomed pot, combine the granulated sugar, evaporated milk, butter pieces, pure pumpkin puree, ground cinnamon, ground nutmeg, ground ginger, ground cloves, and fine sea salt. I like to give everything a good stir with my whisk at this stage to ensure all the ingredients are well incorporated before heating. This initial mixing helps to prevent any dry pockets of sugar and ensures the spices are evenly distributed throughout what will soon become our incredibly flavorful Pumpkin Fudge. Don’t worry if the butter isn’t fully melted yet; it will melt as the mixture heats.
- Bring to a Rolling Boil: Place the pot over medium heat. Continue to stir the mixture almost constantly as it heats up. This continuous stirring is vital, especially as the butter melts and the sugar begins to dissolve, to prevent anything from sticking to the bottom of the pot and scorching. Scorched sugar or milk will impart an unpleasant burnt flavor to your entire batch of Pumpkin Fudge, which we absolutely want to avoid! You’ll notice the mixture will start to bubble around the edges, and as it gets hotter, it will transition into a full, rolling boil. A rolling boil is when the bubbles are vigorous and don’t disappear when stirred.
- Attach Candy Thermometer and Boil to Temperature: Once the mixture reaches a full, rolling boil, reduce the heat slightly to maintain a steady, vigorous boil, but not so high that it bubbles over the pot. Now, carefully clip your candy thermometer to the side of the pot, making sure the tip of the thermometer is submerged in the mixture but not touching the bottom of the pot. This is absolutely critical for an accurate temperature reading. Continue to boil the mixture, stirring frequently (though not constantly, as we want it to boil effectively), until the thermometer registers precisely 238°F (114°C). This temperature is known as the “soft-ball stage” in candy making, and it’s the sweet spot for perfect Pumpkin Fudge consistency. This step usually takes anywhere from 10 to 18 minutes, depending on your stovetop and pot. Be patient, watch that thermometer closely, and resist the urge to rush it! Undercooking will result in soft, unset fudge, while overcooking will yield crumbly or overly hard fudge.
The Cooling and Setting Phase
- Remove from Heat and Add Remaining Ingredients: As soon as your candy thermometer hits that magic 238°F (114°C) mark, immediately remove the pot from the heat. Don’t let it cook for even an extra second! Carefully unclip the candy thermometer. Now, quickly add the white chocolate chips and the pure vanilla extract to the hot fudge mixture. This is an important moment: do not stir the mixture yet! Simply add them on top and let them sit. The residual heat from the fudge will begin to melt the white chocolate, and allowing the mixture to rest undisturbed for 5-10 minutes at this stage is crucial. This cooling period is vital for the proper formation of sugar crystals, which contribute to the smooth, creamy texture of your Pumpkin Fudge. Stirring too early can cause the fudge to become grainy, which we definitely want to avoid for that perfect velvety mouthfeel.
- The Critical Cooling Phase: I know it’s tempting to stir, but please resist! Let the mixture sit undisturbed for the full 5-10 minutes. During this time, the temperature of the fudge will slowly drop. You’ll notice the white chocolate chips starting to soften and melt from the heat, and the surface of the fudge will begin to form a thin skin. This phase is about allowing the initial crystallization process to begin in a controlled manner, leading to very fine sugar crystals. Fine crystals are what give fudge its signature smooth, melt-in-your-mouth texture. Impatience here is the enemy of creamy Pumpkin Fudge!
- Beat Until Thick and Creamy: After the resting period, it’s time for the most physically demanding, but equally rewarding, part of making Pumpkin Fudge: beating the mixture. If you have a stand mixer with a paddle attachment, this is where it shines. Otherwise, a sturdy wooden spoon and strong arm will do the trick! Start beating the fudge vigorously. At first, it will look glossy and fluid. As you continue to beat, you’ll notice a magical transformation. The mixture will start to thicken, lose its glossy sheen, and become noticeably opaque and creamy. This is the stage where tiny sugar crystals are formed, which is what gives fudge its characteristic texture. Keep beating until it becomes very thick, almost like soft-serve ice cream, and starts to pull away from the sides of the pot a little bit. This usually takes between 5 to 10 minutes of continuous beating. You’ll feel the resistance increase as it thickens. It’s important not to under-beat (which can result in soft, runny fudge) or over-beat (which can make it dry and crumbly). If you are adding toasted nuts, now is the time to quickly fold them in during the last minute of beating, ensuring they are evenly distributed.
Cooling, Cutting, and Storing Your Pumpkin Fudge
- Pour into Prepared Pan: Once the Pumpkin Fudge has reached that wonderfully thick, creamy, and dull (no longer glossy) stage, you need to work quickly! Immediately pour the entire mixture into your prepared 9×13 inch pan. Use a heat-proof spatula to scrape every last bit of that delicious fudge from the pot into the pan. The fudge will be quite thick at this point, so you’ll need to gently spread it evenly across the pan. You can lightly tap the pan on your counter a few times to help settle it and remove any air pockets, creating a smooth, flat surface. Don’t overwork it, as it will continue to set. The goal here is an even layer for consistent square pieces later.
- Allow to Set Completely: Now comes the hardest part for me: waiting! For the best results, allow your Pumpkin Fudge to set completely. You have a couple of options here. You can let it cool at room temperature for several hours, typically 2-4 hours, or even overnight. This slower setting allows for maximum flavor development and a slightly firmer texture. If you’re a little impatient, like me sometimes, you can place the pan in the refrigerator for about 1-2 hours. The cold will help it firm up much faster. Regardless of the method you choose, ensure the fudge is completely firm to the touch before attempting to cut it. It should not yield when gently pressed. Proper setting ensures clean, neat slices of your beautiful homemade Pumpkin Fudge.
- Cut and Serve Your Perfect Pumpkin Fudge: Once your Pumpkin Fudge is perfectly set and firm, it’s time to cut it into irresistible pieces! Use those parchment paper or foil “handles” that you thoughtfully created earlier to lift the entire slab of fudge out of the pan. Place it on a clean cutting board. Using a large, sharp knife, cut the fudge into desired squares. I usually aim for 1-inch squares, but you can go larger if you prefer more substantial pieces. For super clean cuts, wipe your knife with a warm, damp cloth between each slice. This prevents the fudge from sticking and creates perfectly defined edges for each piece of Pumpkin Fudge.
- Storing Your Delicious Pumpkin Fudge: To keep your homemade Pumpkin Fudge fresh and flavorful, store it in an airtight container at room temperature for up to 1 week. If you live in a particularly warm or humid climate, or if you want to extend its shelf life, storing it in the refrigerator is also an excellent option; it will keep well for up to 2-3 weeks in the fridge. Just be sure to bring it to room temperature for about 15-20 minutes before serving for the best texture and flavor. You can also freeze Pumpkin Fudge for longer storage – up to 3 months! Wrap individual pieces tightly in plastic wrap, then place them in a freezer-safe bag or container. Thaw in the refrigerator overnight before serving. This recipe yields a generous amount, making it perfect for sharing with friends and family, or simply enjoying as a delightful autumn treat!
Conclusion:
And there you have it, my friends! We’ve journeyed together through the delightful process of creating what I truly believe is one of the most heartwarming and utterly irresistible treats you’ll ever make: homemade Pumpkin Fudge. This isn’t just another dessert; it’s an experience, a little piece of autumn magic captured in every velvety square. What makes this recipe an absolute must-try, you ask? Well, it’s the perfect harmony of rich, earthy pumpkin and warm, inviting spices, all melded into a texture that is simply divine – smooth, creamy, and melt-in-your-mouth decadent. It’s incredibly easy to whip up, even for novice bakers, yet it delivers a sophisticated flavor profile that will impress even the most discerning palates. Forget those complicated desserts that require hours of intricate work; this recipe offers maximum flavor with minimal fuss. It’s the kind of treat that instantly evokes cozy feelings, perfect for a brisk evening by the fire or a festive gathering with loved ones. I promise you, once you taste a bite of this homemade goodness, you’ll understand why it’s destined to become a staple in your seasonal baking repertoire. It’s comfort food elevated, a sweet escape from the everyday, and a testament to the simple joy that comes from creating something truly delicious with your own hands. The aroma alone as it sets is enough to make your kitchen feel like the most inviting place on earth.
Now, let’s talk about making this delightful creation truly your own. While it’s absolutely perfect as is, a little creativity can elevate your experience even further. For a simple yet elegant serving suggestion, try arranging small squares on a beautiful platter alongside a steaming cup of coffee or a chai latte – the flavors complement each other wonderfully. It also makes an incredible, thoughtful homemade gift; package a few pieces in a decorative box tied with a ribbon, and you’ll have a present that speaks volumes of care and effort. Consider crumbling it over a scoop of vanilla ice cream for an extraordinary, deconstructed dessert experience, or even pairing it with a dollop of fresh whipped cream and a sprinkle of cinnamon for an extra touch of indulgence. The possibilities are truly endless!
And for those who love to experiment, here are a few variations to spark your imagination. You could sprinkle a handful of toasted pecans or walnuts over the top just before it sets for a delightful crunch and nutty flavor – a classic pairing that never disappoints. For a touch of sophistication, a pinch of sea salt flakes scattered over the finished fudge can beautifully enhance the sweetness and depth of the spices. Feeling adventurous? Swirl in a tablespoon of maple syrup or a dash of maple extract with the pumpkin puree for an extra layer of autumn flavor. Or, if you’re a chocolate lover, a handful of mini chocolate chips mixed into the warm fudge before pouring, or drizzled on top after it’s set, can create an irresistible contrast. For a truly unique texture, consider folding in a cup of crispy rice cereal for a fun, chewy bite that kids and adults alike will adore. Don’t be afraid to adjust the spice levels to your preference; if you adore a strong kick of ginger or a comforting warmth of nutmeg, feel free to add a little extra. You could even fold in some candied ginger pieces for a delightful chew and spicy zing. If you’re looking to make this dairy-free, simply swap out the butter and sweetened condensed milk for their plant-based alternatives; many excellent options are available now, ensuring everyone can enjoy this scrumptious treat. This recipe is wonderfully forgiving and adaptable, inviting you to put your personal stamp on it, making each batch truly unique.
So, my dear readers, I implore you: don’t just read about this incredible
Pumpkin Fudge
; make it! Clear your schedule, gather your ingredients, and prepare for a truly rewarding baking adventure. The joy of pulling this creamy, fragrant delight from your fridge, slicing into perfect squares, and sharing it with those you love is an experience unlike any other. I am genuinely excited for you to try this recipe and discover the magic for yourselves. Once you’ve made it, please, please share your triumphs with me! I absolutely adore hearing about your kitchen adventures. Did you add a unique topping? Did you serve it in an unexpected way? What was your family’s reaction? Drop a comment below, snap a photo, and tell me all about your experience. Your feedback and creativity inspire not just me, but the entire community of home bakers who visit this space. Let’s celebrate the simple, delicious joys of homemade treats together. Happy baking, and I can’t wait to hear from you!
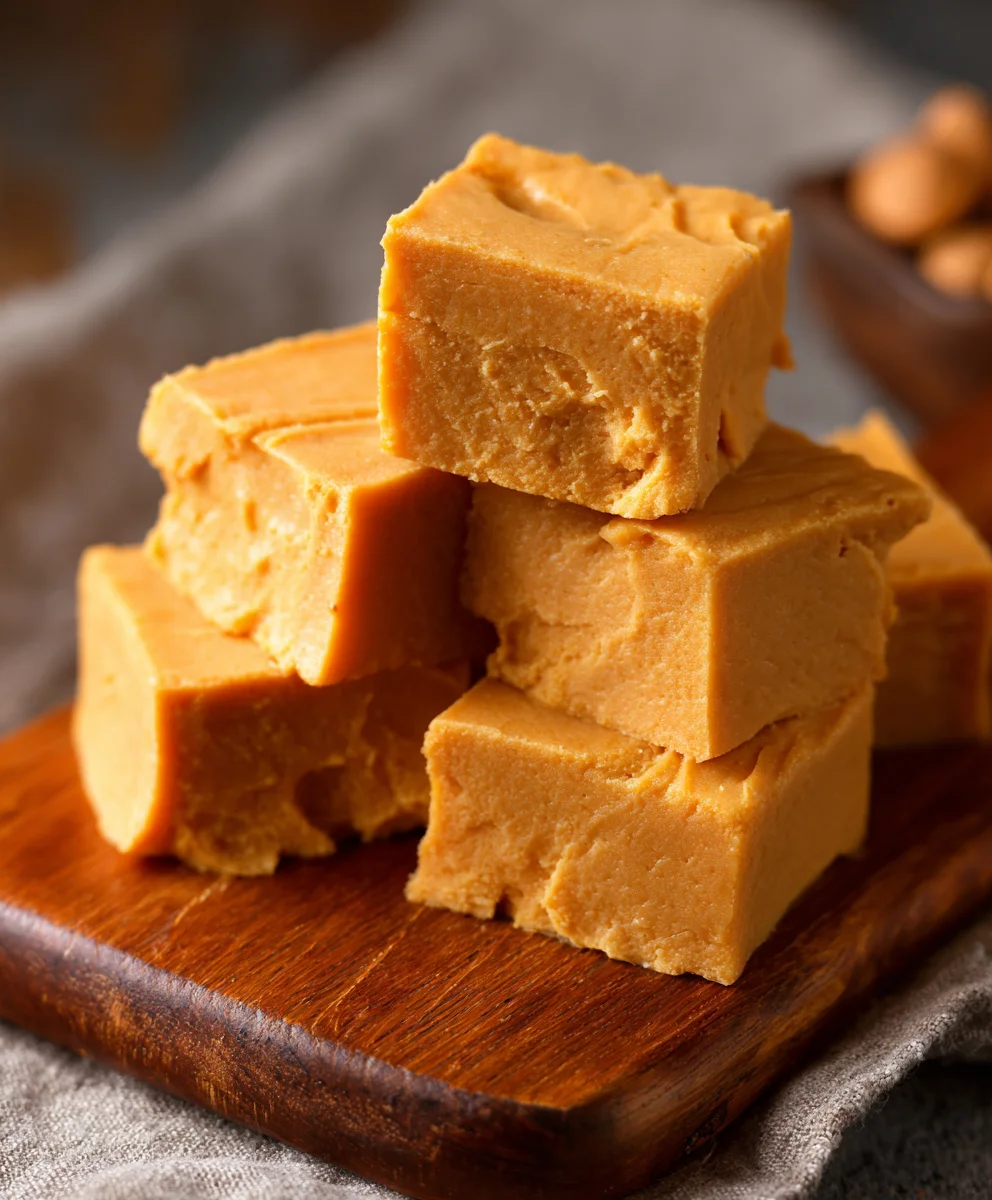
Pumpkin Fudge Recipe: Easy, Creamy & Delicious Fall Treat!
Pumpkin Fudge is a rich and creamy treat that combines the cozy flavors of pumpkin spice with white chocolate for a decadent fall dessert. Made with real pumpkin puree, warm spices like cinnamon, nutmeg, and cloves, and marshmallow fluff for that perfect creamy texture, this fudge is ideal for both indulging and gifting. It’s quick to make and sets beautifully, making it a great addition to any fall celebration. Whether you’re enjoying it yourself or sharing it with friends and family, this pumpkin fudge is sure to be a hit!
Ingredients
-
3 cups (600g) granulated sugar
-
1 cup (240ml) full-fat evaporated milk
-
1/2 cup (113g) unsalted butter, cut into pieces
-
1/2 cup (120g) pure pumpkin puree
-
1 teaspoon pure vanilla extract
-
1 teaspoon ground cinnamon
-
1/2 teaspoon ground nutmeg
-
1/4 teaspoon ground ginger
-
1/8 teaspoon ground cloves
-
1/4 teaspoon fine sea salt
-
12 ounces (340g) white chocolate chips
-
1/2 cup (60g) chopped pecans or walnuts (optional)
Instructions
-
Step 1
Line a 9×13 inch (23×33 cm) baking pan with parchment paper or foil, leaving overhang “handles”. Gather a large, heavy-bottomed pot (4-5 quart), candy thermometer, whisk, and spatula. Measure all ingredients. -
Step 2
{‘@type’: ‘HowToStep’, ‘name’: ‘Toast Optional Nuts’, ‘text’: ‘If using, toast pecans or walnuts in a dry skillet over medium-low heat for 5-7 min, or in a 350°F (175°C) oven for 8-10 min. Set aside to cool.’, ‘optional’: True} -
Step 3
In the pot, combine sugar, evaporated milk, butter, pumpkin puree, cinnamon, nutmeg, ginger, cloves, and salt. Stir well. Place over medium heat, stirring constantly until the mixture reaches a full, rolling boil. -
Step 4
Attach candy thermometer (tip submerged, not touching bottom). Continue to boil, stirring frequently, until the thermometer registers precisely 238°F (114°C) (soft-ball stage). This typically takes 10-18 minutes. -
Step 5
Immediately remove the pot from heat. Add white chocolate chips and vanilla extract. DO NOT stir. Let sit undisturbed for 5-10 minutes to allow cooling and proper sugar crystal formation. -
Step 6
After the resting period, beat the fudge vigorously (with a stand mixer or wooden spoon) until it thickens, loses its gloss, becomes opaque, and creamy (5-10 minutes). If adding toasted nuts, fold them in during the last minute of beating. -
Step 7
Quickly pour the thick fudge into the prepared pan. Spread evenly with a spatula and tap gently to settle. Allow to set completely at room temperature for 2-4 hours (or overnight), or in the refrigerator for 1-2 hours, until firm. -
Step 8
Once set, lift the fudge from the pan using the parchment/foil handles. Place on a cutting board and cut into desired squares (e.g., 1-inch pieces) with a sharp, warm knife. Store in an airtight container at room temperature for up to 1 week, or in the refrigerator for 2-3 weeks. For longer storage, freeze for up to 3 months.
Important Information
Nutrition Facts (Per Serving)
It is important to consider this information as approximate and not to use it as definitive health advice.
Allergy Information
Please check ingredients for potential allergens and consult a health professional if in doubt.

Leave a Comment