
Apple Pie Banana Pudding – just the name itself evokes a sense of delightful indulgence, doesn’t it? Imagine taking two of America’s most beloved comfort desserts and swirling them into one harmonious, irresistible masterpiece. This isn’t just a recipe; it’s a culinary journey that marries the warm, spiced, tender embrace of a classic apple pie with the velvety, sweet, and utterly nostalgic creaminess of a traditional banana pudding.
I’ve always been fascinated by how dishes evolve, and while apple pie traces its roots back centuries as a quintessential American staple, and banana pudding holds a cherished spot in Southern culinary history, this brilliant fusion creates something truly unique and unforgettable. People absolutely adore this dish because it offers the best of both worlds: the comforting familiarity of cinnamon-spiced apples, a hint of buttery crust (often from vanilla wafers), and the irresistible, smooth texture of banana-infused custard. It’s a dessert that speaks directly to the soul, promising a taste that is both innovative and deeply satisfying with every spoonful. Get ready to fall in love with this extraordinary Apple Pie Banana Pudding; it’s a testament to the magic that happens when cherished traditions meet inspired creativity.
Ingredients:
-
For the Apple Pie Filling:
- 6 medium-sized apples (I love using a mix of Honeycrisp and Granny Smith for balance of sweetness and tartness), peeled, cored, and diced into ½-inch pieces
- ½ cup granulated sugar (adjust based on apple sweetness)
- ¼ cup packed light brown sugar
- 1 teaspoon ground cinnamon
- ¼ teaspoon ground nutmeg
- ⅛ teaspoon ground cloves (optional, but adds a lovely warmth)
- 2 tablespoons unsalted butter
- 1 tablespoon fresh lemon juice
- 1 tablespoon cornstarch (mixed with 2 tablespoons cold water to create a slurry)
- Pinch of salt
-
For the Creamy Banana Pudding Base:
- 1 cup granulated sugar
- ⅓ cup all-purpose flour
- ¼ teaspoon salt
- 4 large egg yolks
- 2 cups whole milk
- ½ cup heavy cream
- 2 teaspoons vanilla extract (pure vanilla is key here!)
- 8 ounces cream cheese, softened
- 1 (14-ounce) can sweetened condensed milk
- 1 (8-ounce) container frozen whipped topping, thawed (like Cool Whip), or 2 cups freshly whipped heavy cream
-
For Assembly:
- 1 (12-ounce) box vanilla wafers (Nilla Wafers work perfectly)
- 5-6 ripe but firm bananas, sliced into ¼-inch thick rounds (not too green, not too brown)
- Additional whipped topping or freshly whipped cream for garnish (optional)
- Ground cinnamon or a sprinkle of nutmeg for garnish (optional)
Preparing the Apple Pie Filling: The Heart of Your “Apple Pie Banana Pudding”
-
First things first, let’s get those apples ready! I usually start by peeling, coring, and dicing my apples into nice, uniform ½-inch pieces. This ensures they cook evenly and integrate beautifully into our Apple Pie Banana Pudding.
-
In a large skillet or a deep pot, melt the 2 tablespoons of unsalted butter over medium heat. Once the butter is glistening, add your diced apples. Stir them gently to coat them in the butter.
-
Next, sprinkle in the granulated sugar, light brown sugar, ground cinnamon, ground nutmeg, and optional ground cloves. Add that pinch of salt and the fresh lemon juice. The lemon juice is crucial here; it not only brightens the apple flavor but also helps prevent the apples from turning too mushy and maintains their structure as they cook. Stir everything together until the apples are well coated with the spice and sugar mixture.
-
Reduce the heat to medium-low, cover the skillet, and let the apples cook for about 8-10 minutes, stirring occasionally. This steaming process helps the apples soften without drying out. You’re looking for them to be tender-crisp – not too soft that they turn into applesauce, but soft enough to be easily pierced with a fork.
-
Once the apples are tender-crisp, remove the lid and increase the heat slightly to medium. Pour in your cornstarch slurry (1 tablespoon cornstarch mixed with 2 tablespoons cold water). Stir constantly for 1-2 minutes until the sauce thickens and becomes glossy. It should coat the back of a spoon. This slurry is what gives our apple pie filling that perfect, slightly thickened, luscious texture that we all adore in a classic apple pie.
-
Remove the apple pie filling from the heat and transfer it to a separate bowl. Allow it to cool completely to room temperature. You can even pop it in the fridge for about 30 minutes to an hour to speed up the cooling process. It’s important that the apple filling is cool before layering to prevent it from warming up the creamy banana pudding base.
Crafting the Creamy Banana Pudding Base: The Velvety Foundation of Your “Apple Pie Banana Pudding”
-
In a medium-sized heavy-bottomed saucepan, whisk together the 1 cup granulated sugar, all-purpose flour, and ¼ teaspoon salt. This dry mixture will help prevent lumps when we add the wet ingredients.
-
In a separate bowl, whisk your 4 large egg yolks until they are light yellow and slightly frothy. Set aside.
-
Gradually whisk the 2 cups whole milk and ½ cup heavy cream into the dry ingredients in the saucepan. Place the saucepan over medium heat, stirring constantly with a whisk to prevent scorching, especially at the bottom. Bring the mixture to a gentle simmer.
-
Once the mixture is simmering and slightly thickened, you need to temper the egg yolks. This is a crucial step! Slowly drizzle about half a cup of the hot milk mixture into your whisked egg yolks while continuously whisking the yolks vigorously. This slowly raises the temperature of the yolks without scrambling them. Once tempered, pour the egg yolk mixture back into the saucepan with the remaining hot milk mixture.
-
Continue to cook over medium heat, whisking constantly, for about 2-4 minutes, or until the custard thickens significantly. It should be thick enough to coat the back of a spoon and hold a line when you draw your finger across it. Don’t rush this step, as undercooked custard will be too runny, and overcooked custard might curdle. If you see any signs of curdling, immediately remove it from the heat and whisk vigorously. Once thickened, remove the saucepan from the heat and stir in the 2 teaspoons of pure vanilla extract.
-
Pour the hot custard into a clean bowl. Press a piece of plastic wrap directly onto the surface of the custard to prevent a skin from forming. Let it cool at room temperature for about 30 minutes, then transfer it to the refrigerator to chill completely for at least 2-3 hours, or preferably overnight. A fully chilled custard is essential for the best texture in your Apple Pie Banana Pudding.
-
Once your custard is thoroughly chilled, it’s time to make it truly decadent! In a large mixing bowl, beat the softened 8 ounces of cream cheese with an electric mixer until it’s light and fluffy, about 2-3 minutes. Make sure there are no lumps.
-
Gradually add the 1 (14-ounce) can of sweetened condensed milk to the cream cheese, beating until smooth and well combined. Scrape down the sides of the bowl as needed. This combination creates an incredibly rich and sweet base.
-
Add the chilled custard to the cream cheese mixture and beat on medium speed until smooth and thoroughly incorporated. You want a beautifully consistent, lump-free base for your Apple Pie Banana Pudding.
-
Finally, gently fold in the thawed whipped topping (or your freshly whipped heavy cream) into the custard mixture. Use a rubber spatula and fold gently until no streaks remain. This lightens the pudding and gives it that signature airy texture. Try not to overmix, or you might deflate the whipped topping. Now you have your luscious banana pudding base, ready for assembly!
Assembling Your “Apple Pie Banana Pudding”: Layer by Decadent Layer
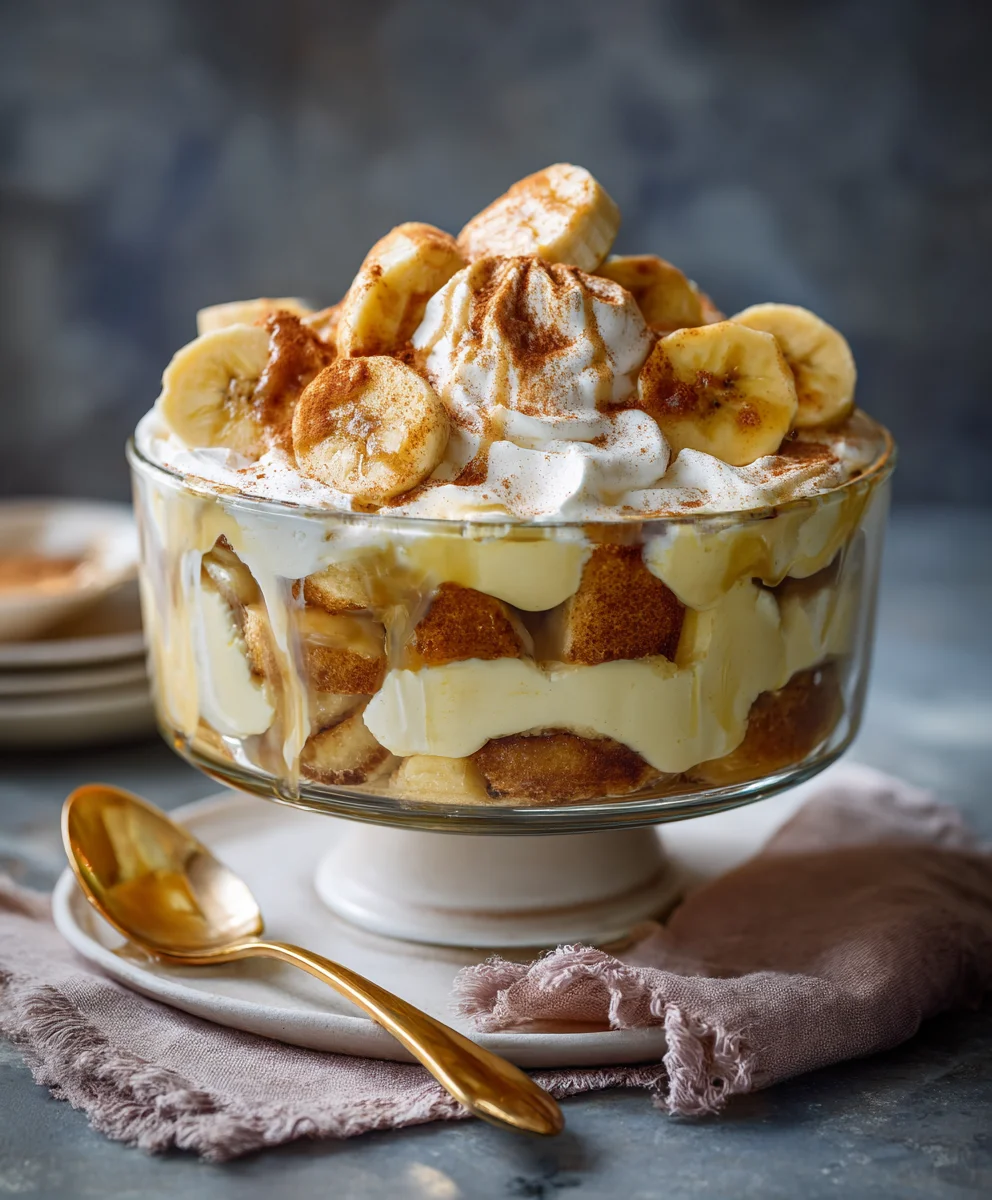
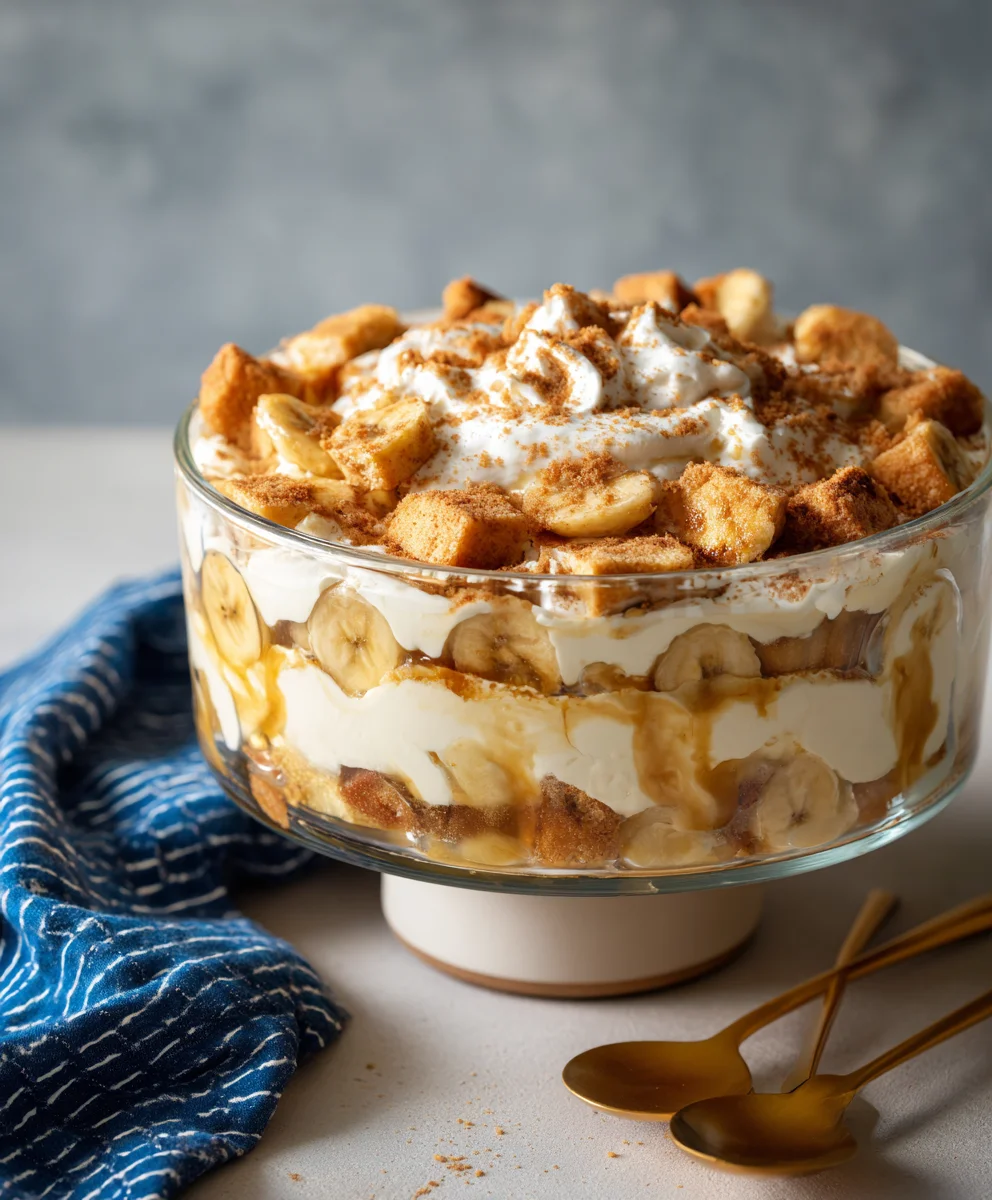
Get ready for the moment of truth! Assembling this exquisite Apple Pie Banana Pudding is where all our hard work comes together. You’ll need a large trifle dish (about 3-4 quarts) or a 9×13-inch baking dish for this. I love using a clear trifle dish so everyone can admire those beautiful layers!
-
Start with a single layer of vanilla wafers on the bottom of your chosen dish. You might need to break some wafers to fit them snugly and cover the entire base. This creates a delicious, slightly crispy foundation that will soften beautifully as it chills.
-
Next, arrange a layer of sliced bananas over the wafers. Make sure they are evenly distributed. I like to overlap them slightly to get a good banana presence in every bite.
-
Now, for the star of the show! Spoon about half of your cooled apple pie filling evenly over the banana slices. Spread it out gently with the back of a spoon or an offset spatula. Ensure an even distribution of those tender, spiced apples.
-
Following the apple layer, spoon about one-third of your creamy banana pudding base over the apples. Carefully spread it out to cover the entire layer, taking care not to disturb the layers too much underneath.
-
Repeat the layers: another layer of vanilla wafers, followed by another layer of sliced bananas.
-
Add the remaining half of your cooled apple pie filling over the second banana layer. Spread it out as you did before.
-
Spoon another one-third of the creamy banana pudding base over the apple pie filling layer, spreading it gently and evenly.
-
For your final layer, place any remaining vanilla wafers (whole or broken) on top. Then, dollop and spread the last one-third of your banana pudding base over everything, ensuring it reaches the edges of the dish. You can make it smooth or create soft swirls with the back of your spoon for a decorative touch.
-
Cover the dish tightly with plastic wrap and refrigerate for at least 6-8 hours, or ideally, overnight. This chilling time is absolutely crucial. It allows the flavors to meld beautifully, the wafers to soften to that perfect cake-like consistency, and the pudding to set properly. Patience truly pays off for this magnificent Apple Pie Banana Pudding!
-
Before serving, if you wish, you can garnish your Apple Pie Banana Pudding with some additional whipped topping, a sprinkle of ground cinnamon, or a few extra vanilla wafers for a pretty presentation. Sometimes, I even crush a few wafers and sprinkle them on top for a little texture.
Important Tips for the Perfect “Apple Pie Banana Pudding” Experience
Creating this fusion dessert is a delightful journey, and a few key pointers can elevate your Apple Pie Banana Pudding from great to absolutely unforgettable!
-
Banana Ripeness is Key: For this recipe, you want bananas that are ripe but still firm. Look for bananas with a solid yellow color and maybe just a few tiny speckles of brown. Overly ripe, mushy bananas will release too much liquid and can make your pudding watery, while green bananas won’t have enough sweetness or flavor. Slice them just before layering to prevent browning as much as possible.
-
Chilling Time is Non-Negotiable: I cannot stress this enough – resist the urge to dive in too soon! The long chilling period (at least 6-8 hours, but overnight is truly best) allows the vanilla wafers to soften and absorb some of the pudding’s moisture, transforming them into a delightful cake-like texture. More importantly, it gives all those incredible flavors – the spiced apples, the sweet bananas, and the rich custard – time to mingle and create a truly harmonious bite. If you serve it too early, the flavors won’t be as developed, and the texture might be too soft.
-
Customizing Your Apples: Feel free to experiment with different apple varieties! As mentioned, I love a Honeycrisp and Granny Smith mix for that perfect sweet-tart balance and good texture. Braeburn, Fuji, or Golden Delicious would also work beautifully. If your apples are very tart, you might want to slightly increase the sugar in the apple filling. Conversely, if they’re super sweet, you can reduce it a little.
-
Achieving Smooth Custard: When making the custard, whisk constantly. Seriously, don’t walk away! This prevents lumps and ensures a silky-smooth base. Tempering your egg yolks slowly and carefully is also vital to avoid scrambled eggs in your pudding. If, despite your best efforts, you end up with a few small lumps, you can always press the cooled custard through a fine-mesh sieve before folding in the cream cheese and whipped topping for a super-smooth finish. A perfectly smooth custard contributes immensely to the luxurious mouthfeel of your Apple Pie Banana Pudding.
-
Make Ahead Magic: This Apple Pie Banana Pudding is an ideal make-ahead dessert! In fact, it tastes even better on the second day once the flavors have had ample time to marry. You can assemble the entire dish the day before your gathering, making entertaining a breeze. Just remember to keep it tightly covered in the refrigerator.
-
Serving Suggestions: While this dessert is a complete showstopper on its own, a little extra garnish never hurts! A dollop of freshly whipped cream, a sprinkle of extra cinnamon or nutmeg, or even a few decorative apple slices (tossed in a little lemon juice to prevent browning) can elevate its presentation. This Apple Pie Banana Pudding is fantastic for potlucks, family gatherings, or any occasion where you want to impress with a unique and comforting dessert.
-
Storing Leftovers: Any leftover Apple Pie Banana Pudding should be stored covered in the refrigerator. It will generally keep well for up to 3-4 days. While the bananas might darken slightly over time, the flavor will remain wonderful.
Conclusion:
So there you have it, friends! We’ve journeyed through the creation of what I truly believe is one of the most exciting and comforting dessert mash-ups you’ll ever encounter. This isn’t just another dessert; it’s an experience, a delightful fusion that brings together the best of two beloved worlds. Imagine the comforting embrace of a classic banana pudding, with its creamy layers and soft vanilla wafers, elevated to an entirely new dimension by the warm, spiced, and utterly irresistible essence of an apple pie. It’s a symphony of textures and flavors that dance on your palate — the tender, sweet bananas, the rich, smooth pudding, the crisp, buttery notes of the “crust” components, and then, the star, those perfectly cooked apples, fragrant with cinnamon and nutmeg.
This isn’t merely an amalgamation; it’s a thoughtful evolution, resulting in a dessert so unique, so utterly satisfying, that it demands a place in your regular baking rotation. The very concept of this Apple Pie Banana Pudding might sound audacious, but I promise you, the execution is pure genius, delivering a harmonious blend where each element shines without overpowering the other. It offers that nostalgic warmth we crave from apple pie, coupled with the cool, creamy comfort of banana pudding, making it truly irresistible. It’s perfect for any occasion, from a cozy family dinner to a festive gathering, always sparking conversation and delight. The ease of preparation, combined with the incredibly impressive outcome, makes this recipe a true gem. It truly is one of those dishes that tastes far more complex and labor-intensive than it actually is, making you look like a culinary superstar with minimal effort.
Serving Suggestions for Maximum Delight:
Now, let’s talk about how to truly make this masterpiece shine on your table. While it’s absolutely divine straight out of the dish, whether you prefer it slightly warm or perfectly chilled from the fridge, there are a few ways to elevate your serving experience. For an extra touch of decadence, I highly recommend a generous dollop of freshly whipped cream, perhaps infused with a hint of vanilla bean or even a touch of bourbon for the adults. A sprinkle of toasted pecans or walnuts would add a lovely crunch and another layer of nutty flavor that complements both the apples and bananas beautifully. You could even drizzle a little caramel sauce over the top just before serving for an incredibly luxurious finish. Think of it as your canvas for culinary creativity! A scoop of premium vanilla bean ice cream melting into a warm slice of this pudding is also an experience not to be missed. The contrast of warm, spiced fruit and cool, creamy ice cream is simply heavenly and adds another layer of indulgence that will have everyone asking for seconds.
Exciting Variations to Explore:
And for those of you who love to experiment, the possibilities for variations are exciting. While our core recipe focuses on apples, don’t be afraid to consider other fruits that pair well with banana and warm spices. A touch of pear, or even some dried cranberries rehydrated in apple cider, could add an interesting twist. For the “crust” element, feel free to experiment beyond vanilla wafers. Perhaps a graham cracker crust base, or even crushed ginger snaps for a spicier kick, could work wonderfully. You could also play with the spices; a pinch of allspice or cardamom could introduce new aromatic notes. Don’t limit yourself to just cinnamon and nutmeg – the world of spices is your oyster! For a more adult version, a splash of rum or brandy in the apple mixture or the pudding itself could add a sophisticated depth. Or, for a dairy-free option, coconut cream can be a fantastic substitute for traditional milk and cream, lending a subtle tropical note that pairs surprisingly well with the apples and bananas.
Your Turn: Try It and Share Your Story!
Seriously, my friends, if you’ve been searching for a dessert that offers something truly special, something that will impress your guests and bring a huge smile to your own face, then this is it. It’s surprisingly simple to put together, considering the complex and layered flavors it delivers. Don’t be intimidated by the idea of combining two classics; embrace the adventure! I can confidently say that once you take that first spoonful, you’ll understand exactly why I’m so passionate about this recipe. It’s more than just a dessert; it’s a moment of pure, unadulterated joy that promises to become a new family favorite.
So, what are you waiting for? Gather your ingredients, roll up your sleeves, and dive into creating this extraordinary treat. I am genuinely so excited for you to experience the magic for yourselves. And please, please, please, after you’ve savored every last bite, come back and share your experience with me! I absolutely adore hearing your stories, seeing your creations, and learning about any personal touches or variations you might have added. Did you serve it warm with a scoop of vanilla bean ice cream? Did you add a secret spice? Did your family rave about it? Your feedback and photos are what truly bring this community to life, and I can’t wait to hear all about your delicious journey with this incredible fusion dessert. Happy baking, everyone, and may your kitchens always be filled with the sweet aroma of delightful creations!
Sweet & Creamy Apple Pie Banana Pudding
Imagine taking two of America’s most beloved comfort desserts and swirling them into one harmonious, irresistible masterpiece. This Apple Pie Banana Pudding marries the warm, spiced, tender embrace of a classic apple pie with the velvety, sweet, and utterly nostalgic creaminess of a traditional banana pudding. It offers the comforting familiarity of cinnamon-spiced apples, a hint of buttery crust from vanilla wafers, and the irresistible, smooth texture of banana-infused custard, creating a truly unique and unforgettable dessert.
Ingredients
-
6 medium apples (Honeycrisp/Granny Smith mix), peeled, cored, diced ½-inch
-
½ cup granulated sugar (for apples)
-
¼ cup packed light brown sugar (for apples)
-
1 tsp ground cinnamon
-
¼ tsp ground nutmeg
-
⅛ tsp ground cloves (optional)
-
2 tbsp unsalted butter (for apples)
-
1 tbsp fresh lemon juice
-
1 tbsp cornstarch (mixed with 2 tbsp cold water)
-
Pinch of salt (for apples)
-
1 cup granulated sugar (for pudding base)
-
⅓ cup all-purpose flour
-
¼ tsp salt (for pudding base)
-
4 large egg yolks
-
2 cups whole milk
-
½ cup heavy cream
-
2 tsp vanilla extract
-
8 oz cream cheese, softened
-
1 (14-ounce) can sweetened condensed milk
-
1 (8-ounce) container frozen whipped topping, thawed, OR 2 cups freshly whipped heavy cream
-
1 (12-ounce) box vanilla wafers
-
5-6 ripe but firm bananas, sliced ¼-inch thick
-
Additional whipped topping/cream for garnish (optional)
-
Ground cinnamon/nutmeg for garnish (optional)
Instructions
-
Step 1
Peel, core, and dice apples into ½-inch pieces. In a large skillet, melt butter over medium heat. Add diced apples, granulated sugar, brown sugar, cinnamon, nutmeg, optional cloves, salt, and lemon juice. Stir to coat. Cover and cook on medium-low for 8-10 minutes, stirring occasionally, until tender-crisp. Remove lid, increase heat slightly, and stir in cornstarch slurry. Cook for 1-2 minutes until sauce thickens. Remove from heat, transfer to a bowl, and cool completely to room temperature or chill in the fridge for 30-60 minutes. -
Step 2
In a heavy-bottomed saucepan, whisk together 1 cup granulated sugar, flour, and ¼ tsp salt. In a separate bowl, whisk egg yolks. Gradually whisk milk and heavy cream into dry ingredients in the saucepan. Heat over medium heat, stirring constantly, until simmering. Slowly drizzle about ½ cup of hot milk mixture into whisked egg yolks, whisking vigorously. Pour tempered egg yolks back into saucepan. Cook over medium heat, whisking constantly, for 2-4 minutes until custard significantly thickens. Remove from heat, stir in vanilla extract. Pour custard into a clean bowl, press plastic wrap directly onto surface, and chill completely in the refrigerator for 2-3 hours or overnight. -
Step 3
Once custard is chilled, beat softened cream cheese in a large mixing bowl until light and fluffy (2-3 minutes). Gradually add sweetened condensed milk, beating until smooth. Add chilled custard to cream cheese mixture and beat until smooth. Gently fold in thawed whipped topping or freshly whipped cream until no streaks remain. Do not overmix. -
Step 4
In a large trifle dish (3-4 quarts) or 9×13-inch baking dish, create a base layer of vanilla wafers (breaking to fit). Arrange a layer of sliced bananas over the wafers. Spoon half of the cooled apple pie filling evenly over the bananas. Spoon one-third of the creamy banana pudding base over the apple layer, spreading gently. Repeat with another layer of vanilla wafers, sliced bananas, the remaining apple pie filling, and another one-third of the pudding base. Top with any remaining vanilla wafers and spread the last one-third of the pudding base evenly. -
Step 5
Cover the dish tightly with plastic wrap and refrigerate for at least 6-8 hours, or ideally overnight, to allow flavors to meld and wafers to soften. Before serving, garnish with additional whipped topping, a sprinkle of ground cinnamon or nutmeg, or extra vanilla wafers, if desired.
Important Information
Nutrition Facts (Per Serving)
It is important to consider this information as approximate and not to use it as definitive health advice.
Allergy Information
Please check ingredients for potential allergens and consult a health professional if in doubt.

Leave a Comment