
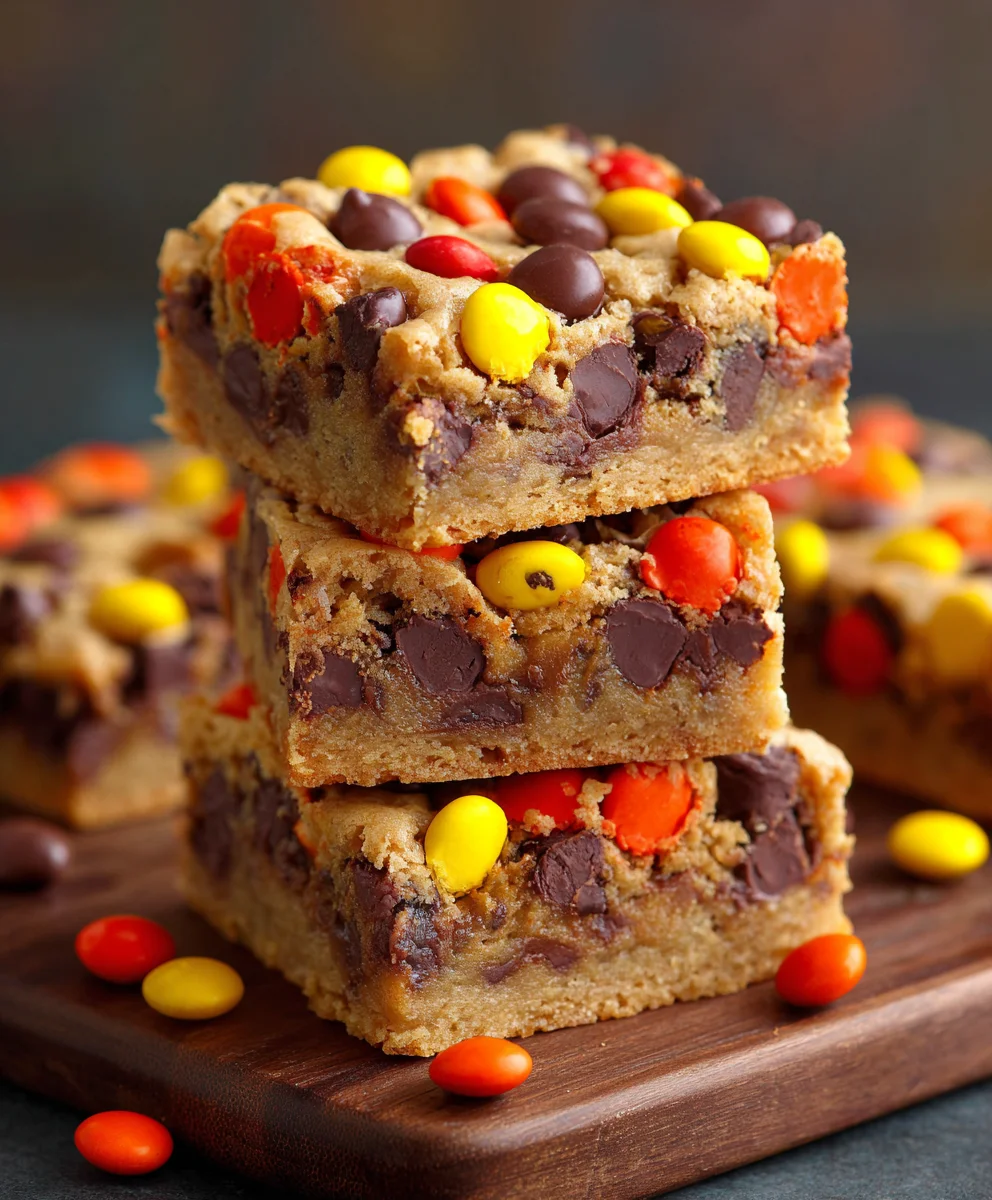
Reeses Pieces Chocolate Chip Cookie Bars are an absolute dream come true for anyone who cherishes that iconic sweet and salty, chocolate and peanut butter combination. I can confidently say that these bars aren’t just a dessert; they’re an experience! Imagine the classic, beloved chocolate chip cookie – a staple in American baking since Ruth Wakefield famously invented them – elevated to an entirely new level. We’re taking that comforting chewiness and infusing it with the vibrant color and unmistakable peanut butter crunch of Reese’s Pieces candy. This delightful marriage creates a treat that captures the heart of childhood nostalgia while delivering an undeniably sophisticated flavor profile.
Why You’ll Fall in Love with These Bars
People adore these Reeses Pieces Chocolate Chip Cookie Bars not only for their irresistible taste and varied textures – the melt-in-your-mouth chocolate, the chewy cookie base, and the surprising pop of the candy – but also for their sheer convenience. Perfect for sharing at a gathering, bringing to a potluck, or simply enjoying a quick, satisfying bite at home, they offer all the joy of a homemade cookie with an exciting twist. This makes them a consistently popular choice for any occasion, promising smiles with every single square.
Ingredients:
- 1 cup (2 sticks) unsalted butter, softened to room temperature. This is crucial for a smooth, creamy base for our “Reeses Pieces Chocolate Chip Cookie Bars.”
- 1 ½ cups light brown sugar, packed. The brown sugar adds moisture and a wonderful caramel-like depth that pairs perfectly with the peanut butter flavor of the Reeses Pieces.
- ½ cup granulated sugar. Just enough to ensure the perfect balance of sweetness and chewiness in our bars.
- 2 large eggs, at room temperature. Like the butter, room temperature eggs emulsify better, leading to a more uniform dough.
- 2 teaspoons pure vanilla extract. I always say, go for the good stuff! It elevates the flavor profile of any cookie.
- 2 ½ cups all-purpose flour. Measured correctly (spooned and leveled) to avoid dense, cakey bars.
- 1 teaspoon baking soda. This is our leavening agent, giving the bars a nice lift without making them too airy.
- 1 teaspoon salt. A touch of salt enhances all the other flavors, making the sweetness pop and balancing the richness.
- 1 cup (6 oz) semi-sweet chocolate chips. Classic chocolate chip goodness, I prefer a good quality chip that melts beautifully.
- 1 cup (6 oz) peanut butter chips (optional, but highly recommended for an extra peanut butter punch!). If you’re going all in on the peanut butter theme for these “Reeses Pieces Chocolate Chip Cookie Bars,” these are a must.
- 1 ½ cups Reeses Pieces candy, divided. The star of our show! We’ll use some in the dough and save some for sprinkling on top for maximum visual appeal and that irresistible candy crunch.
Equipment You’ll Need:
- 9×13-inch baking pan
- Parchment paper
- Electric mixer (stand mixer or hand mixer)
- Large mixing bowl
- Medium mixing bowl
- Spatula or wooden spoon
- Measuring cups and spoons
- Wire cooling rack
Preparing Your Workspace and Ingredients:
Before we dive into creating these magnificent “Reeses Pieces Chocolate Chip Cookie Bars,” let’s get our kitchen prepped! Trust me, a little organization upfront makes the whole process so much smoother and more enjoyable.
- Preheat Your Oven: First things first, go ahead and preheat your oven to 350°F (175°C). It’s important for the oven to be at the correct temperature when your bars go in to ensure even baking. A properly preheated oven helps the baking soda activate correctly, giving us that lovely rise.
- Prepare Your Baking Pan: Grab your 9×13-inch baking pan. To make life incredibly easy when it comes to serving and cleanup, I always recommend lining the pan with parchment paper. Cut two pieces of parchment paper: one to fit the length of the pan, allowing it to hang over the long sides, and another to fit the width, also allowing it to hang over the short sides. This creates a convenient sling, so you can effortlessly lift the entire slab of cooled bars out of the pan. If you only have one long piece, you can crisscross it, or just use one piece, buttering and flouring the exposed sides of the pan. A light spray with non-stick cooking spray before the parchment paper can also help the paper stick down, which is a neat little trick!
- Bring Ingredients to Room Temperature: This step cannot be stressed enough, especially for baking. Ensure your unsalted butter is truly softened – it should yield easily when gently pressed, but not be melted or greasy. Similarly, your large eggs should be at room temperature. This allows them to incorporate much more effectively with the butter and sugar, creating a smoother, more homogeneous dough. Cold ingredients can cause the butter to seize up, leading to a lumpy, less uniform batter. I usually take them out at least an hour before I plan to bake.
- Whisk Dry Ingredients: In a medium-sized mixing bowl, combine your 2 ½ cups all-purpose flour, 1 teaspoon baking soda, and 1 teaspoon salt. Use a whisk to thoroughly combine them. This step isn’t just about mixing; it’s about aerating the flour and ensuring that the leavening agent and salt are evenly distributed throughout. This prevents pockets of unmixed ingredients and contributes to an even texture in our finished “Reeses Pieces Chocolate Chip Cookie Bars.” Don’t skip this, it takes only a moment!
Crafting the Cookie Dough Base:
Now for the fun part – bringing all these wonderful ingredients together to form the perfect foundation for our “Reeses Pieces Chocolate Chip Cookie Bars.” This is where the magic truly begins!
- Cream the Butter and Sugars: In your large mixing bowl, using an electric mixer (either a stand mixer with the paddle attachment or a hand mixer), combine the 1 cup (2 sticks) softened unsalted butter, 1 ½ cups packed light brown sugar, and ½ cup granulated sugar. Start on low speed to prevent a sugar cloud from engulfing your kitchen, then gradually increase to medium-high speed. Beat these ingredients together for about 2-3 minutes, or until the mixture becomes wonderfully light, fluffy, and pale in color. This process, known as creaming, incorporates air into the butter and sugar, which contributes significantly to the tender texture of our bars. You’ll notice the texture transform from dense to airy, and it will almost double in volume. Scrape down the sides of the bowl with your spatula once or twice during this process to ensure everything is thoroughly combined. This step is paramount for a chewy, delightful bar!
- Incorporate Eggs and Vanilla: With your mixer still running on medium speed, add the 2 large room temperature eggs, one at a time. After adding the first egg, beat until it is fully incorporated into the butter mixture before adding the second. This prevents the mixture from curdling and ensures a smooth emulsion. Once both eggs are mixed in, add the 2 teaspoons pure vanilla extract. Beat for another 30 seconds to 1 minute, until everything is well combined and the mixture looks smooth and glossy. Again, take a moment to scrape down the sides and bottom of the bowl to catch any stray bits that haven’t been fully mixed.
- Gently Fold in Dry Ingredients: Reduce your mixer speed to low. Gradually add the whisked dry ingredients (flour, baking soda, and salt) to the wet mixture, a little at a time. Mix only until just combined. The key here is not to overmix! Overmixing develops the gluten in the flour too much, which can lead to tough, dense cookie bars – and we are aiming for tender and chewy! As soon as you see no more streaks of dry flour, stop the mixer. It’s perfectly fine if there are a few tiny specks of flour still visible; you’ll finish mixing by hand in the next step.
- Introduce the Mix-Ins: Now for the stars of the show! Remove the bowl from the mixer and grab your sturdy spatula or wooden spoon. Gently fold in the 1 cup semi-sweet chocolate chips and, if you’re using them, the 1 cup peanut butter chips. Then, add 1 cup of the Reeses Pieces candy to the dough. Reserve the remaining ½ cup of Reeses Pieces for sprinkling on top later – trust me, it makes a beautiful presentation! Fold these delicious additions into the dough until they are evenly distributed. Be gentle but thorough, ensuring every bite of your future “Reeses Pieces Chocolate Chip Cookie Bars” will be packed with flavor and texture. This stage is exciting because you start to see the incredible potential of these bars!
Baking Your Reeses Pieces Chocolate Chip Cookie Bars:
You’ve done the hard work of mixing; now it’s time for the oven to do its magic and transform that delicious dough into irresistible “Reeses Pieces Chocolate Chip Cookie Bars.”
- Press Dough into Prepared Pan: Carefully transfer all of the cookie dough into your parchment-lined 9×13-inch baking pan. Using your spatula, or even the back of a lightly floured measuring cup or your clean hands, gently press the dough into an even layer across the entire bottom of the pan. It might seem a bit sticky, but just keep pressing until it’s spread out smoothly and uniformly. An even layer is crucial for uniform baking, ensuring every bar has the same wonderful texture. Pay special attention to the corners to make sure they are filled in nicely.
- Initial Bake: Place the pan into your preheated 350°F (175°C) oven. Bake for approximately 20-25 minutes. During this initial bake, the edges will start to set and turn a light golden brown, and the center will still look a bit soft and slightly underdone. This is exactly what we want! We’re creating a solid base before adding our final flourish.
- Add Remaining Reeses Pieces (Mid-Bake): After the 20-25 minute mark, carefully remove the pan from the oven. At this point, the dough will be mostly set but still soft enough for the candy to adhere. Evenly sprinkle the remaining ½ cup of Reeses Pieces candy all over the top of the partially baked bars. This step isn’t just for aesthetics; it provides an extra burst of color and ensures that gorgeous, vibrant orange and yellow peeking out from the top of your finished “Reeses Pieces Chocolate Chip Cookie Bars.”
- Continue Baking to Golden Perfection: Return the pan to the oven and continue baking for another 10-15 minutes, or until the edges are beautifully golden brown and the center is set. The center should look firm but still be slightly soft when gently pressed. Do not overbake! Overbaking is the enemy of a chewy cookie bar; it will result in dry, crumbly bars. The bars will continue to set as they cool. The total baking time will be around 30-40 minutes, but ovens vary, so keep a close eye on them. When they come out, they might look a little puffy, but they will settle as they cool.
Cooling and Slicing Your Irresistible Bars:
Patience is a virtue, especially when it comes to cooling your “Reeses Pieces Chocolate Chip Cookie Bars.” This step is just as important as the baking itself for achieving perfect, neat slices and the ideal chewy texture.
- Initial Cooling in the Pan: Once baked to golden perfection, remove the pan from the oven and place it on a wire cooling rack. Allow the bars to cool in the pan for at least 30 minutes. During this time, they will continue to firm up and the flavors will meld beautifully. Trying to remove or cut them too soon will result in a crumbly mess, as they are still very soft and delicate when warm. Resist the urge to dive in immediately!
- Complete Cooling on a Rack: After the initial cooling period in the pan, carefully lift the entire slab of bars out of the pan using the parchment paper sling. Transfer the slab, still on the parchment paper, to the wire cooling rack. Allow them to cool completely, and I mean completely, to room temperature. This can take anywhere from 1.5 to 2 hours, or even longer, depending on your kitchen’s temperature. This is absolutely essential for clean, sharp cuts and for the bars to develop their optimal chewy texture. Warm bars will simply crumble and stick to your knife.
- Slicing Your Bars: Once fully cooled, transfer the slab of bars (still on the parchment paper) to a cutting board. Using a sharp, large knife, cut the slab into desired bar sizes. I typically go for 3×4 cuts, yielding 12 generous bars, or 4×5 for 20 smaller, snack-sized bars. For the cleanest cuts, I recommend running your knife under hot water, wiping it dry, and then making each cut. Repeat this process for every few cuts to prevent sticking and dragging the chocolate and candy. This little trick makes a huge difference in the presentation of your “Reeses Pieces Chocolate Chip Cookie Bars”!
- Serving and Storage: Once sliced, arrange your delectable “Reeses Pieces Chocolate Chip Cookie Bars” on a serving platter. They are fantastic served at room temperature. Any leftover bars can be stored in an airtight container at room temperature for up to 3-4 days. To keep them fresh longer, you can also freeze them. Simply wrap individual bars tightly in plastic wrap, then place them in a freezer-safe bag or container for up to 2-3 months. Thaw at room temperature for a quick, delicious treat anytime!
Tips for Perfect Reeses Pieces Chocolate Chip Cookie Bars:
Achieving bakery-quality “Reeses Pieces Chocolate Chip Cookie Bars” is totally within reach with a few extra pointers. Here are some of my go-to tips to ensure your bars are nothing short of spectacular every single time!
- Room Temperature Ingredients are Non-Negotiable: I know I’ve mentioned it, but it bears repeating! Softened butter and room temperature eggs are the secret to that perfectly emulsified, fluffy, and tender dough. If your butter is too cold, it won’t cream properly, leading to a dense texture. If it’s too warm or melted, your bars might turn out greasy. Plan ahead!
- Accurate Flour Measurement: The “spoon and level” method is your best friend here. Don’t just scoop the flour directly from the bag with your measuring cup, as this compacts it and you’ll end up with too much flour. Instead, lightly spoon the flour into your measuring cup until it’s overflowing, then level it off with the back of a knife. This ensures you’re using the correct amount, leading to the ideal chewy, not cakey, texture for your “Reeses Pieces Chocolate Chip Cookie Bars.”
- Do Not Overmix the Dough: Once you add the dry ingredients to the wet, mix only until just combined. Overmixing develops gluten, which can make your bars tough and dry. As soon as those flour streaks disappear, stop the mixer! A light hand ensures a tender crumb.
- Don’t Overbake! This is perhaps the most crucial tip for any cookie or bar recipe. Bars continue to bake slightly from residual heat after they’re removed from the oven. Pull your “Reeses Pieces Chocolate Chip Cookie Bars” from the oven when the edges are golden brown and the center still looks a little soft and slightly underbaked. If you wait until the center is firm in the oven, they will be overbaked and dry once cooled. A slightly underbaked center yields a wonderfully chewy bar.
- The Parchment Paper Sling: Using parchment paper isn’t just for easy cleanup; it’s genuinely the best way to remove the entire batch of bars from the pan in one piece. This makes cooling and slicing so much easier and prevents any potential sticking.
- Patience During Cooling: I know it’s hard, but allowing the bars to cool completely to room temperature before slicing is absolutely essential. This allows the internal structure to set and firm up, giving you clean, neat cuts and preventing a crumbly mess. Warm bars are delicious, but if you want beautiful, defined squares, wait it out!
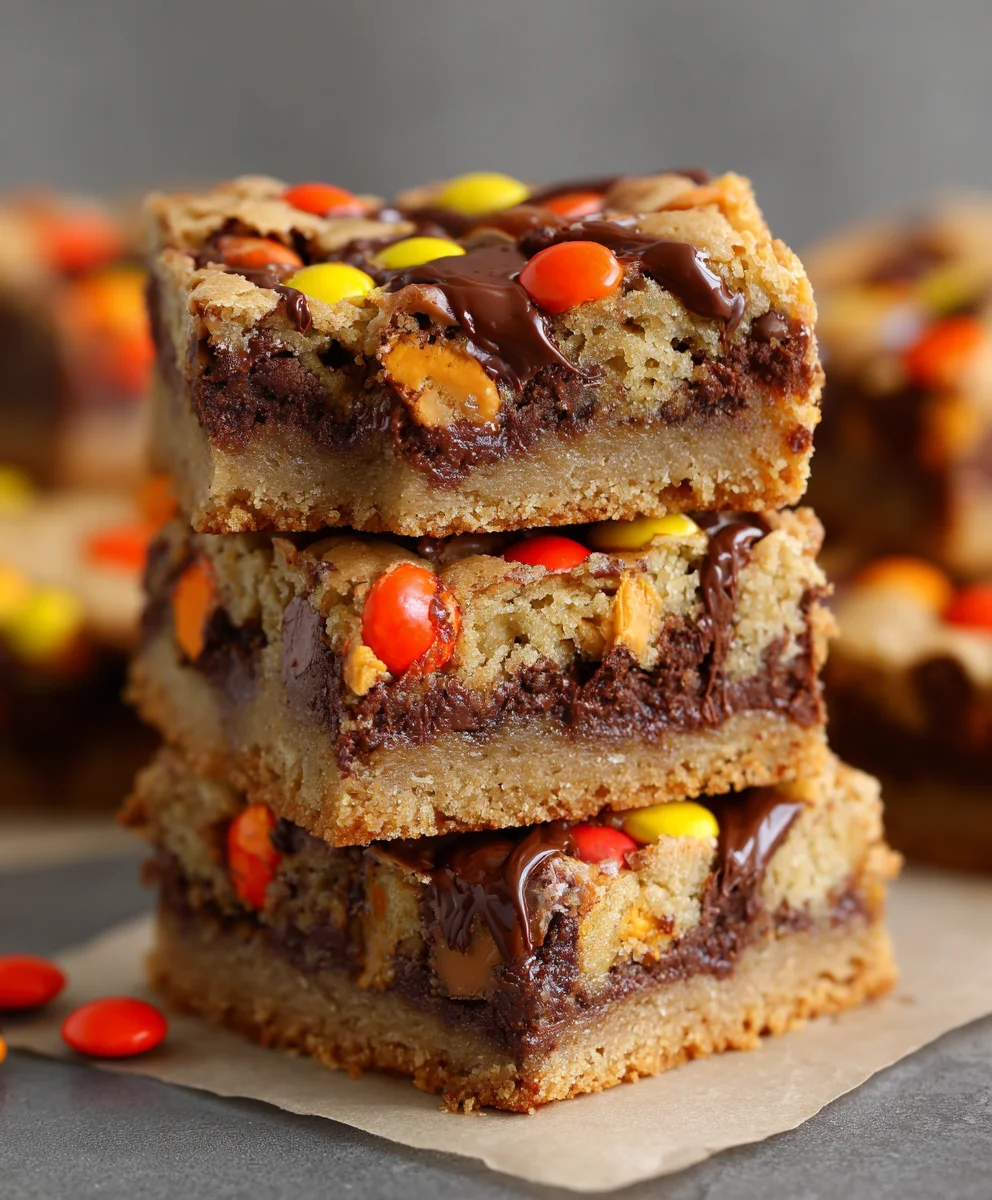
- Get Creative with Mix-Ins: While “Reeses Pieces Chocolate Chip Cookie Bars” are fantastic as is, feel free to experiment! You could add a sprinkle of flaky sea salt on top after baking to enhance the chocolate and peanut butter flavors. Or, for an extra layer of decadence, drizzle melted peanut butter or chocolate over the cooled bars.
- Freezing for Future Cravings: These bars freeze beautifully! Wrap individual cooled bars tightly in plastic wrap, then place them in a freezer-safe bag or container. They can be stored in the freezer for up to 2-3 months. Thaw at room temperature whenever a craving strikes for a quick, homemade treat. They taste just as good as fresh!
- Know Your Oven: Every oven is a little different. Keep an eye on your bars during baking, especially the first time you make them. If your oven runs hot, you might need to reduce the baking time slightly. If it runs cool, they might need a few extra minutes. Trust your instincts and the visual cues!
<h2>Conclusion:</h2>
<p>Well, my friends, we’ve journeyed through the delightful process of creating something truly spectacular, a treat that transcends the ordinary and dives headfirst into pure, unadulterated joy. If there’s one recipe I could implore you to try this year, this is it. It’s not just about baking; it’s about crafting an experience, a moment of pure bliss that can be shared or savored in quiet solitude. These bars are more than just a dessert; they are a celebration of classic flavors uniting in perfect harmony, guaranteed to bring a smile to anyone’s face, young or old. <strong>The sheer simplicity combined with the incredible flavor payoff makes this recipe an absolute must-try for any home baker, regardless of their skill level.</strong></p>
<h3>Why These Bars Are an Absolute Game-Changer</h3>
<p>What makes this particular recipe so irresistible, you ask? It’s the masterful blend of textures and tastes. Imagine a soft, chewy chocolate chip cookie base, rich with buttery notes and pockets of melted chocolate. Now, picture that elevated with the delightful crunch and distinct peanut butter candy flavor of Reese’s Pieces, generously sprinkled throughout. The combination creates a symphony of sweet and salty, crunchy and gooey, that is utterly addictive. <strong>These aren’t just any cookie bars; they are the quintessential Reeses Pieces Chocolate Chip Cookie Bars</strong>, delivering a nostalgic flavor punch that feels both comforting and exciting. They’re incredibly easy to whip up, requiring no fancy techniques or specialized equipment, yet they yield a dessert that looks and tastes like it came straight from a gourmet bakery. They’re perfect for potlucks, birthday parties, after-school snacks, or simply as a comforting treat during a cozy evening at home. The robust flavor holds up beautifully, whether served warm or at room temperature, making them incredibly versatile for any occasion.</p>
<h3>Elevate Your Experience: Serving Suggestions</h3>
<p>While these <strong>Reeses Pieces Chocolate Chip Cookie Bars</strong> are phenomenal on their own, there are several ways to take your enjoyment to the next level. <strong>My absolute favorite way to serve them is warm, fresh from the oven, with a generous scoop of vanilla bean ice cream melting slowly over the top.</strong> The contrast of the warm, gooey bar with the cold, creamy ice cream is simply heavenly. You could also opt for a scoop of peanut butter ice cream to really lean into the Reese’s flavor profile, or even a rich chocolate ice cream for ultimate decadence. Another fantastic option is to serve them with a dollop of freshly whipped cream, perhaps with a drizzle of warm chocolate fudge or caramel sauce. For a simpler, yet equally satisfying experience, pair a square with a tall, frosty glass of milk – it’s a classic combination for a reason! They also make an excellent accompaniment to your morning coffee or afternoon tea, providing that perfect burst of sweetness to get you through the day. Consider cutting them into smaller, bite-sized squares for a dessert platter at your next gathering, where they’re sure to be the first to disappear.</p>
<h3>Unleash Your Inner Baker: Creative Variations</h3>
<p>One of the joys of baking is the freedom to experiment, and this recipe offers a wonderful canvas for your creativity. While the original <strong>Reeses Pieces Chocolate Chip Cookie Bars</strong> are perfect as written, don’t hesitate to put your own spin on them. For an even more intense peanut butter flavor, consider adding a thin layer of peanut butter frosting on top once the bars have cooled completely. This adds another dimension of richness and makes them feel extra special. You could also swap out some of the chocolate chips for white chocolate chips or even butterscotch chips for a different twist. If you’re feeling adventurous, try adding a sprinkle of sea salt over the top before baking; this simple addition beautifully enhances all the sweet flavors and adds a gourmet touch. For those who love nuts, a handful of chopped peanuts or pecans folded into the dough would provide an extra layer of crunch and nutty flavor. And if you prefer individual treats, this dough can easily be rolled into balls and baked as standalone cookies, adjusting the baking time accordingly. Don’t be afraid to mix and match; the possibilities are truly endless!</p>
<h3>Your Turn to Bake and Share!</h3>
<p>Now that you have all the insider tips and tricks, it’s your turn to roll up your sleeves and dive into this fantastic recipe. I truly believe that once you bake these <strong>Reeses Pieces Chocolate Chip Cookie Bars</strong>, they will become a cherished staple in your baking repertoire. They are a testament to how simple ingredients, when combined with a little love and care, can create something truly extraordinary. So, gather your ingredients, preheat that oven, and get ready to fill your home with the most enticing aroma imaginable. <strong>I’m so excited for you to experience the magic of these bars firsthand!</strong> After you’ve had a chance to bake them, please come back and share your experience. Did you try any variations? What were your favorite serving suggestions? I absolutely love hearing about your kitchen adventures and seeing your beautiful creations. Happy baking, my friends, and may your days be filled with deliciousness and joy!</p>
Ultimate Reeses Pieces Chocolate Chip Cookie Bars Recipe!
These Reeses Pieces Chocolate Chip Cookie Bars are an absolute dream come true, combining sweet and salty, chocolate and peanut butter flavors. Imagine a classic chocolate chip cookie, elevated with the vibrant color and unmistakable peanut butter crunch of Reese’s Pieces candy. This delightful treat captures childhood nostalgia with a sophisticated flavor profile.
Ingredients
-
1 cup (2 sticks) unsalted butter, softened
-
1 ½ cups light brown sugar, packed
-
½ cup granulated sugar
-
2 large eggs, room temperature
-
2 teaspoons pure vanilla extract
-
2 ½ cups all-purpose flour
-
1 teaspoon baking soda
-
1 teaspoon salt
-
1 cup (6 oz) semi-sweet chocolate chips
-
1 cup (6 oz) peanut butter chips (optional)
-
1 ½ cups Reeses Pieces candy, divided
Instructions
-
Step 1
Preheat oven to 350°F (175°C). Line a 9×13-inch baking pan with parchment paper, allowing overhang for a sling. Ensure butter and eggs are at room temperature. -
Step 2
In a medium bowl, whisk together flour, baking soda, and salt. -
Step 3
In a large bowl, cream softened butter, brown sugar, and granulated sugar with an electric mixer until light and fluffy (2-3 min). Add eggs one at a time, then vanilla extract, beating until combined. -
Step 4
Gradually add dry ingredients to wet mixture on low speed; mix until just combined. Do not overmix. -
Step 5
Gently fold in 1 cup chocolate chips, 1 cup peanut butter chips (if using), and 1 cup Reeses Pieces candy. Reserve remaining ½ cup Reeses Pieces. -
Step 6
Press dough evenly into the prepared baking pan. -
Step 7
Bake for 20-25 minutes, until edges are light golden and center is still soft. -
Step 8
Remove from oven, sprinkle remaining ½ cup Reeses Pieces over the top. Return to oven and bake for another 10-15 minutes, until edges are golden and center is set but slightly soft. Do not overbake. -
Step 9
Cool bars in the pan on a wire rack for 30 minutes. Then, lift with parchment paper and transfer to a wire rack to cool completely (1.5-2 hours). -
Step 10
Once fully cooled, cut into 12-20 bars. For clean cuts, run a sharp knife under hot water and wipe dry between cuts. -
Step 11
Serve at room temperature. Store leftovers in an airtight container for 3-4 days or freeze for up to 2-3 months.
Important Information
Nutrition Facts (Per Serving)
It is important to consider this information as approximate and not to use it as definitive health advice.
Allergy Information
Please check ingredients for potential allergens and consult a health professional if in doubt.

Leave a Comment